ESP Device Installation
Flash firmware NodeMCU ESP8266 device using NodeMCU PyFlasher, supporting both wired and wireless (OTA) connections.
Wired Connection
-
Download NodeMCU PyFlasher, an EXE file for Windows, and a DMG file for MAC.
-
Download the CH341SER driver for Windows only to enable communication with the ESP Device through the USB.
-
Download the latest firmware ESP8266-firmware BIN file.
-
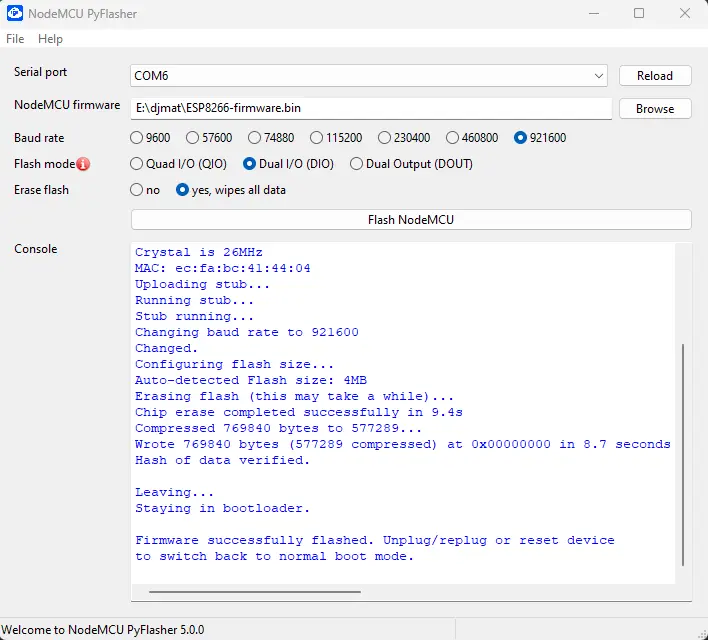
Now open the NodeMCU PyFlasher and flash the firmware, see the example image below.

- Change the Baud Rate to the next lowest number if your Windows/MAC device is not supported.
- If you choose not to format the settings or configuration saved on the ESP device, select no at the Erase Flash section.
- Select Flash NodeMCU to initiate the firmware flashing process for the ESP device.
Wireless (OTA) Connection
-
ESP device must already been connected to the MikroTik router. If not follow the wired connection instead.
-
Connect to your MikroTik Wi-Fi network, open a browser and go to this URL 10.0.0.2 and enter your password.
-
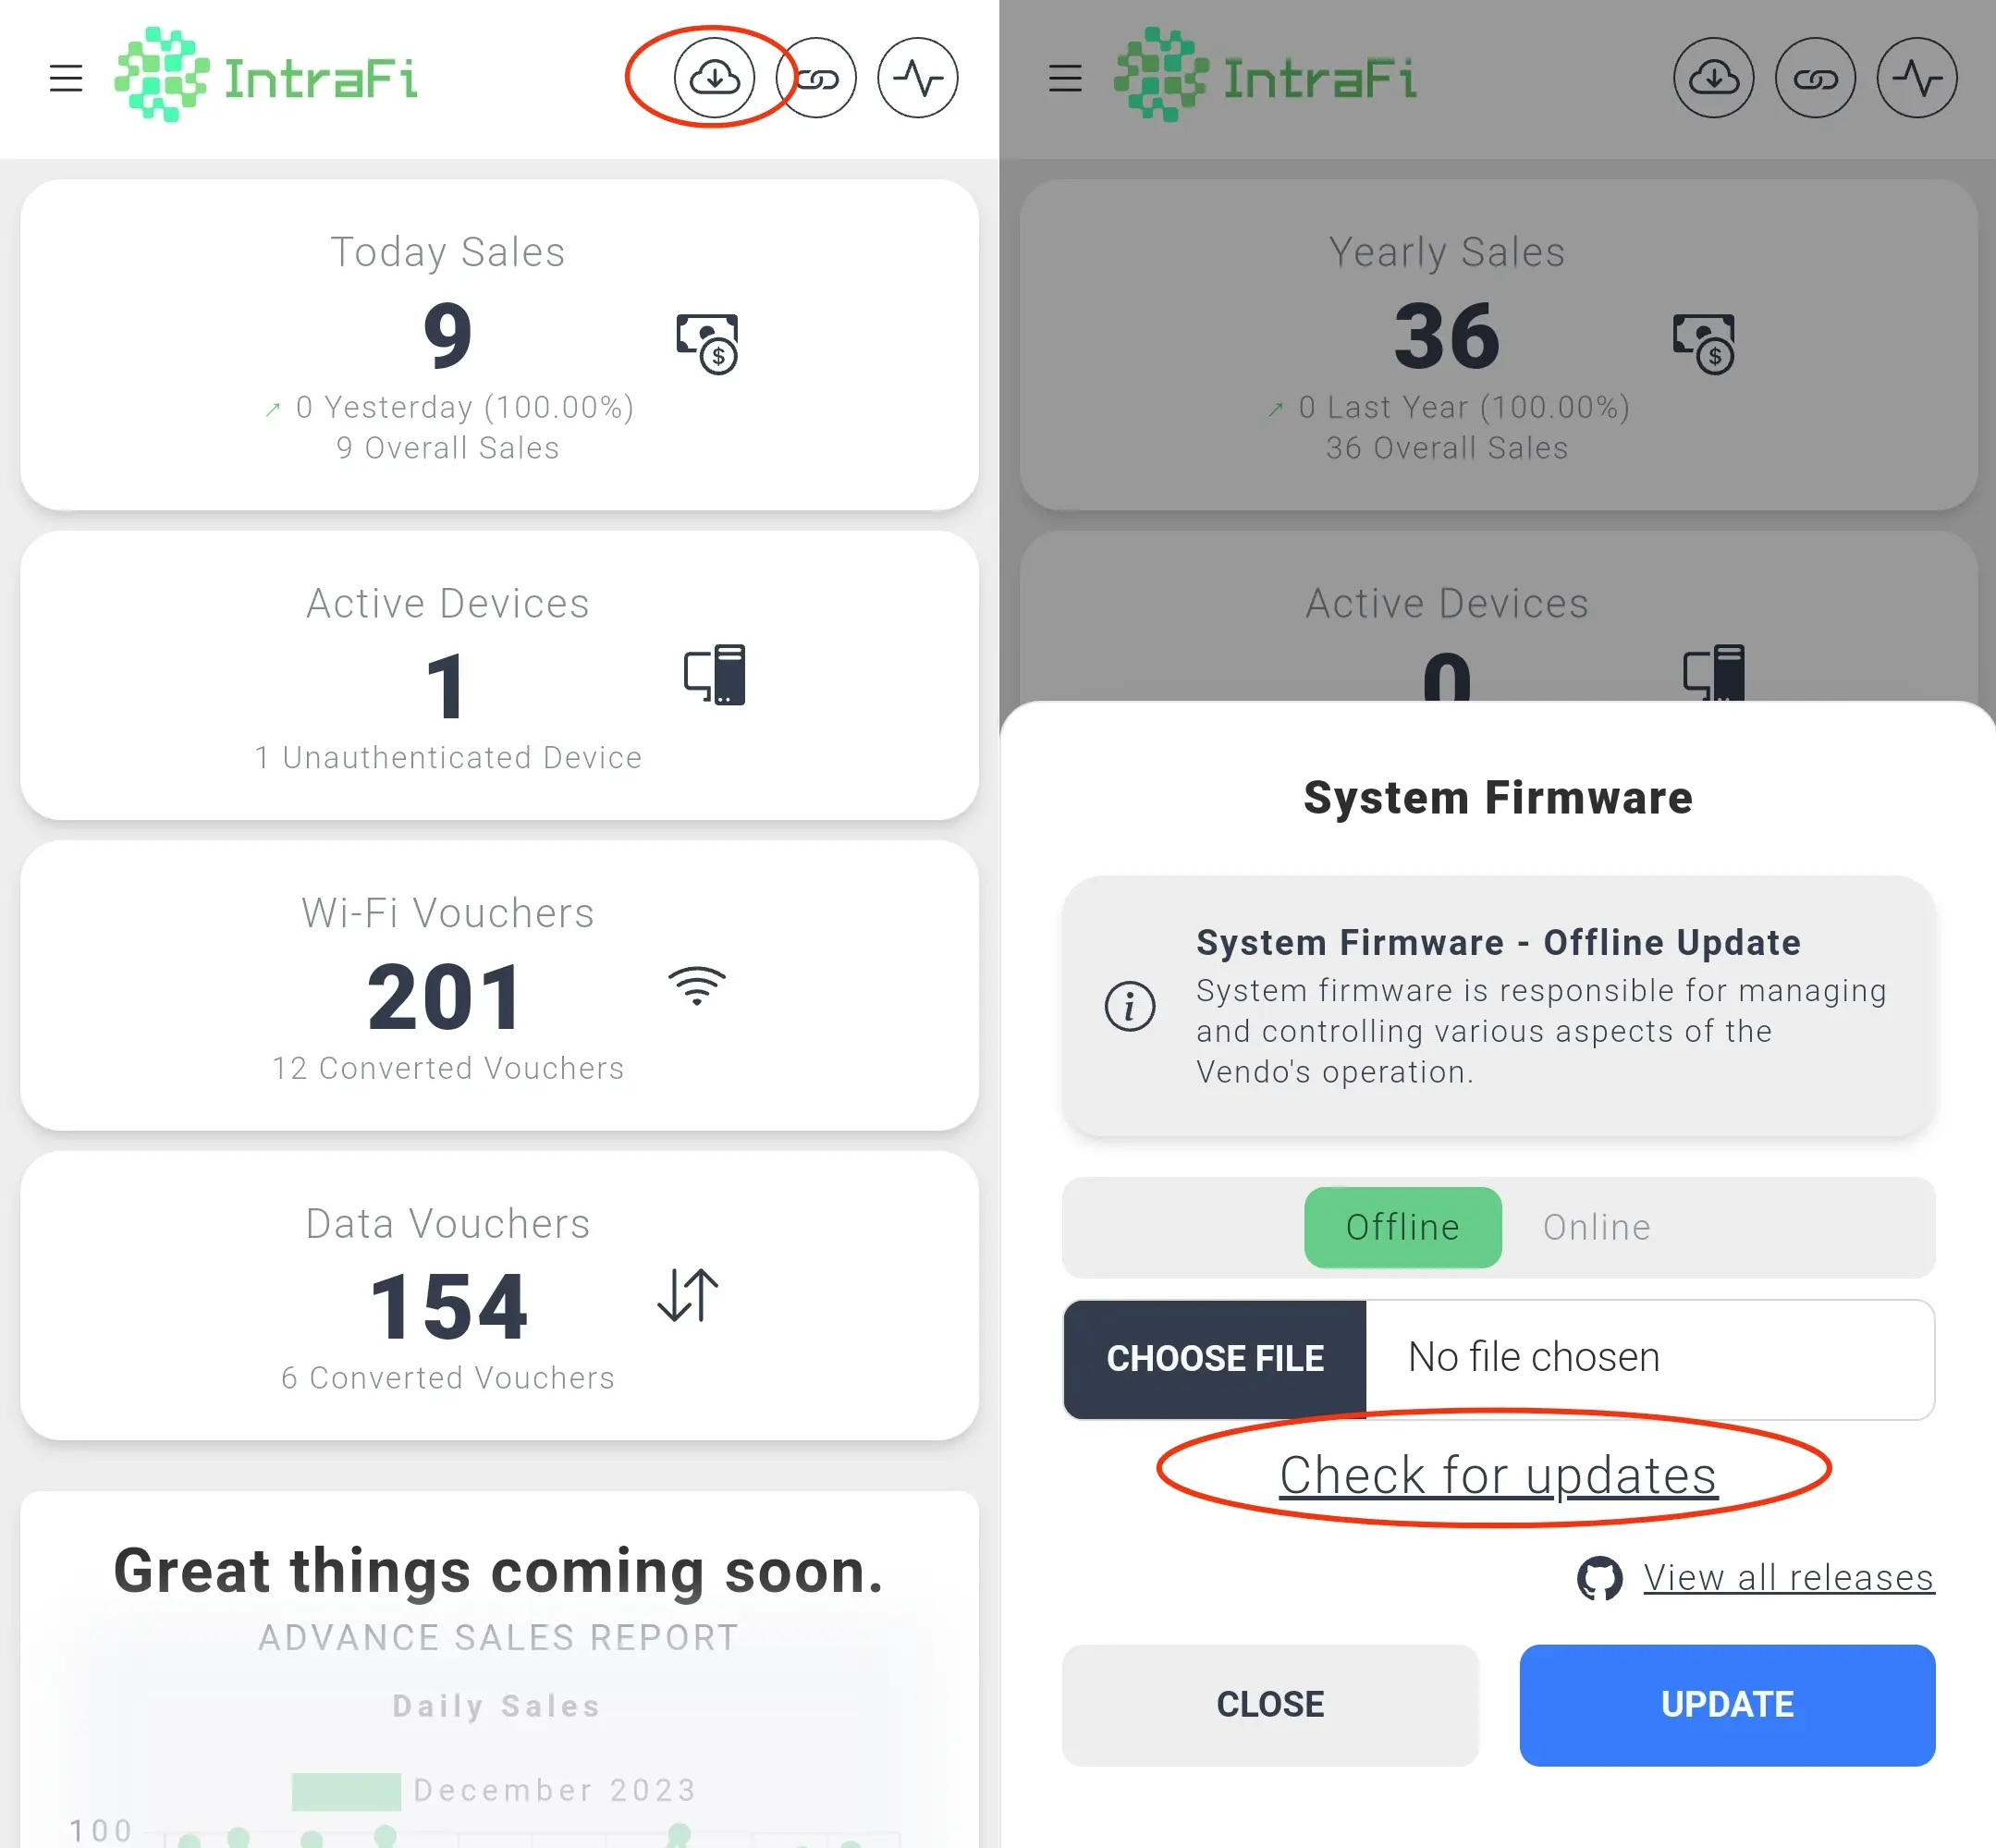
After logging in, select the System Firmware Update button, then select Check for updates as shown in the image below.

-
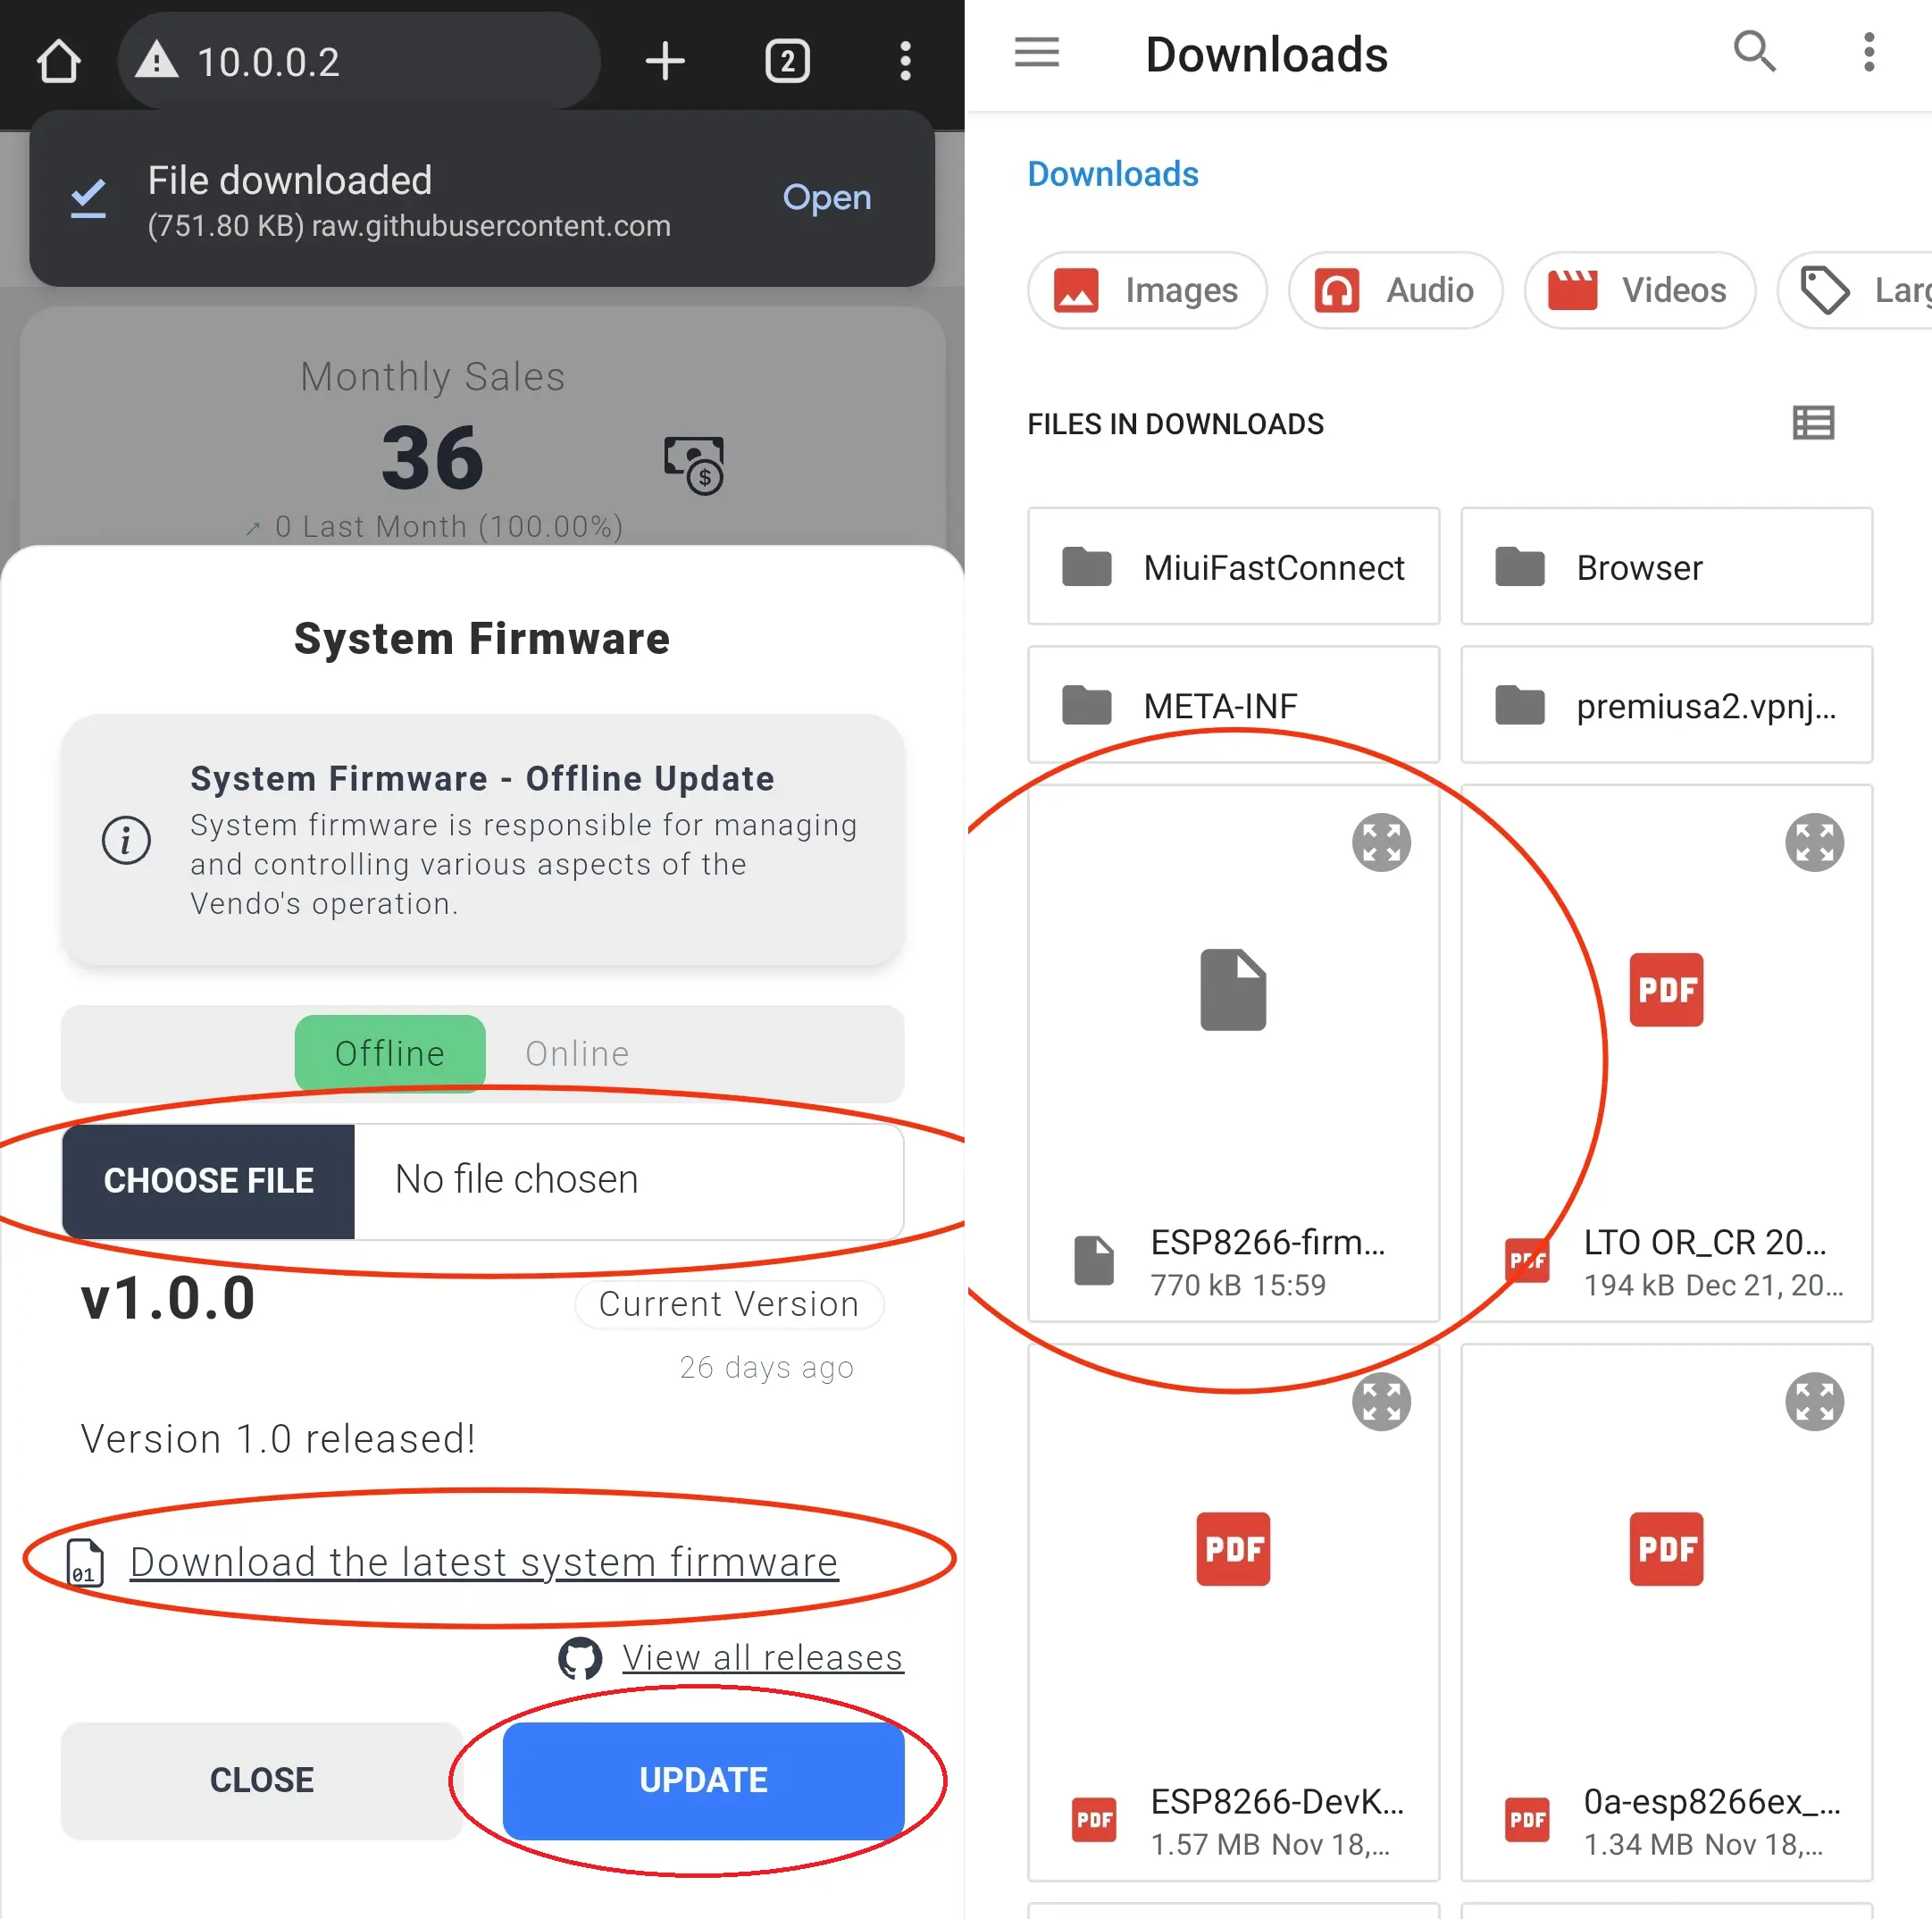
Select the Download the latest system firmware, wait for it to download, then choose Choose File and proceed to Update as shown in the image below.

-
After successful update, the system will restart.