ESP Device Configuration
ESP device configuration setup for MikroTik and Vendo account, hotspot portal files, and system clock.
-
Perform the MikroTik Router Configuration first. If your ESP device configuration has been reset, proceed to the next steps.
-
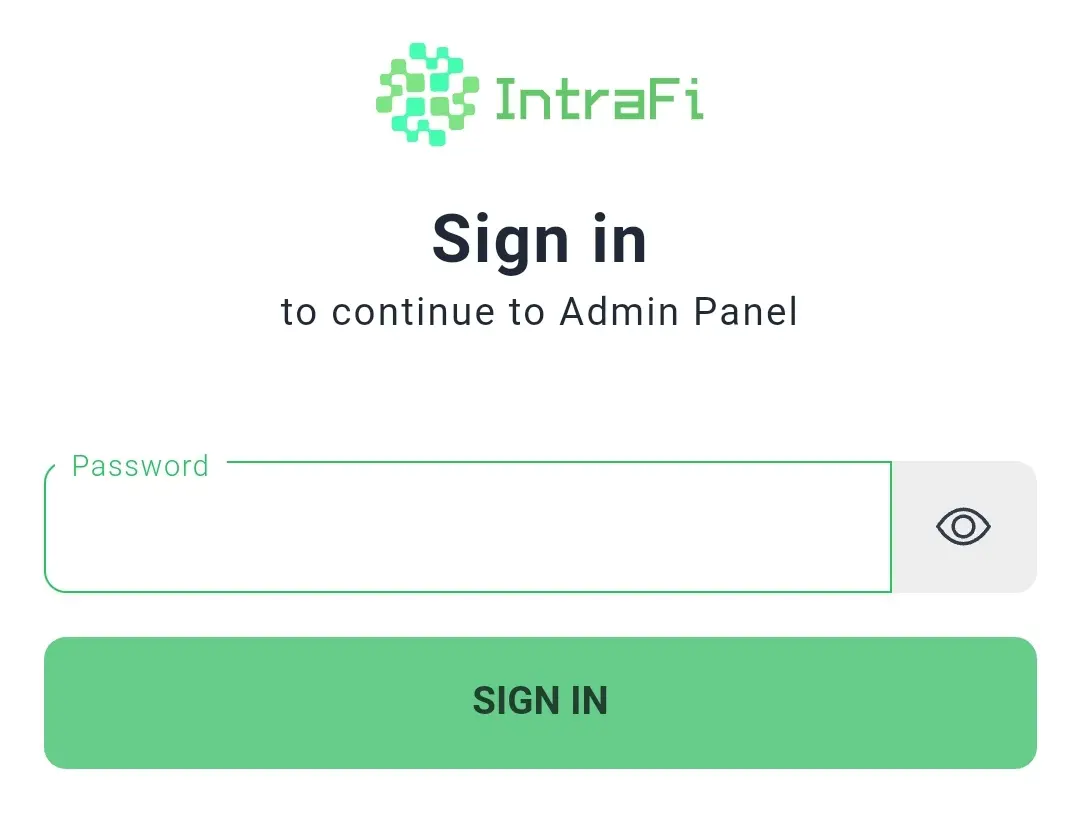
Connect to the MikroTik router’s Wi-Fi, open a browser, and navigate to the URL http://10.0.0.2, use the default admin for the password.
-
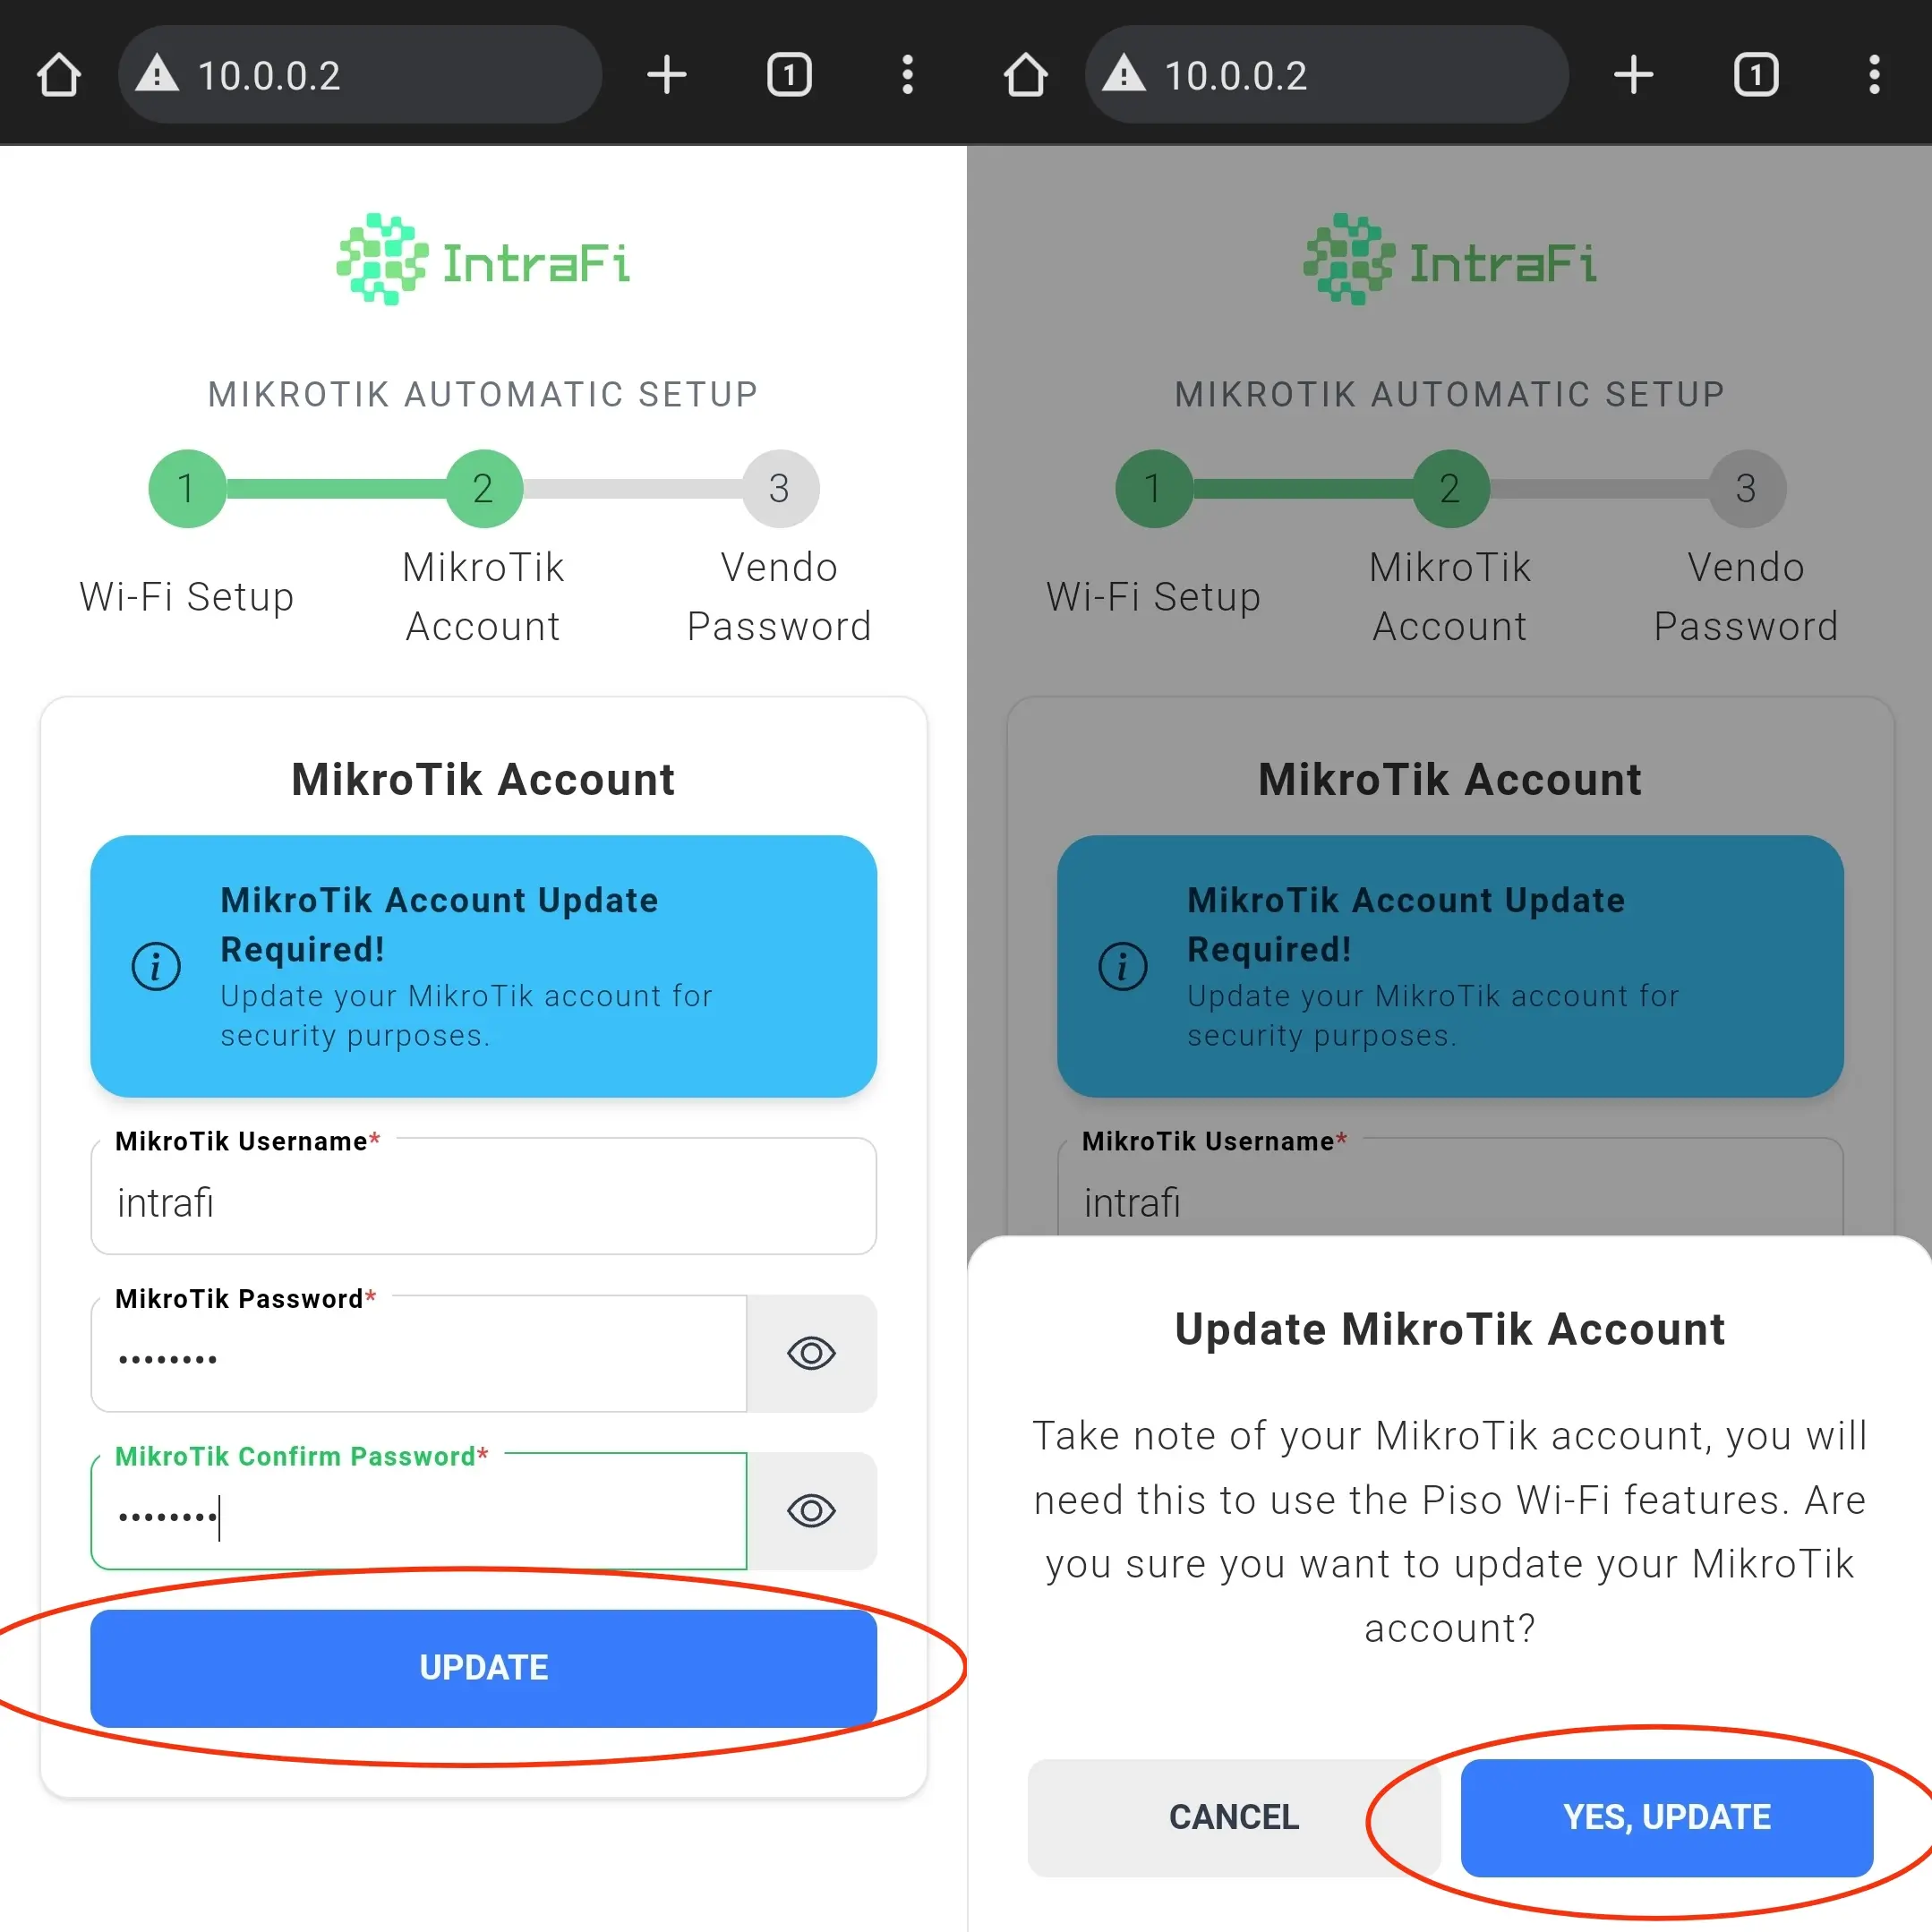
Set up the MikroTik Account, as it is crucial for accessing the Piso Wi-Fi Vendo features. In case the username or password is forgotten, the only recovery option is to perform a factory reset on the MikroTik router’s device.
-
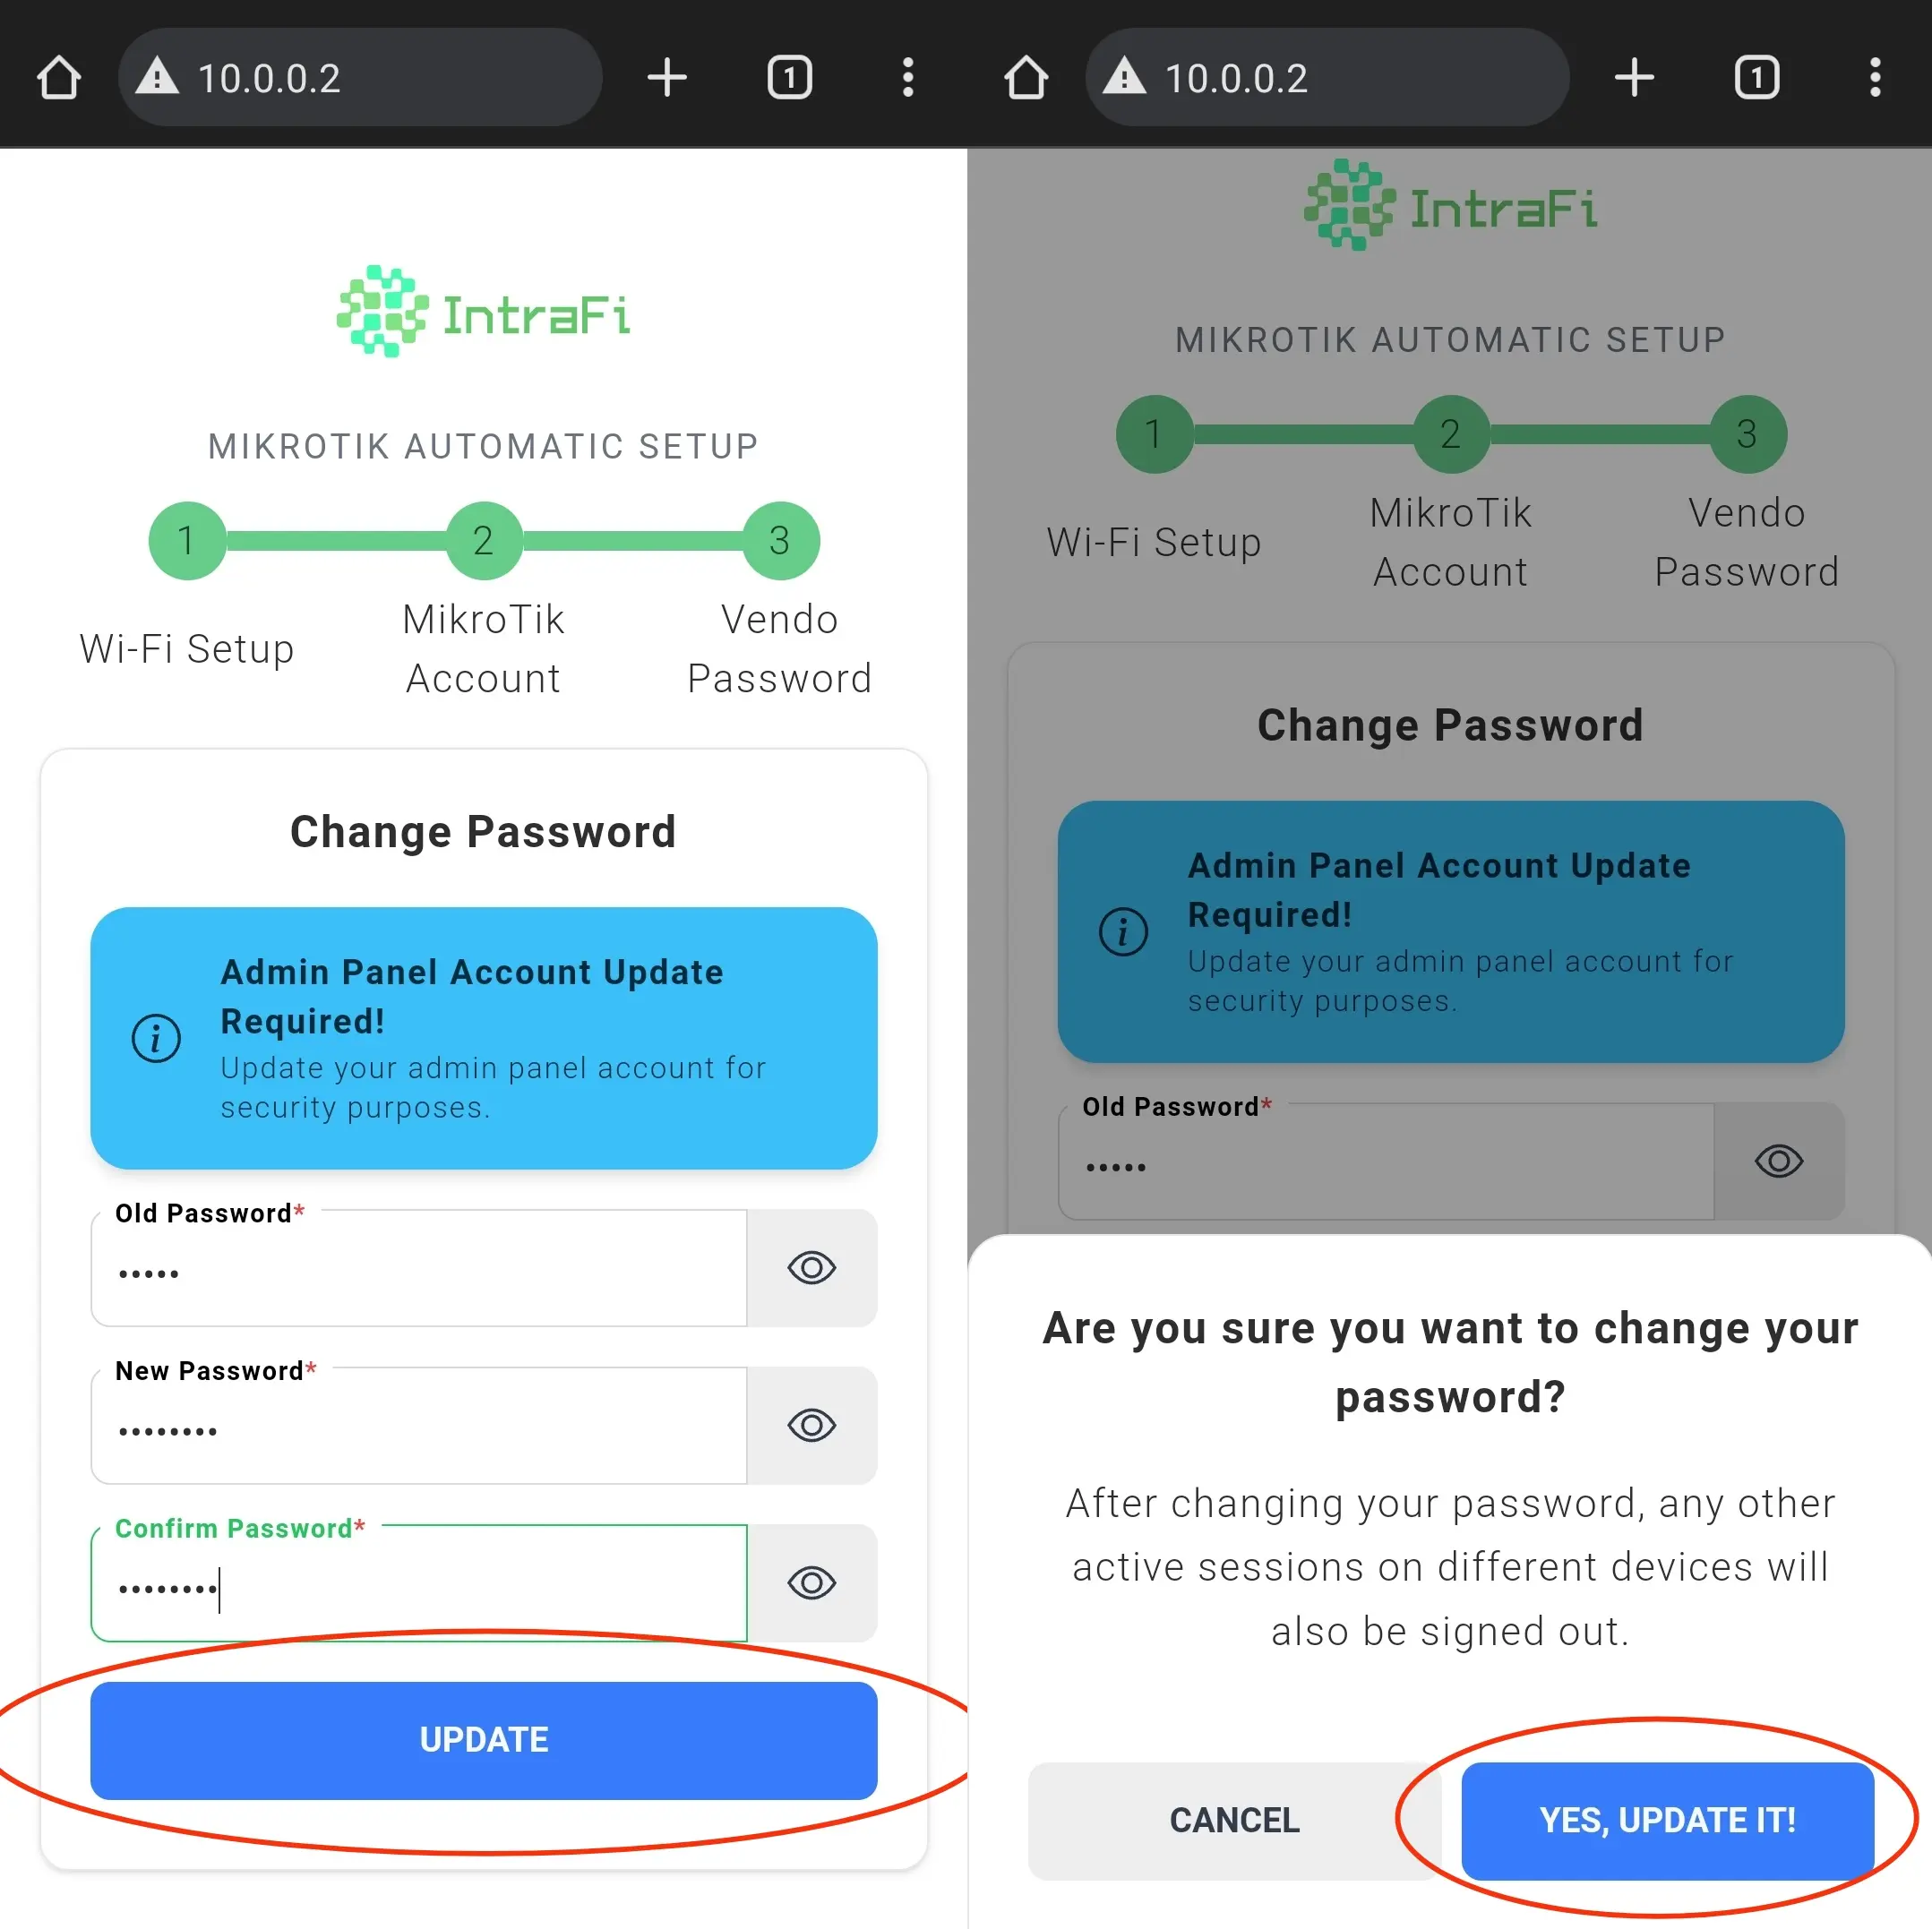
Update the Vendo Account. If the password is forgotten, reset the ESP device by pressing the RST button five times, see more for the indicators to perform the reset.
-
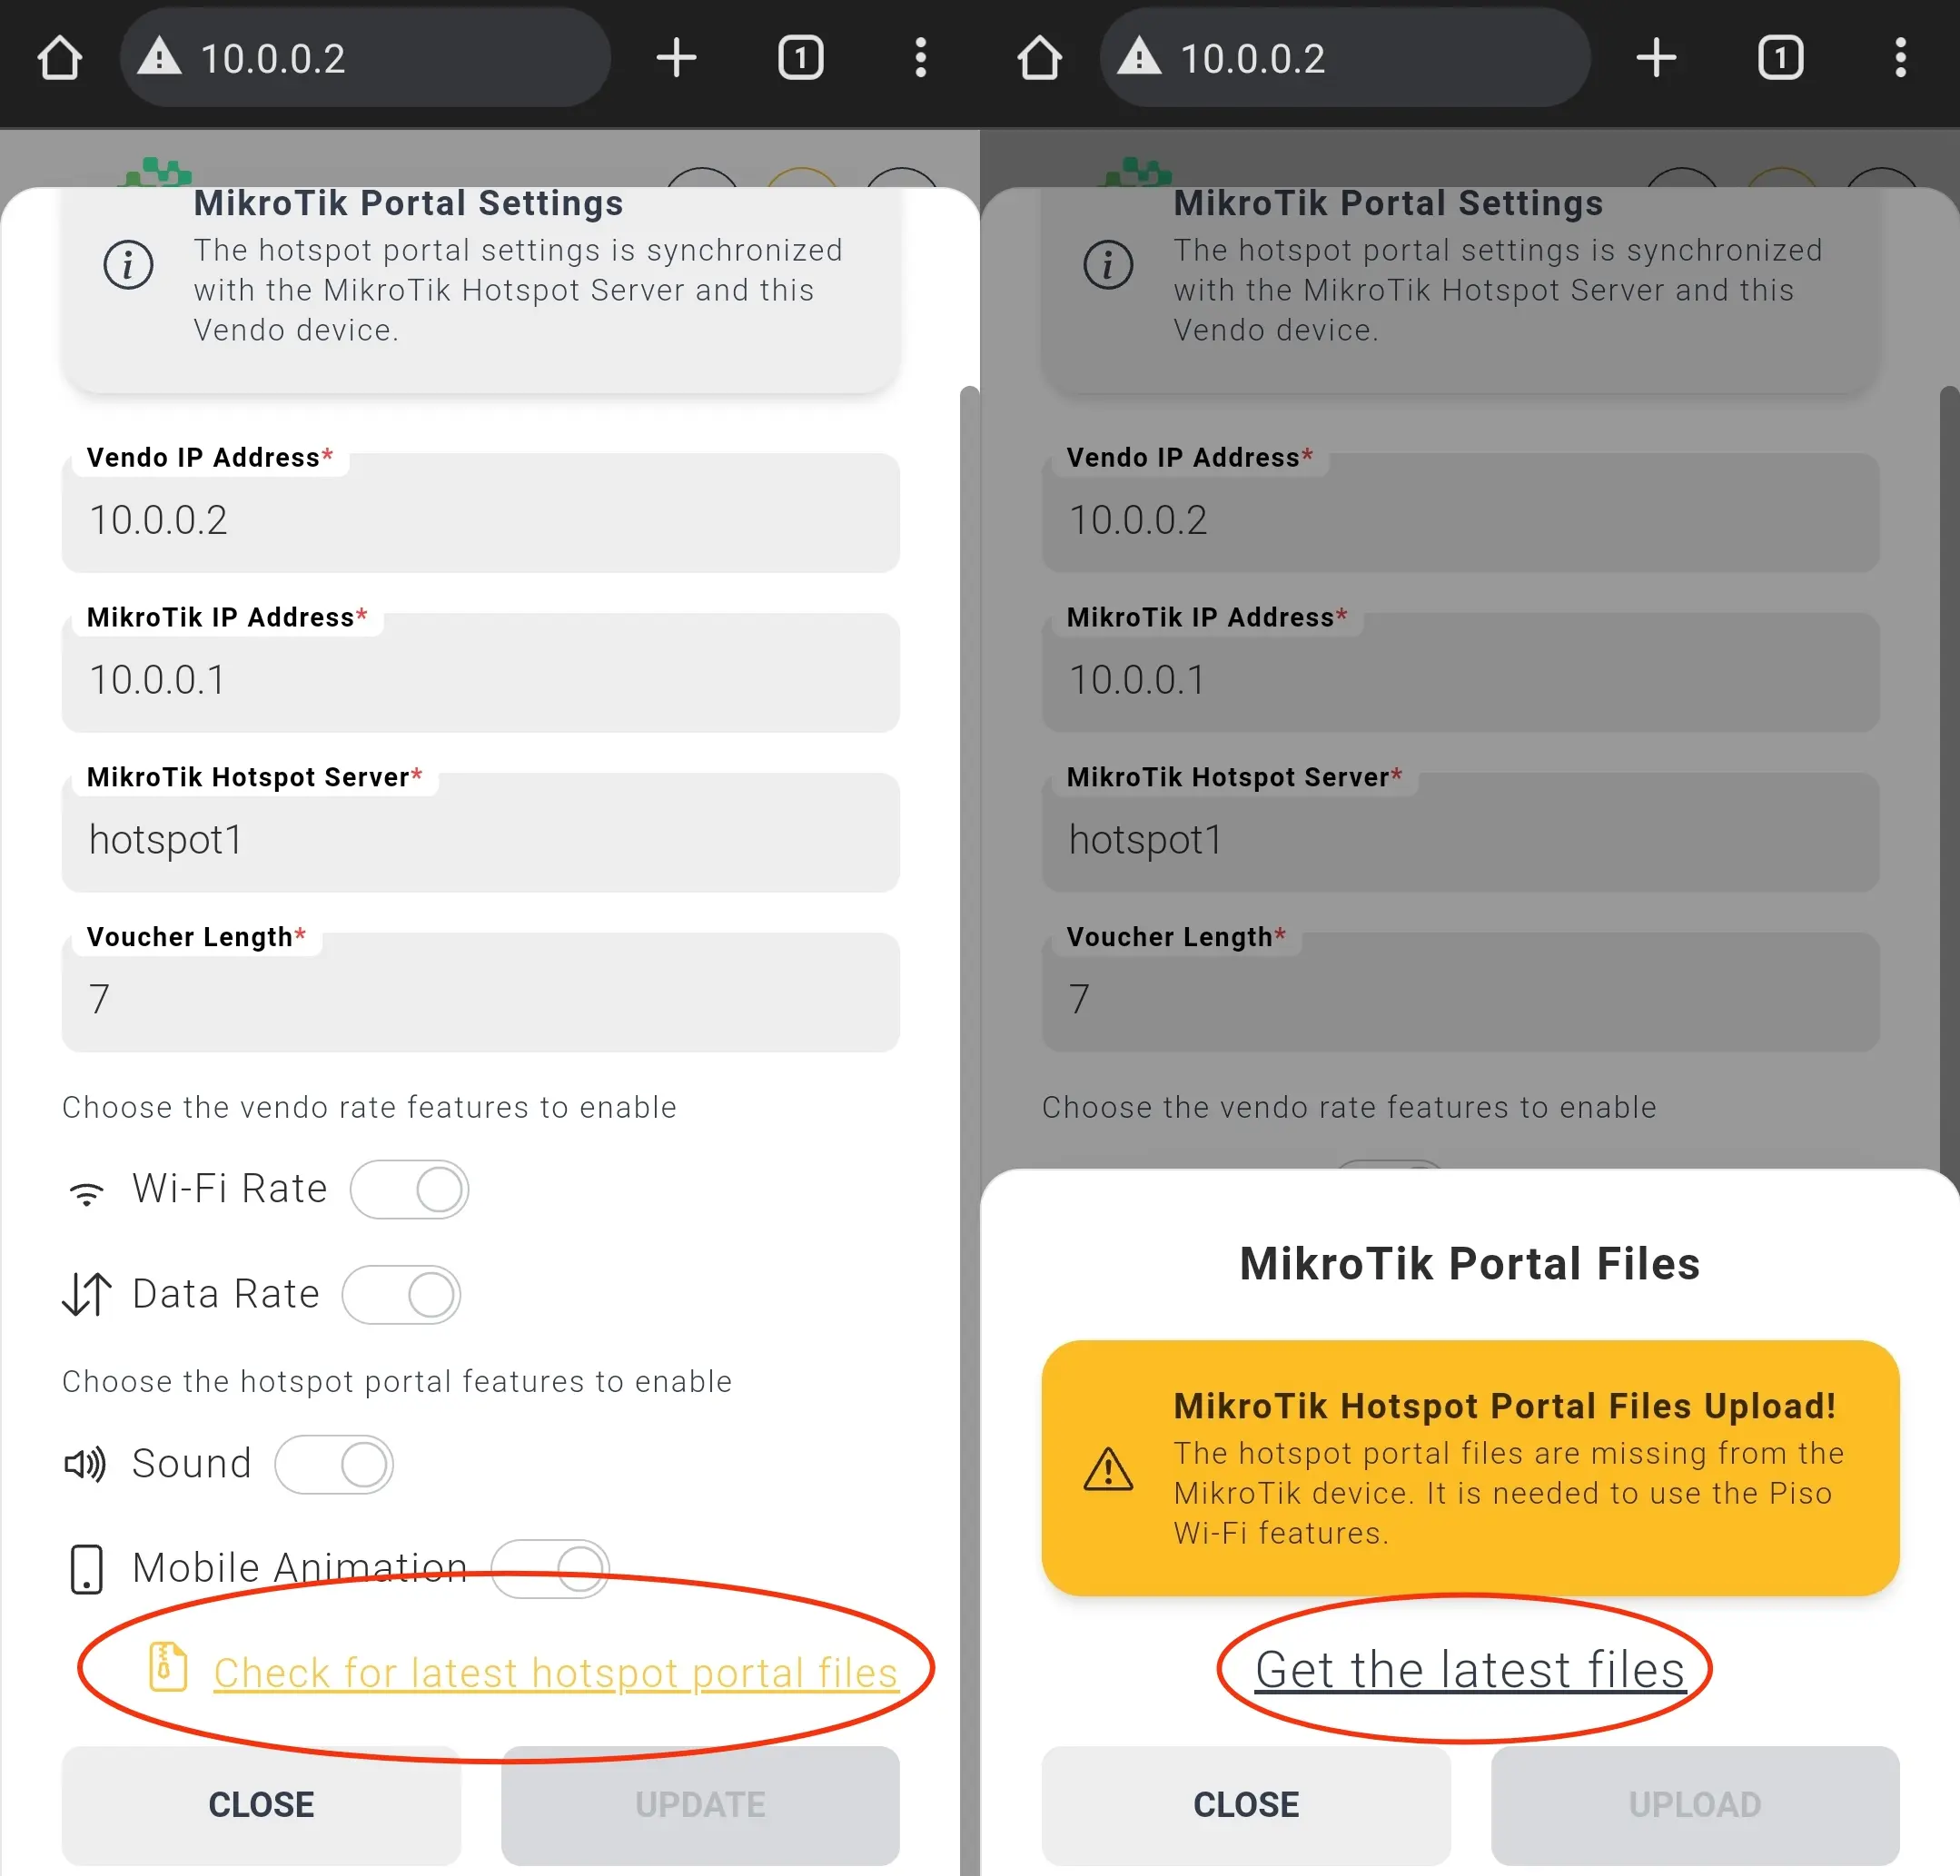
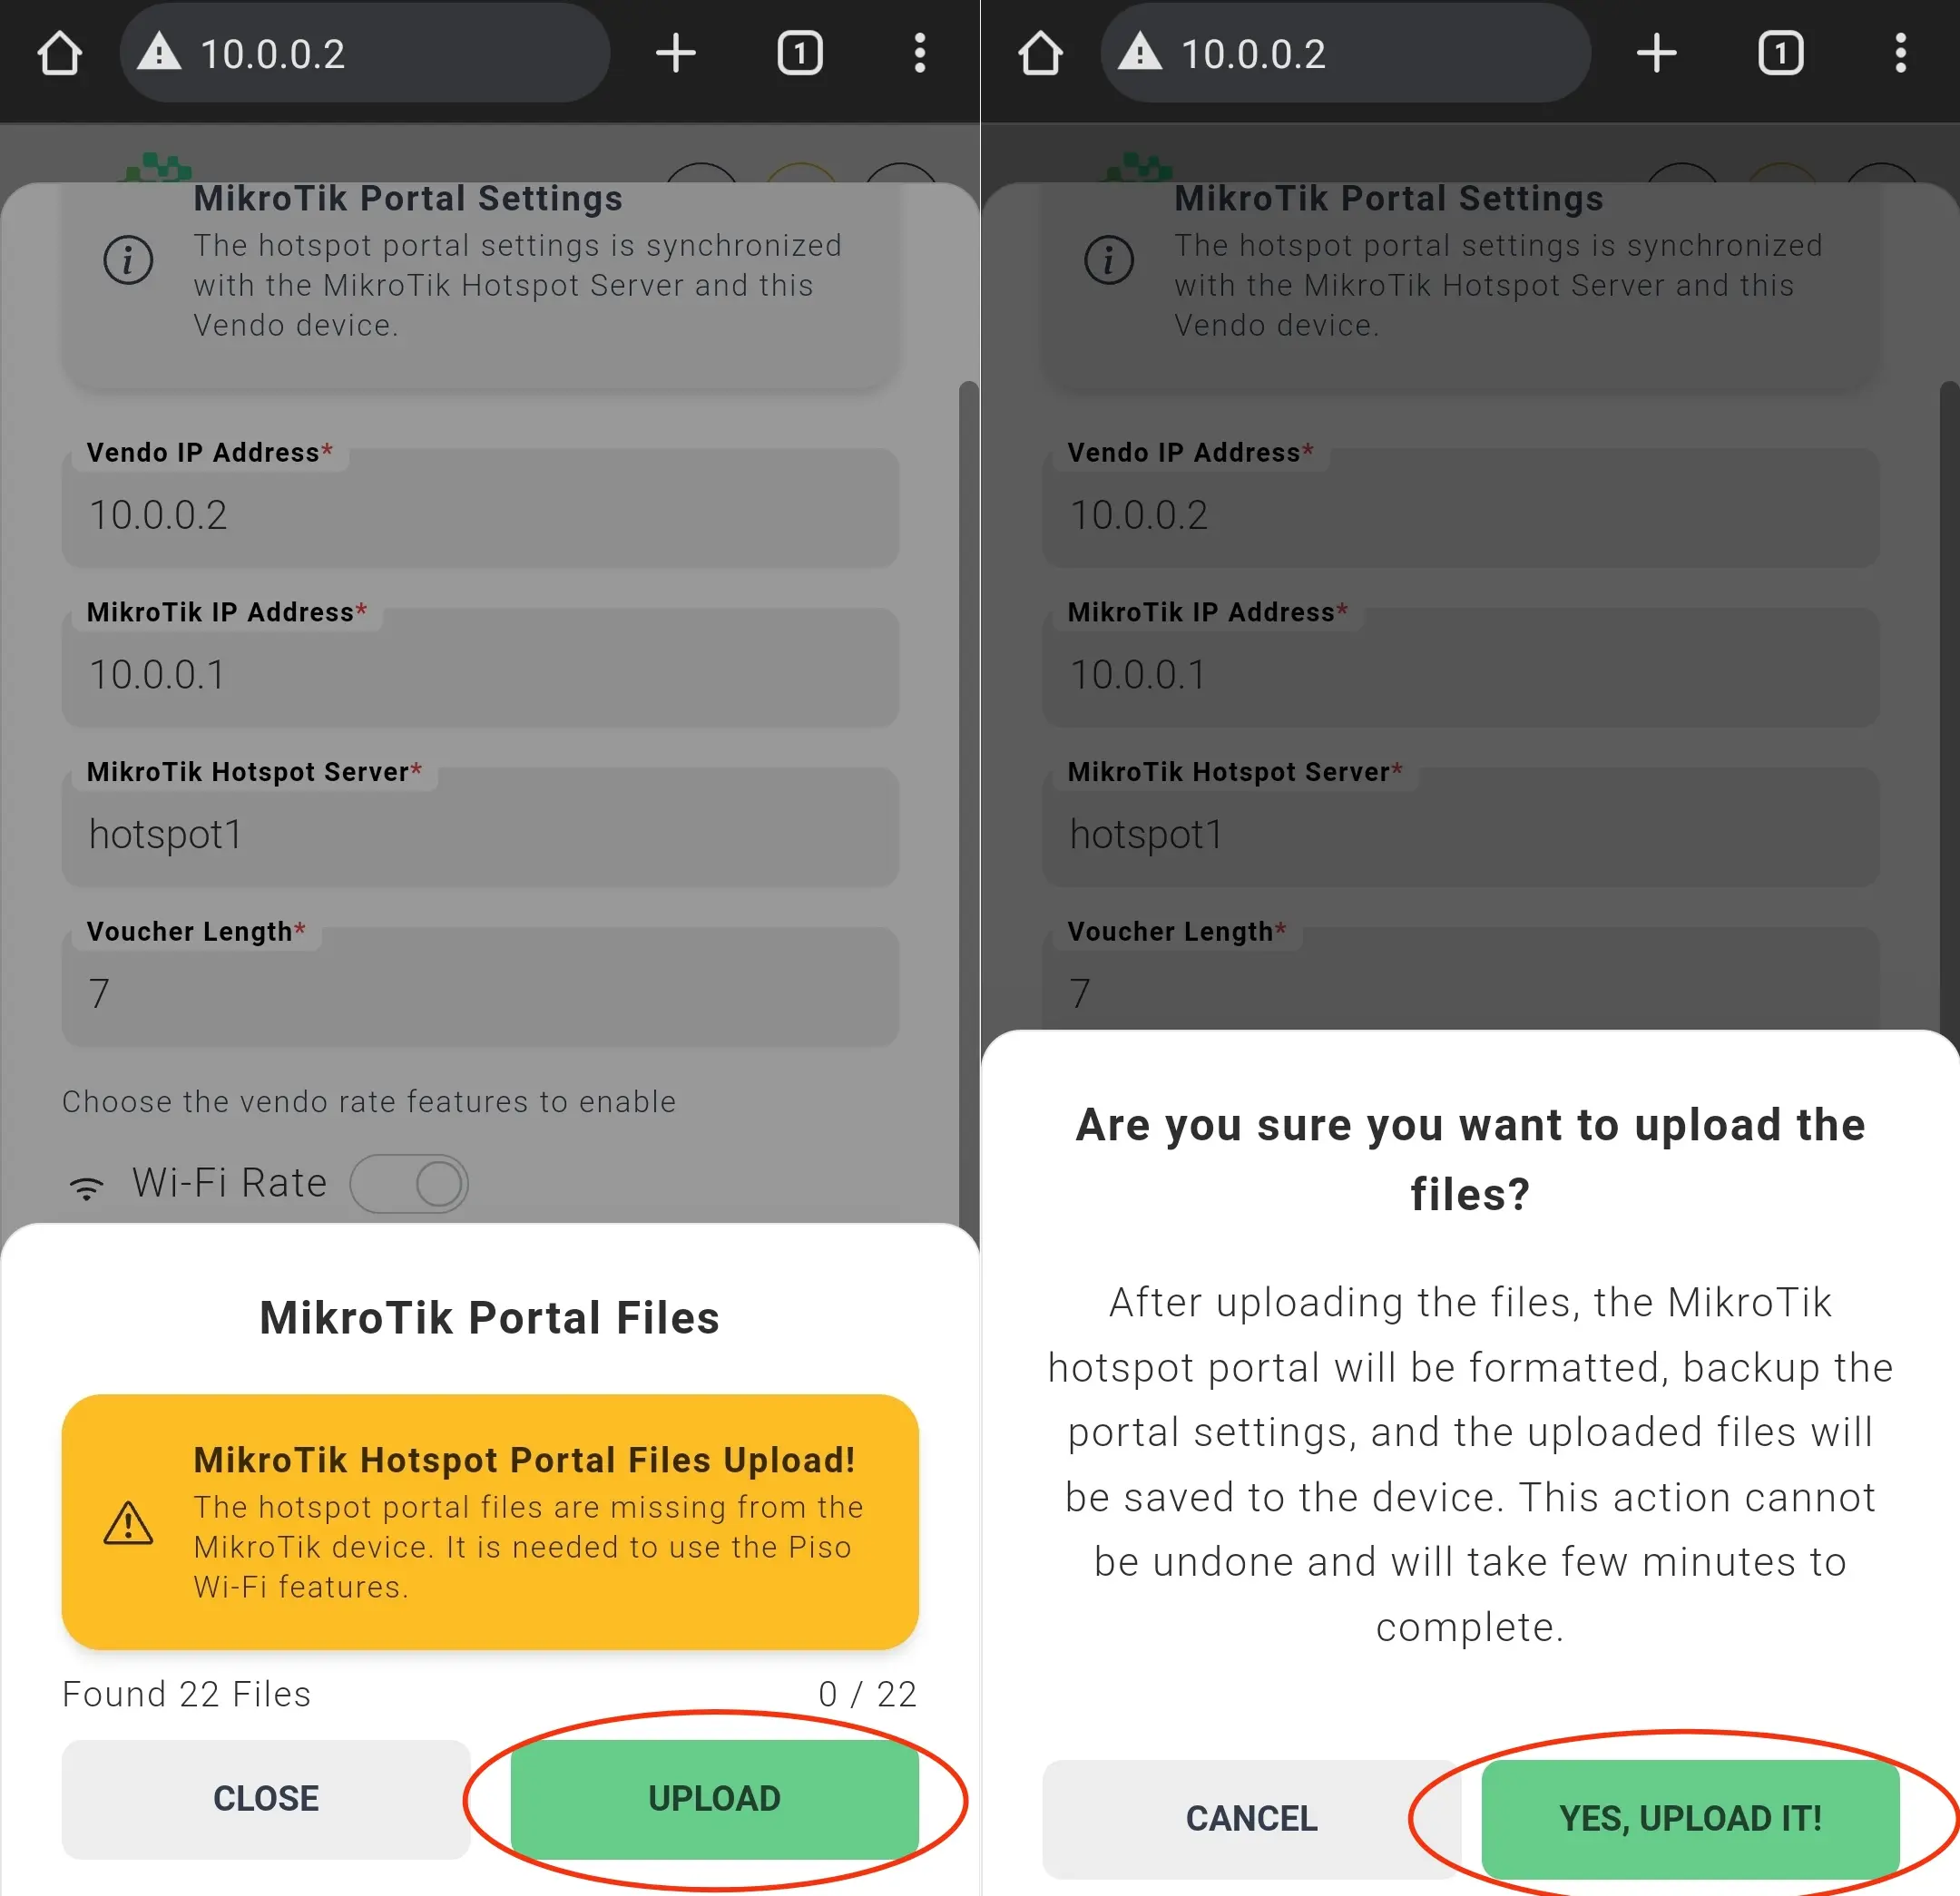
Bind the MikroTik Portal Settings and download the latest MikroTik Hotspot Portal Files. If the MikroTik Hotspot Portal Bind button is colored, this notifies you to update the necessary settings.

The quick access buttons MikroTik Hotspot Portal Bind color indicators.
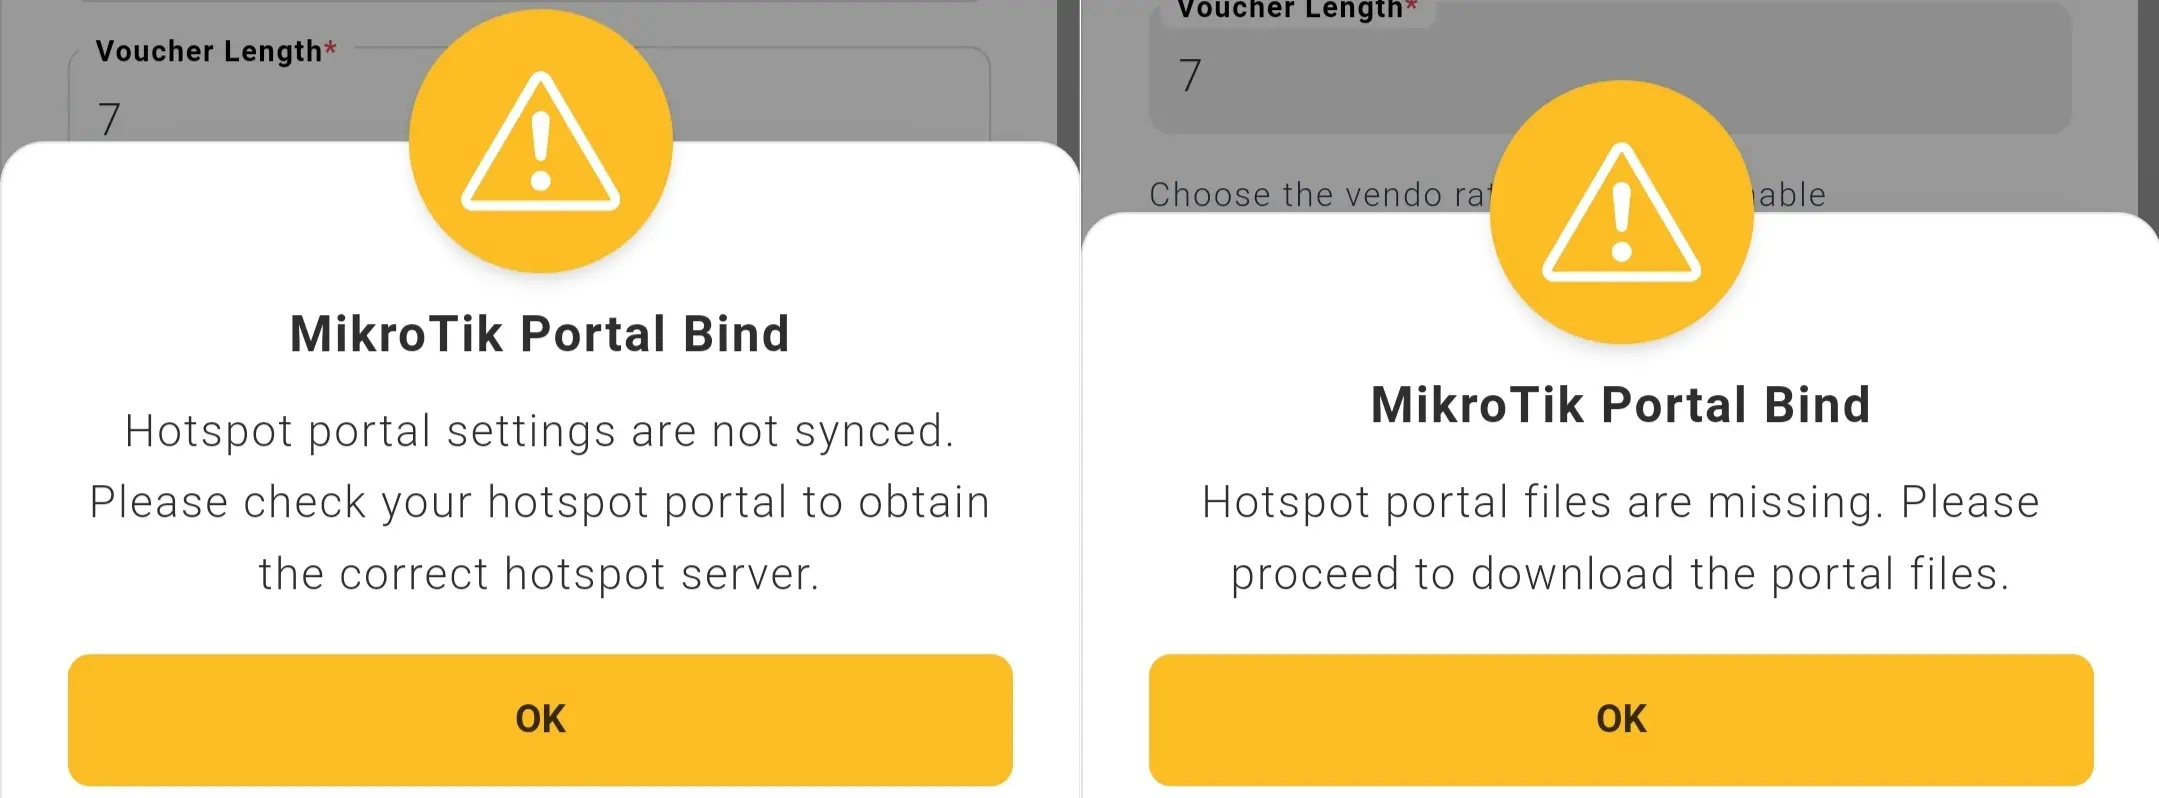
The MikroTik Hotspot Portal Bind requires to update warnings.
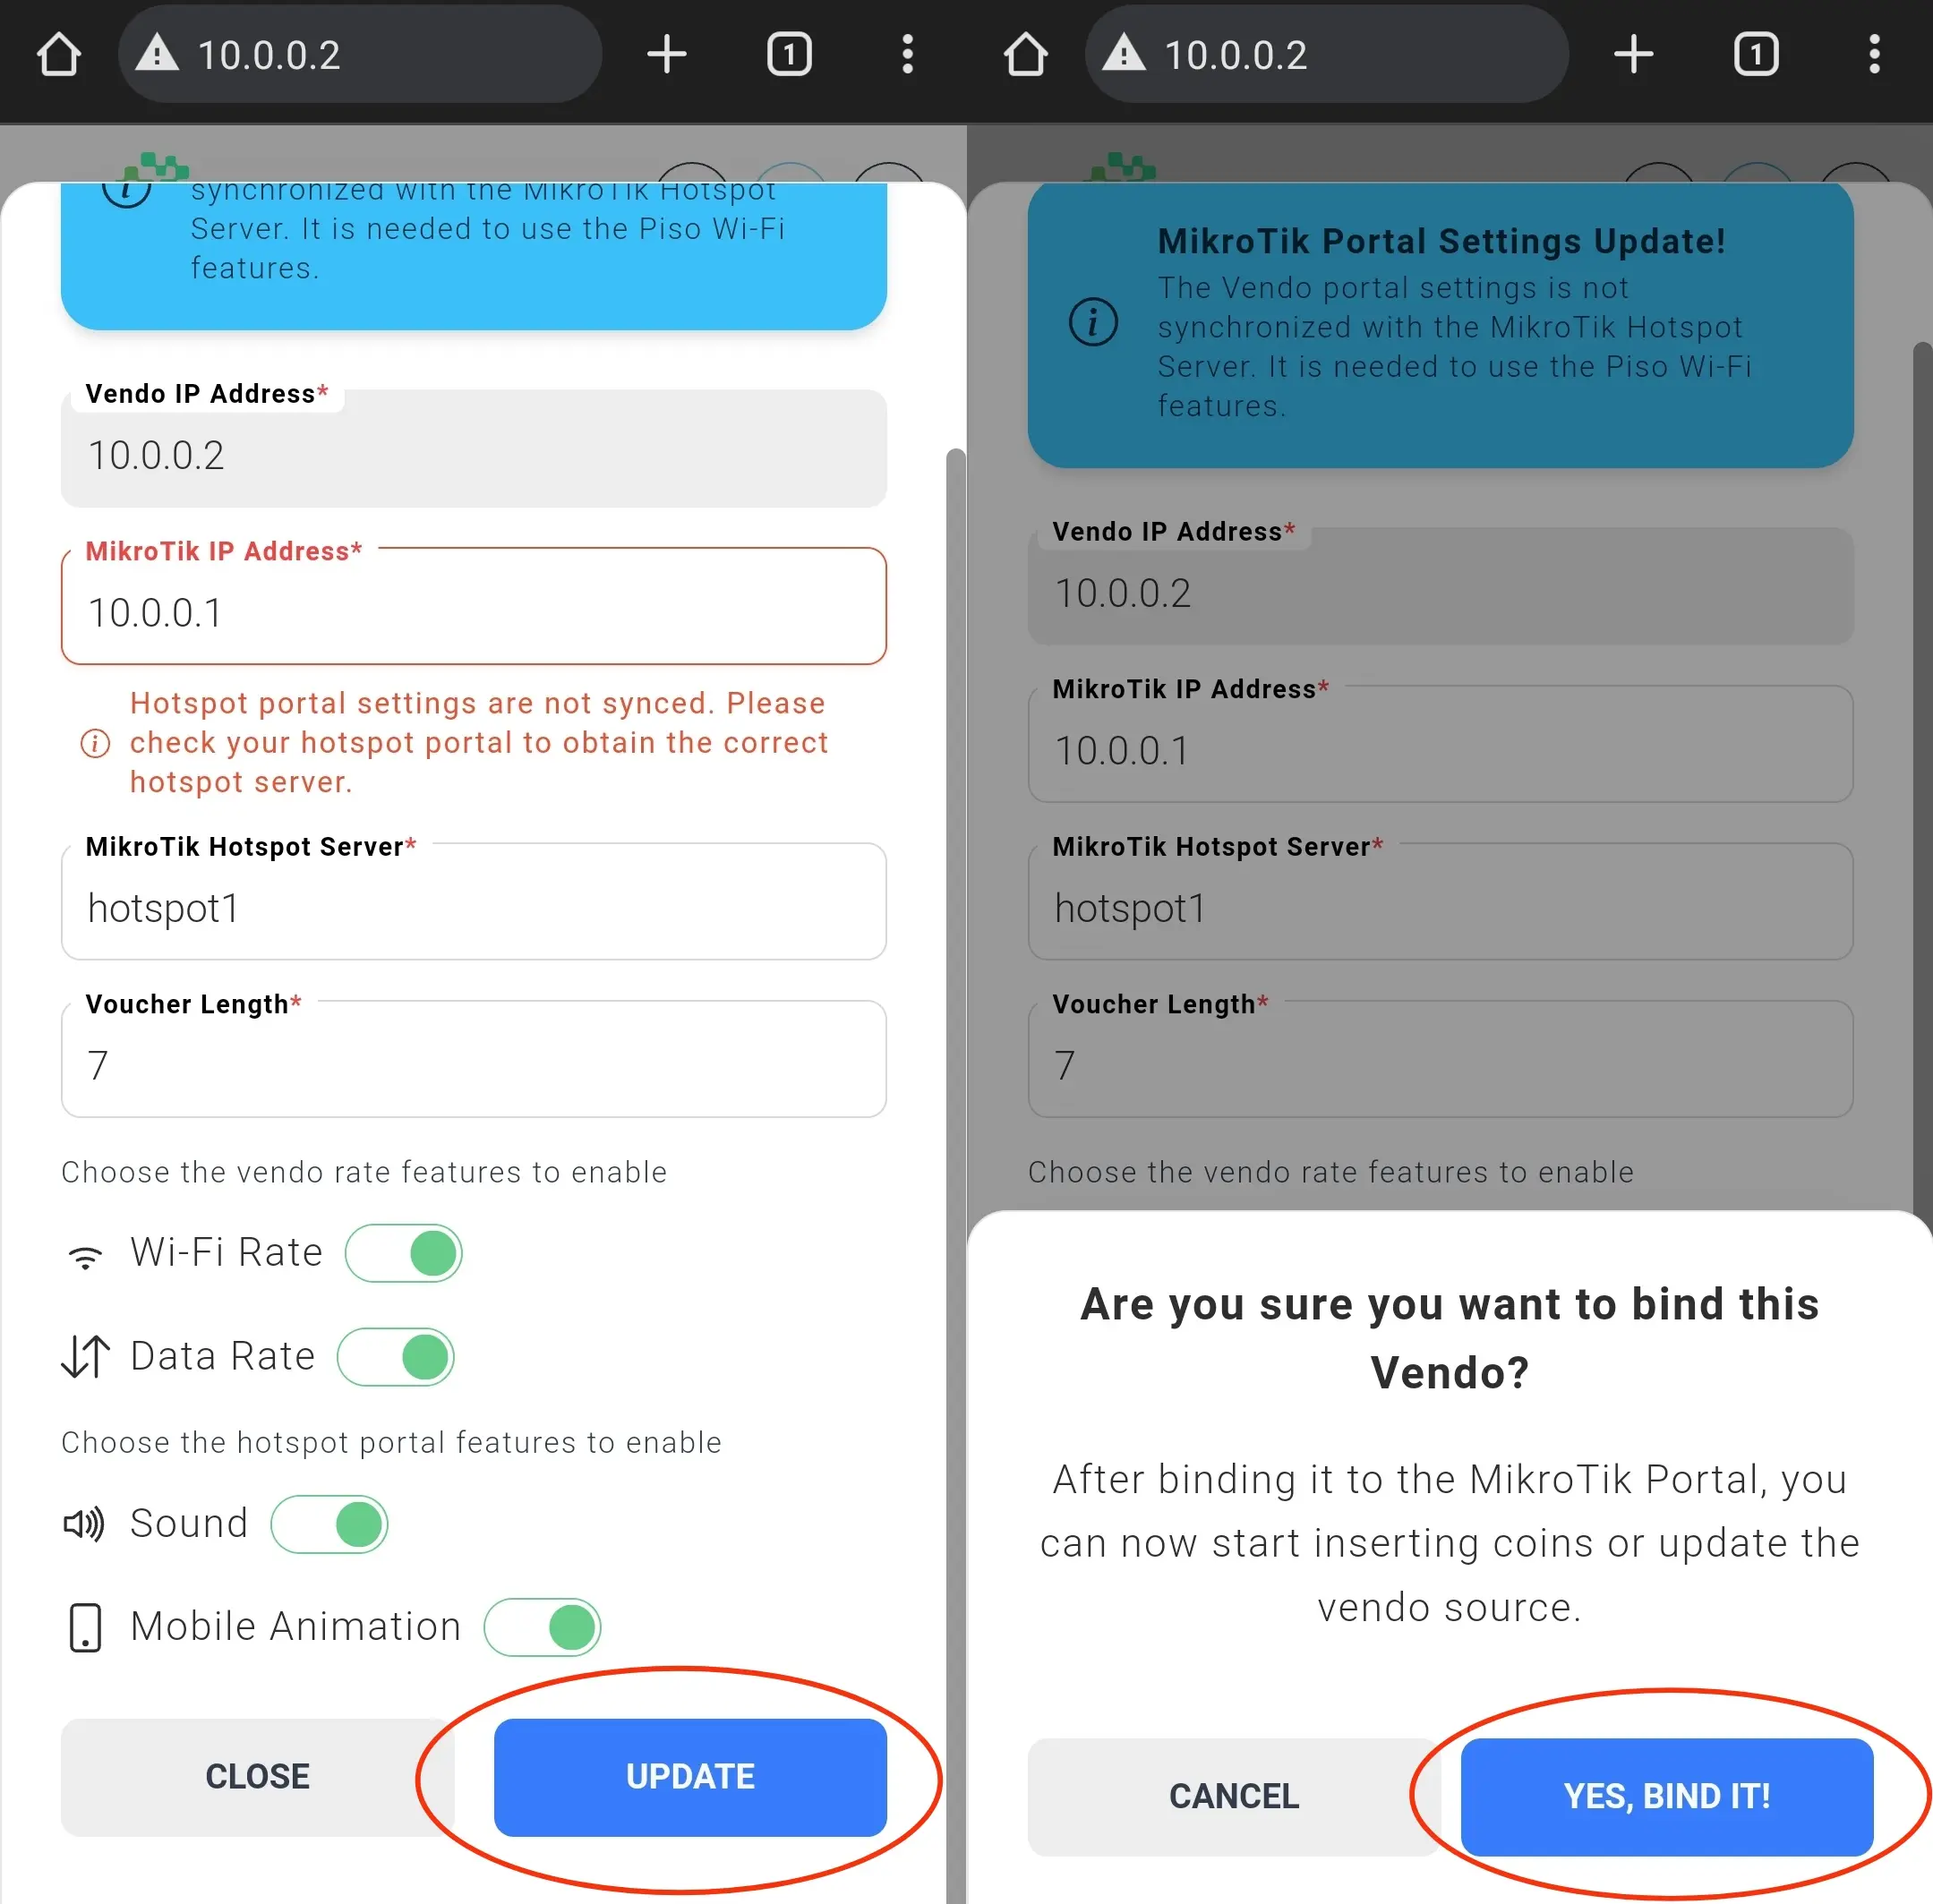
MikroTik Portal Settings Update
Input all the required details and choose the Vendo Rate Features and Hotspot Portal Features as shown in the image below.
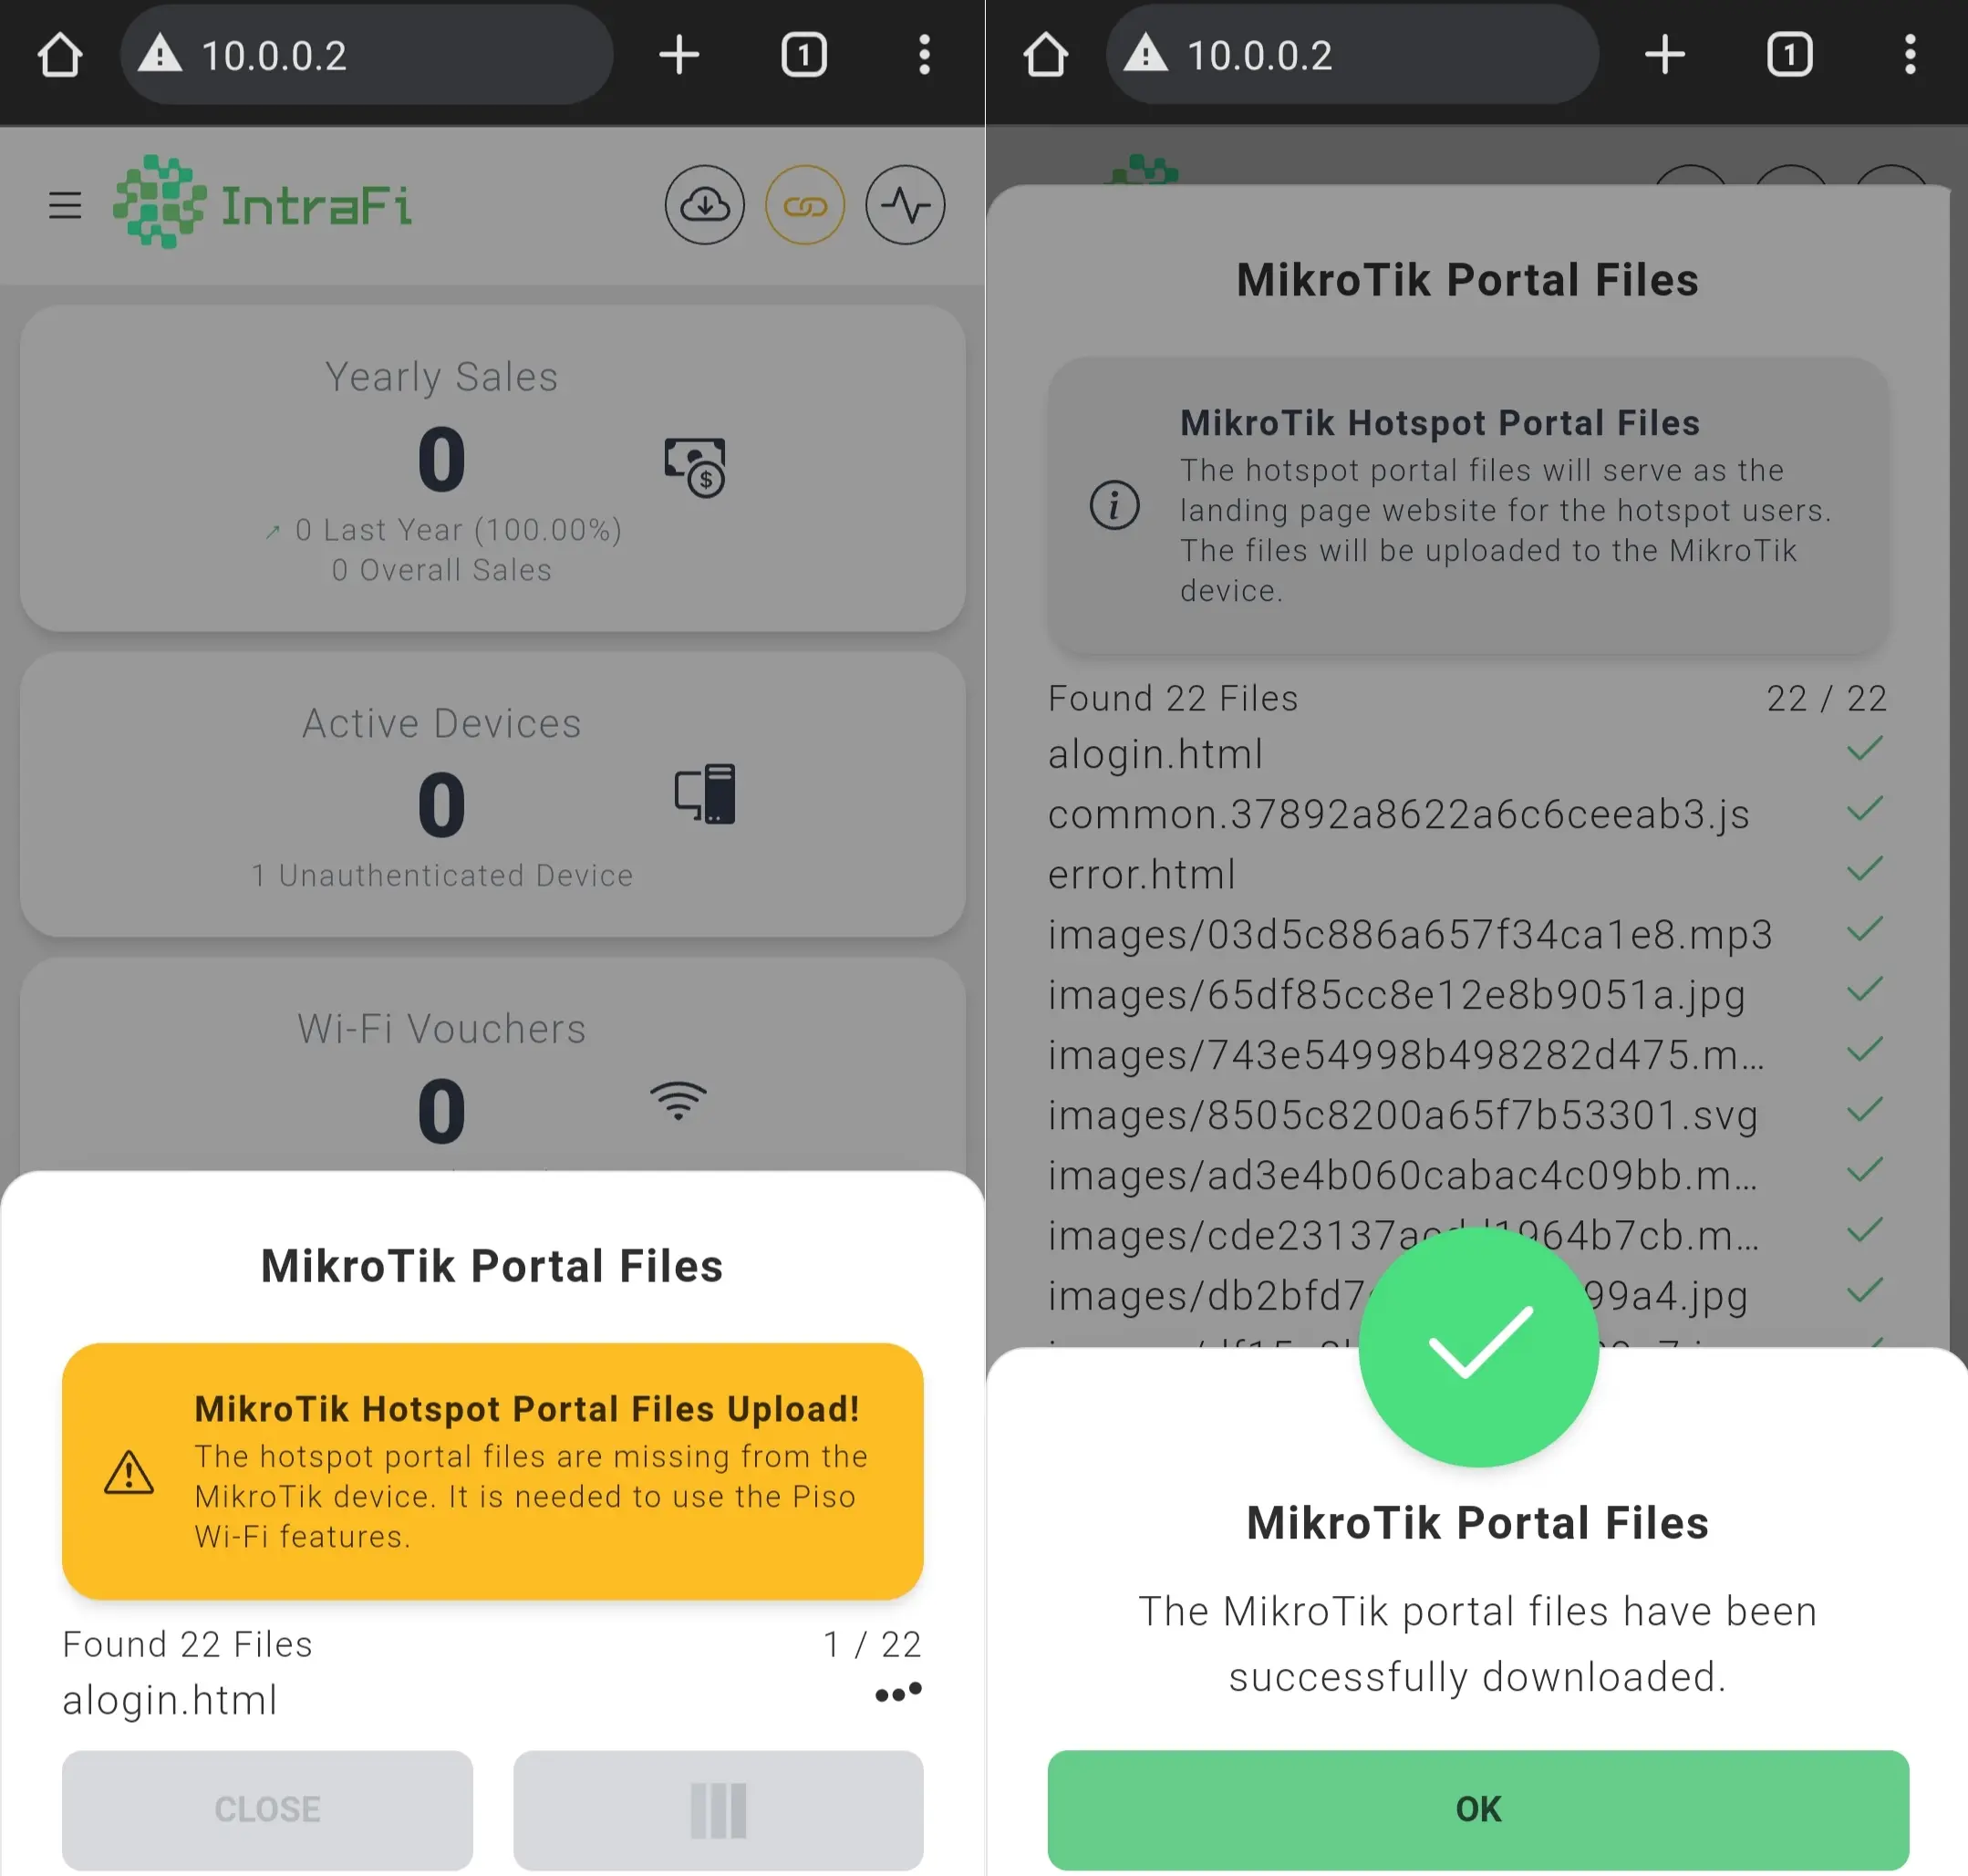
MikroTik Portal Files Download
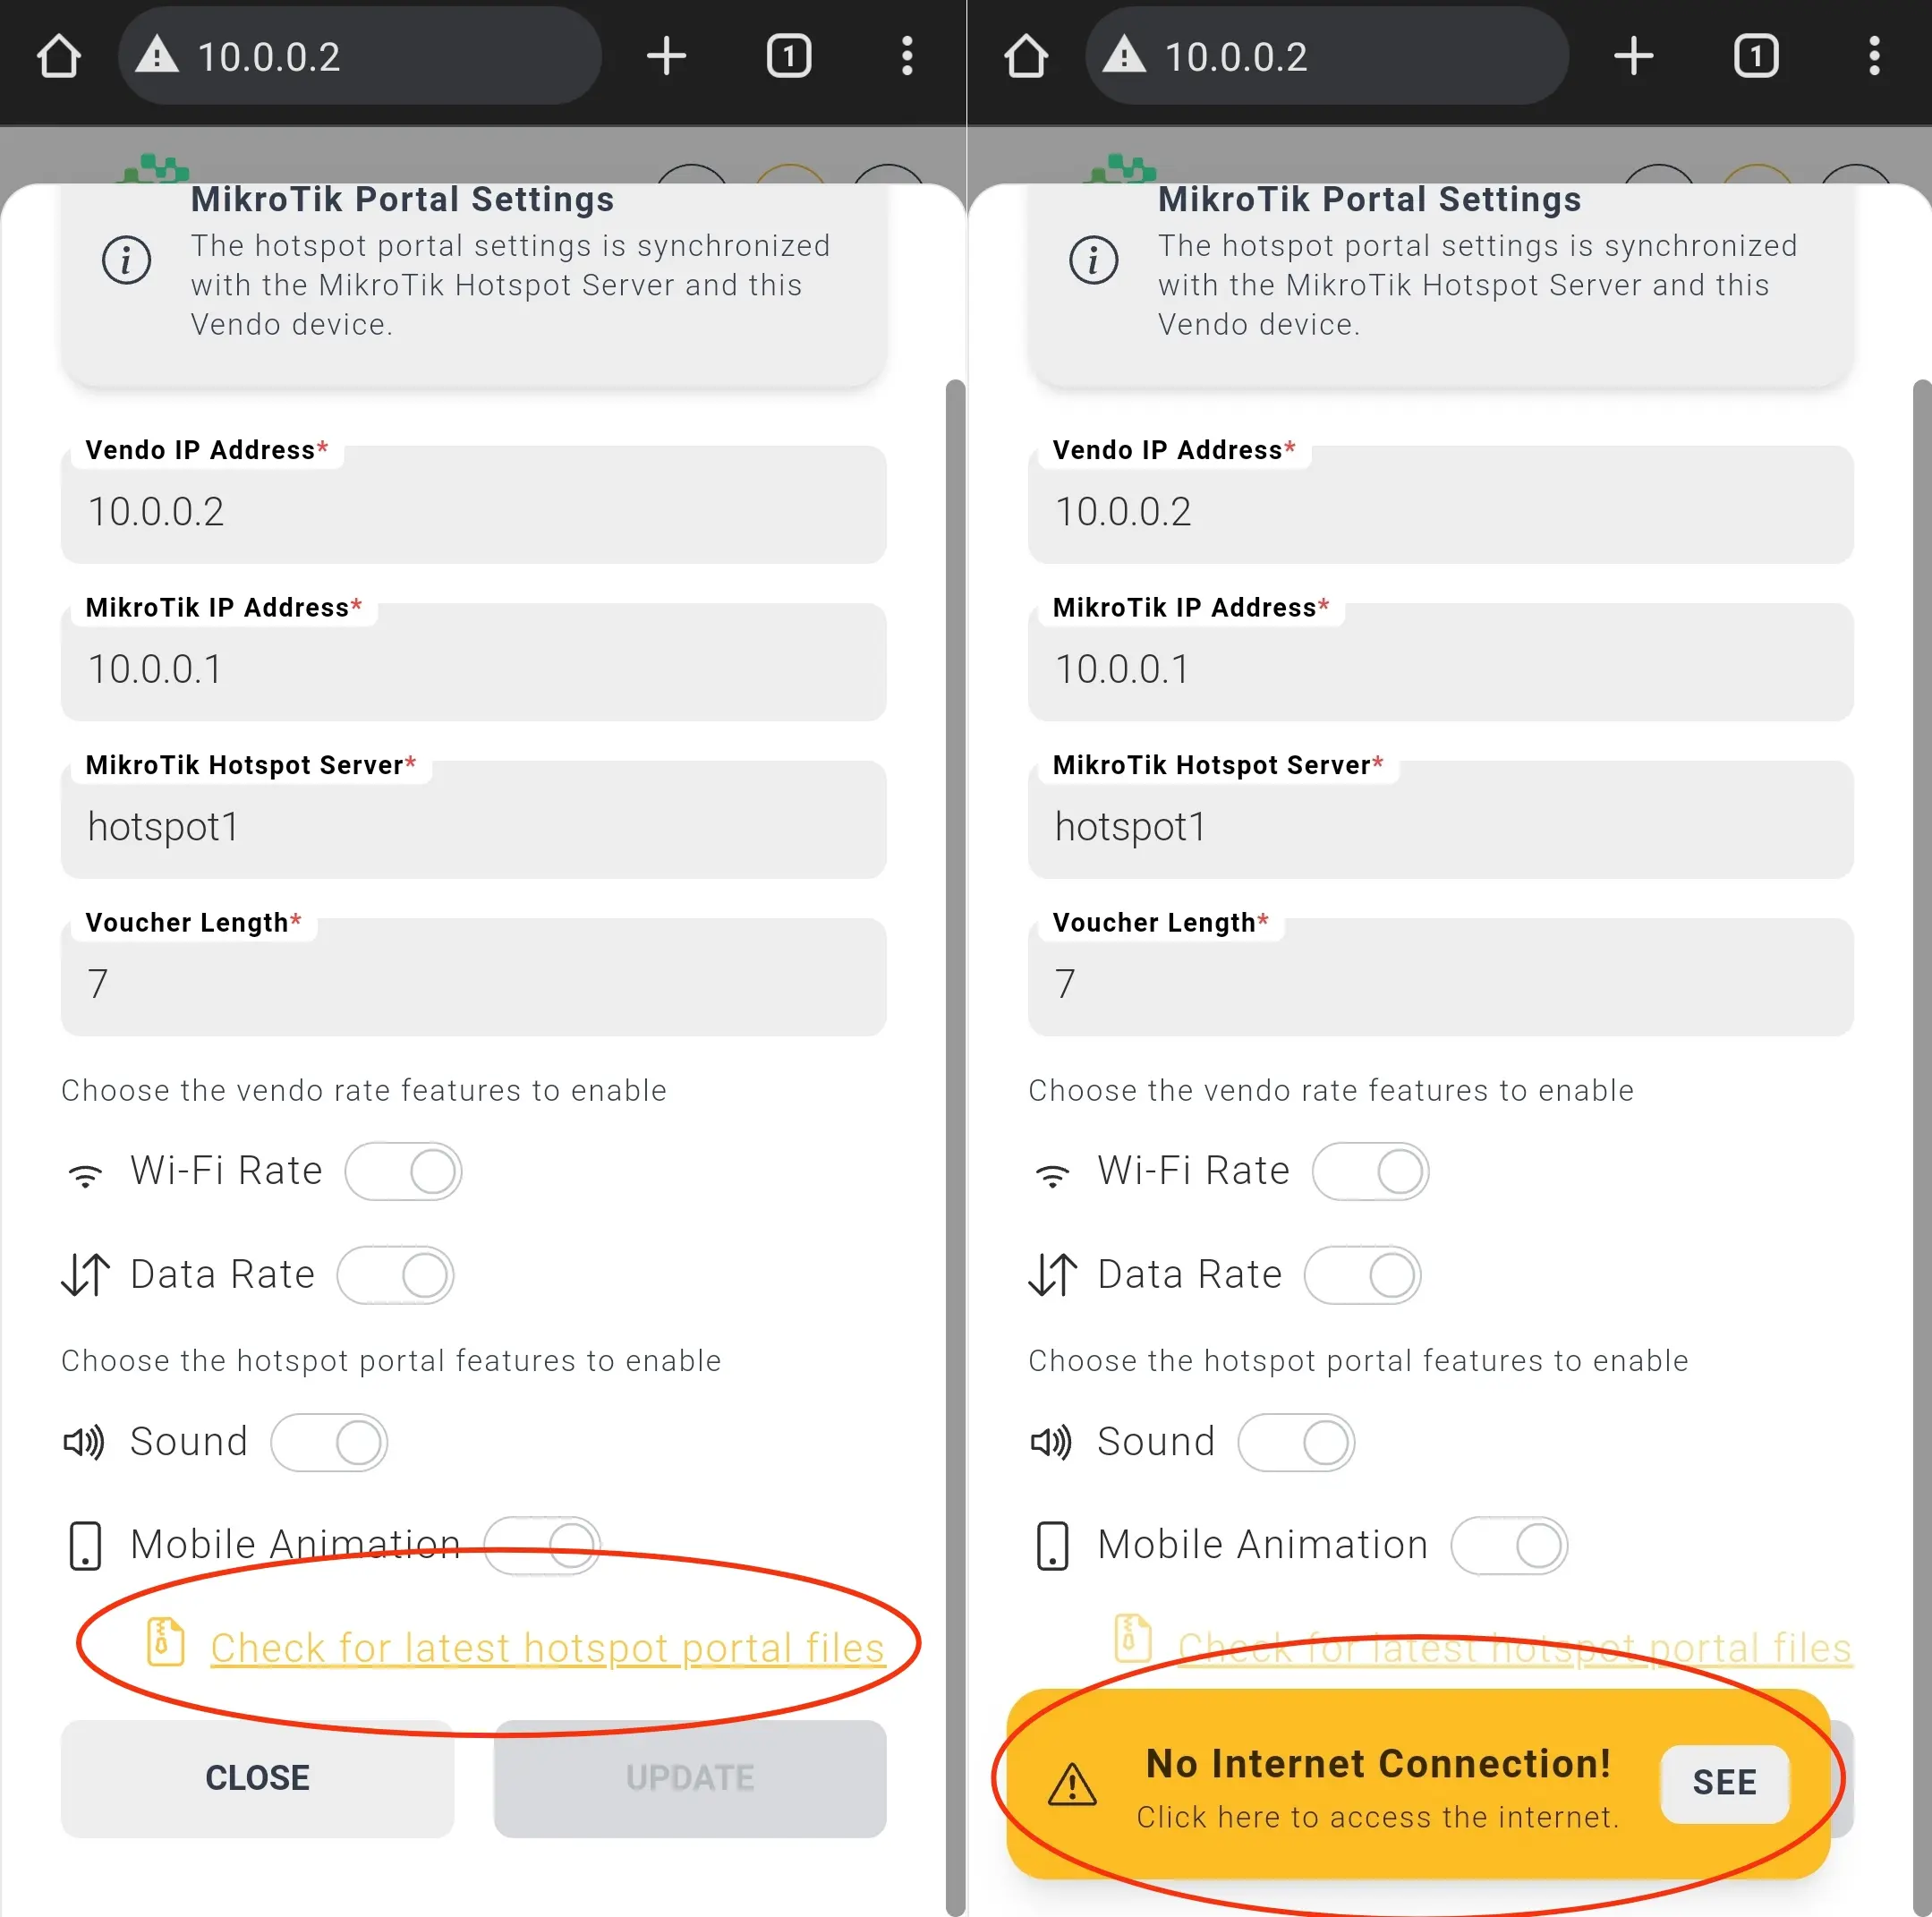
The MikroTik Portal Files Download requires internet connection.
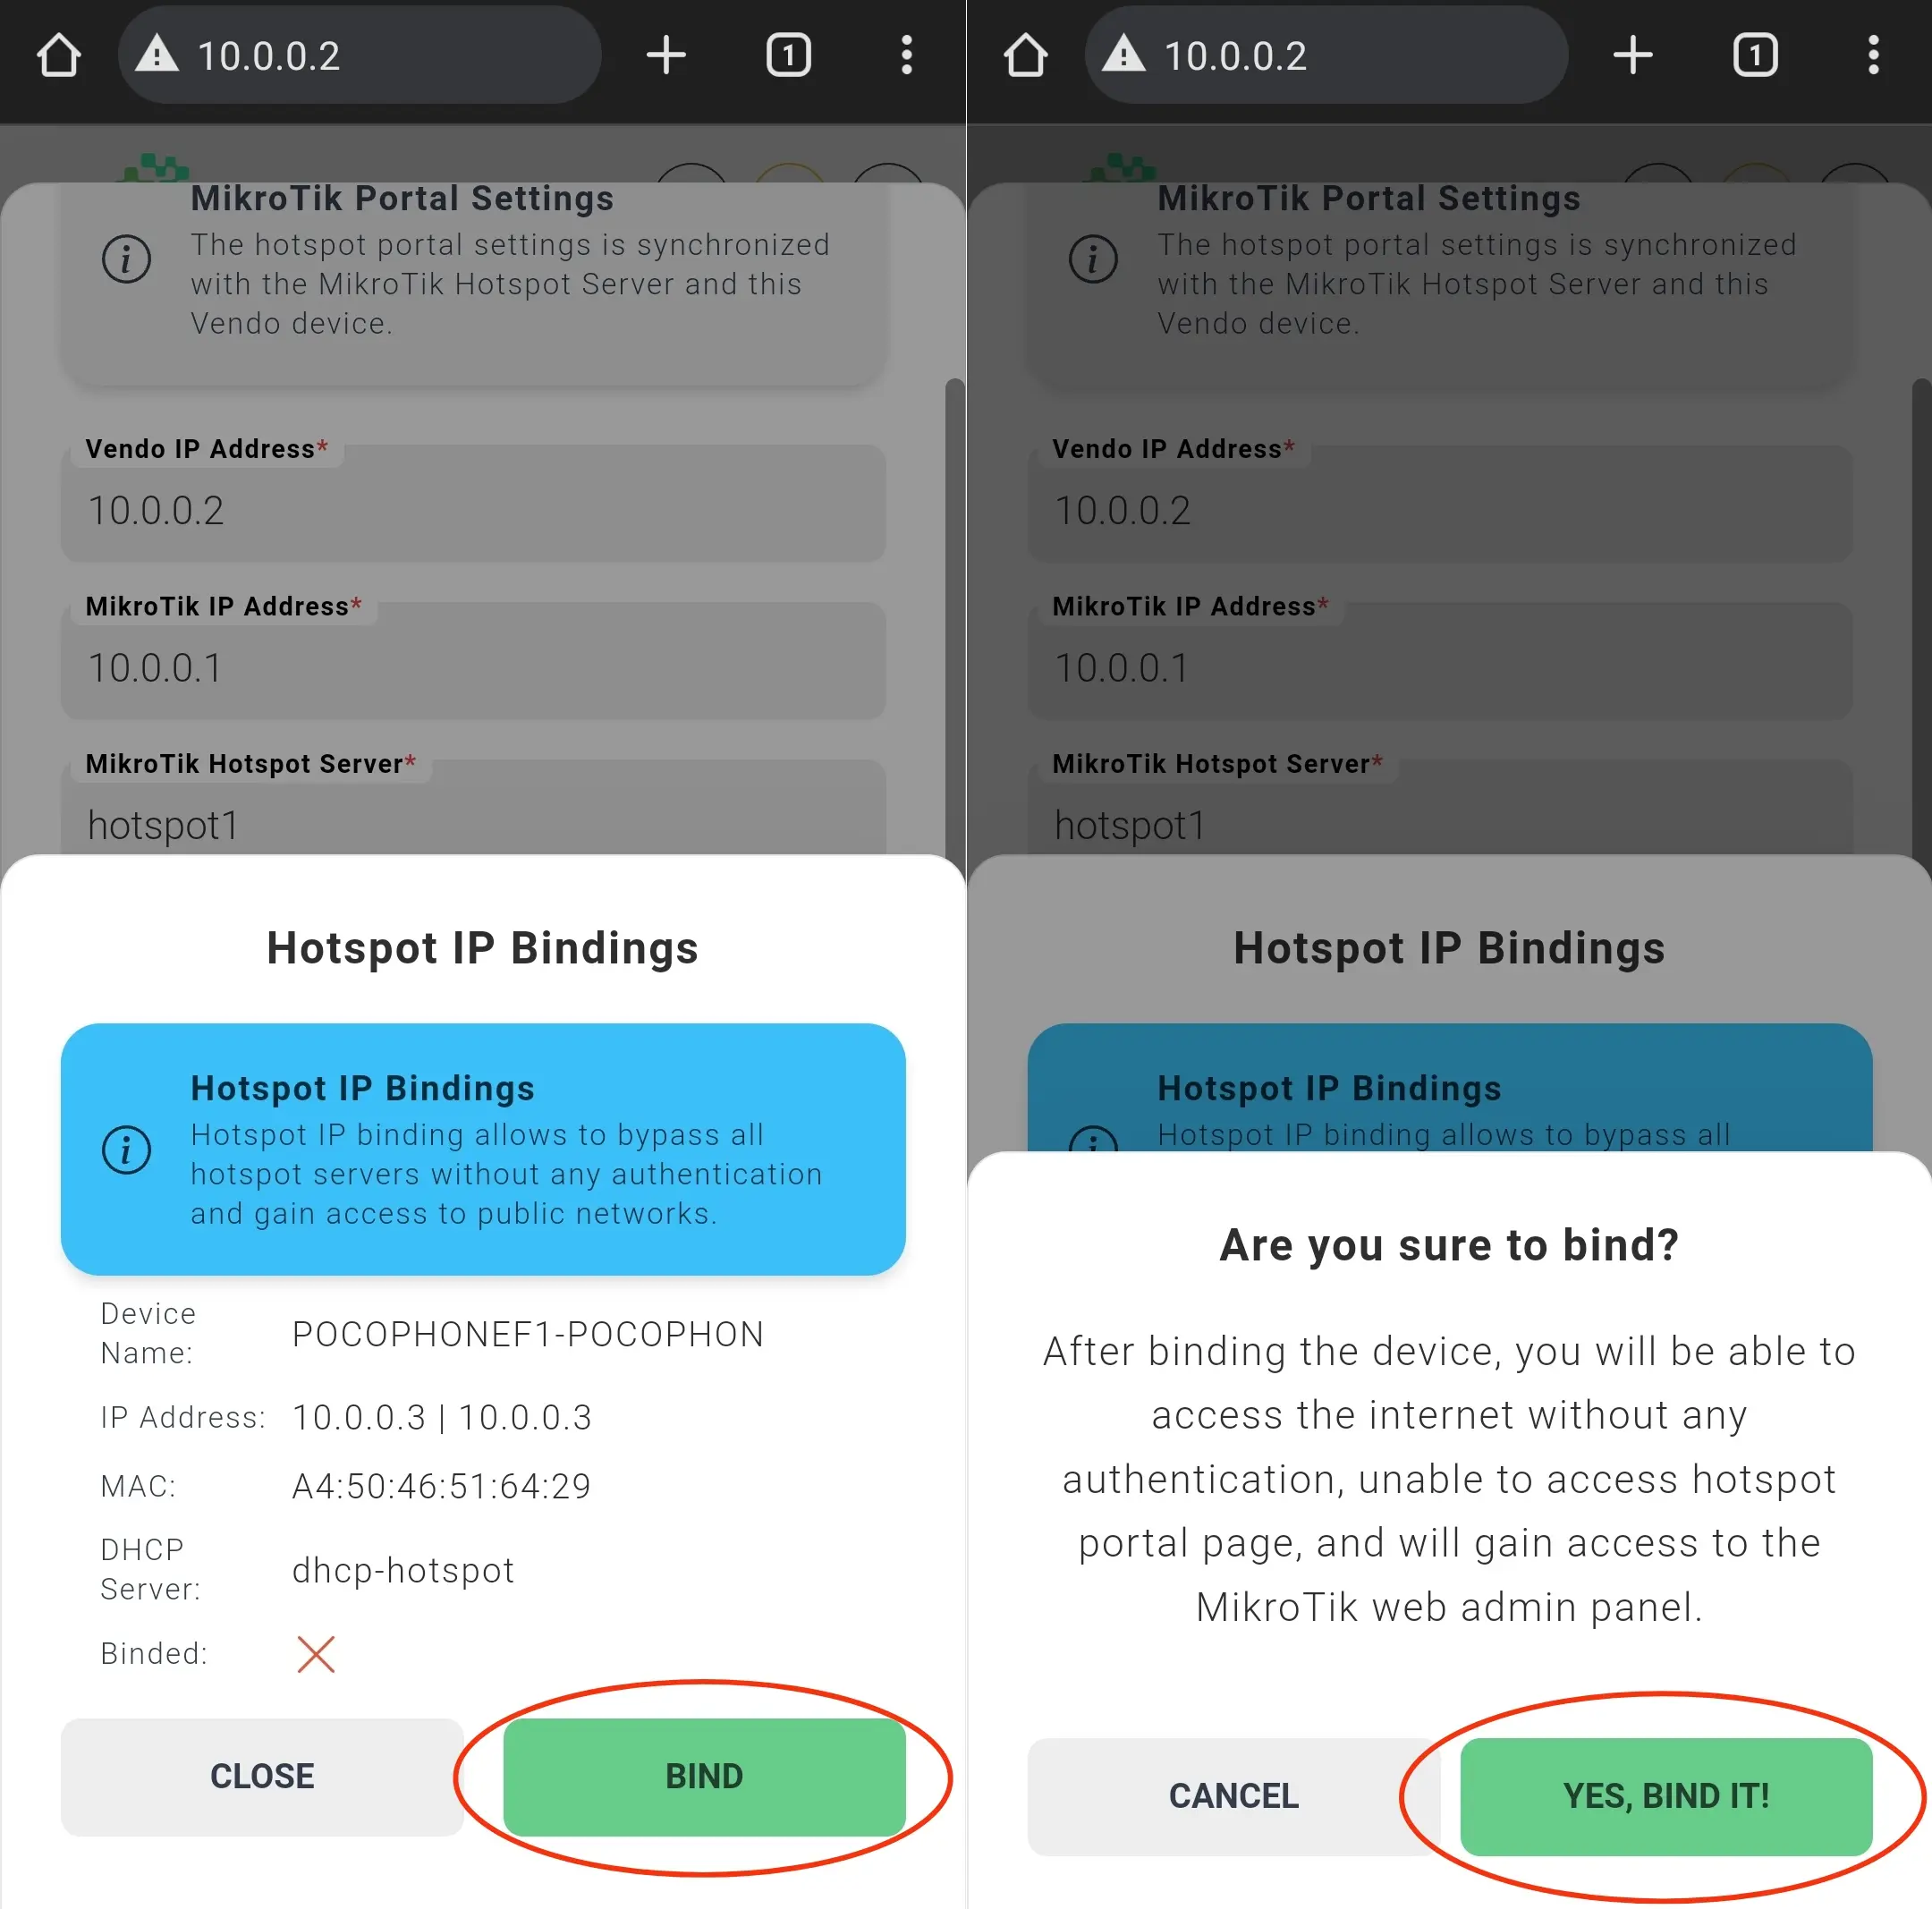
The Hotspot IP Binding will gain access to the internet and to the MikroTik Web Admin Panel.
-
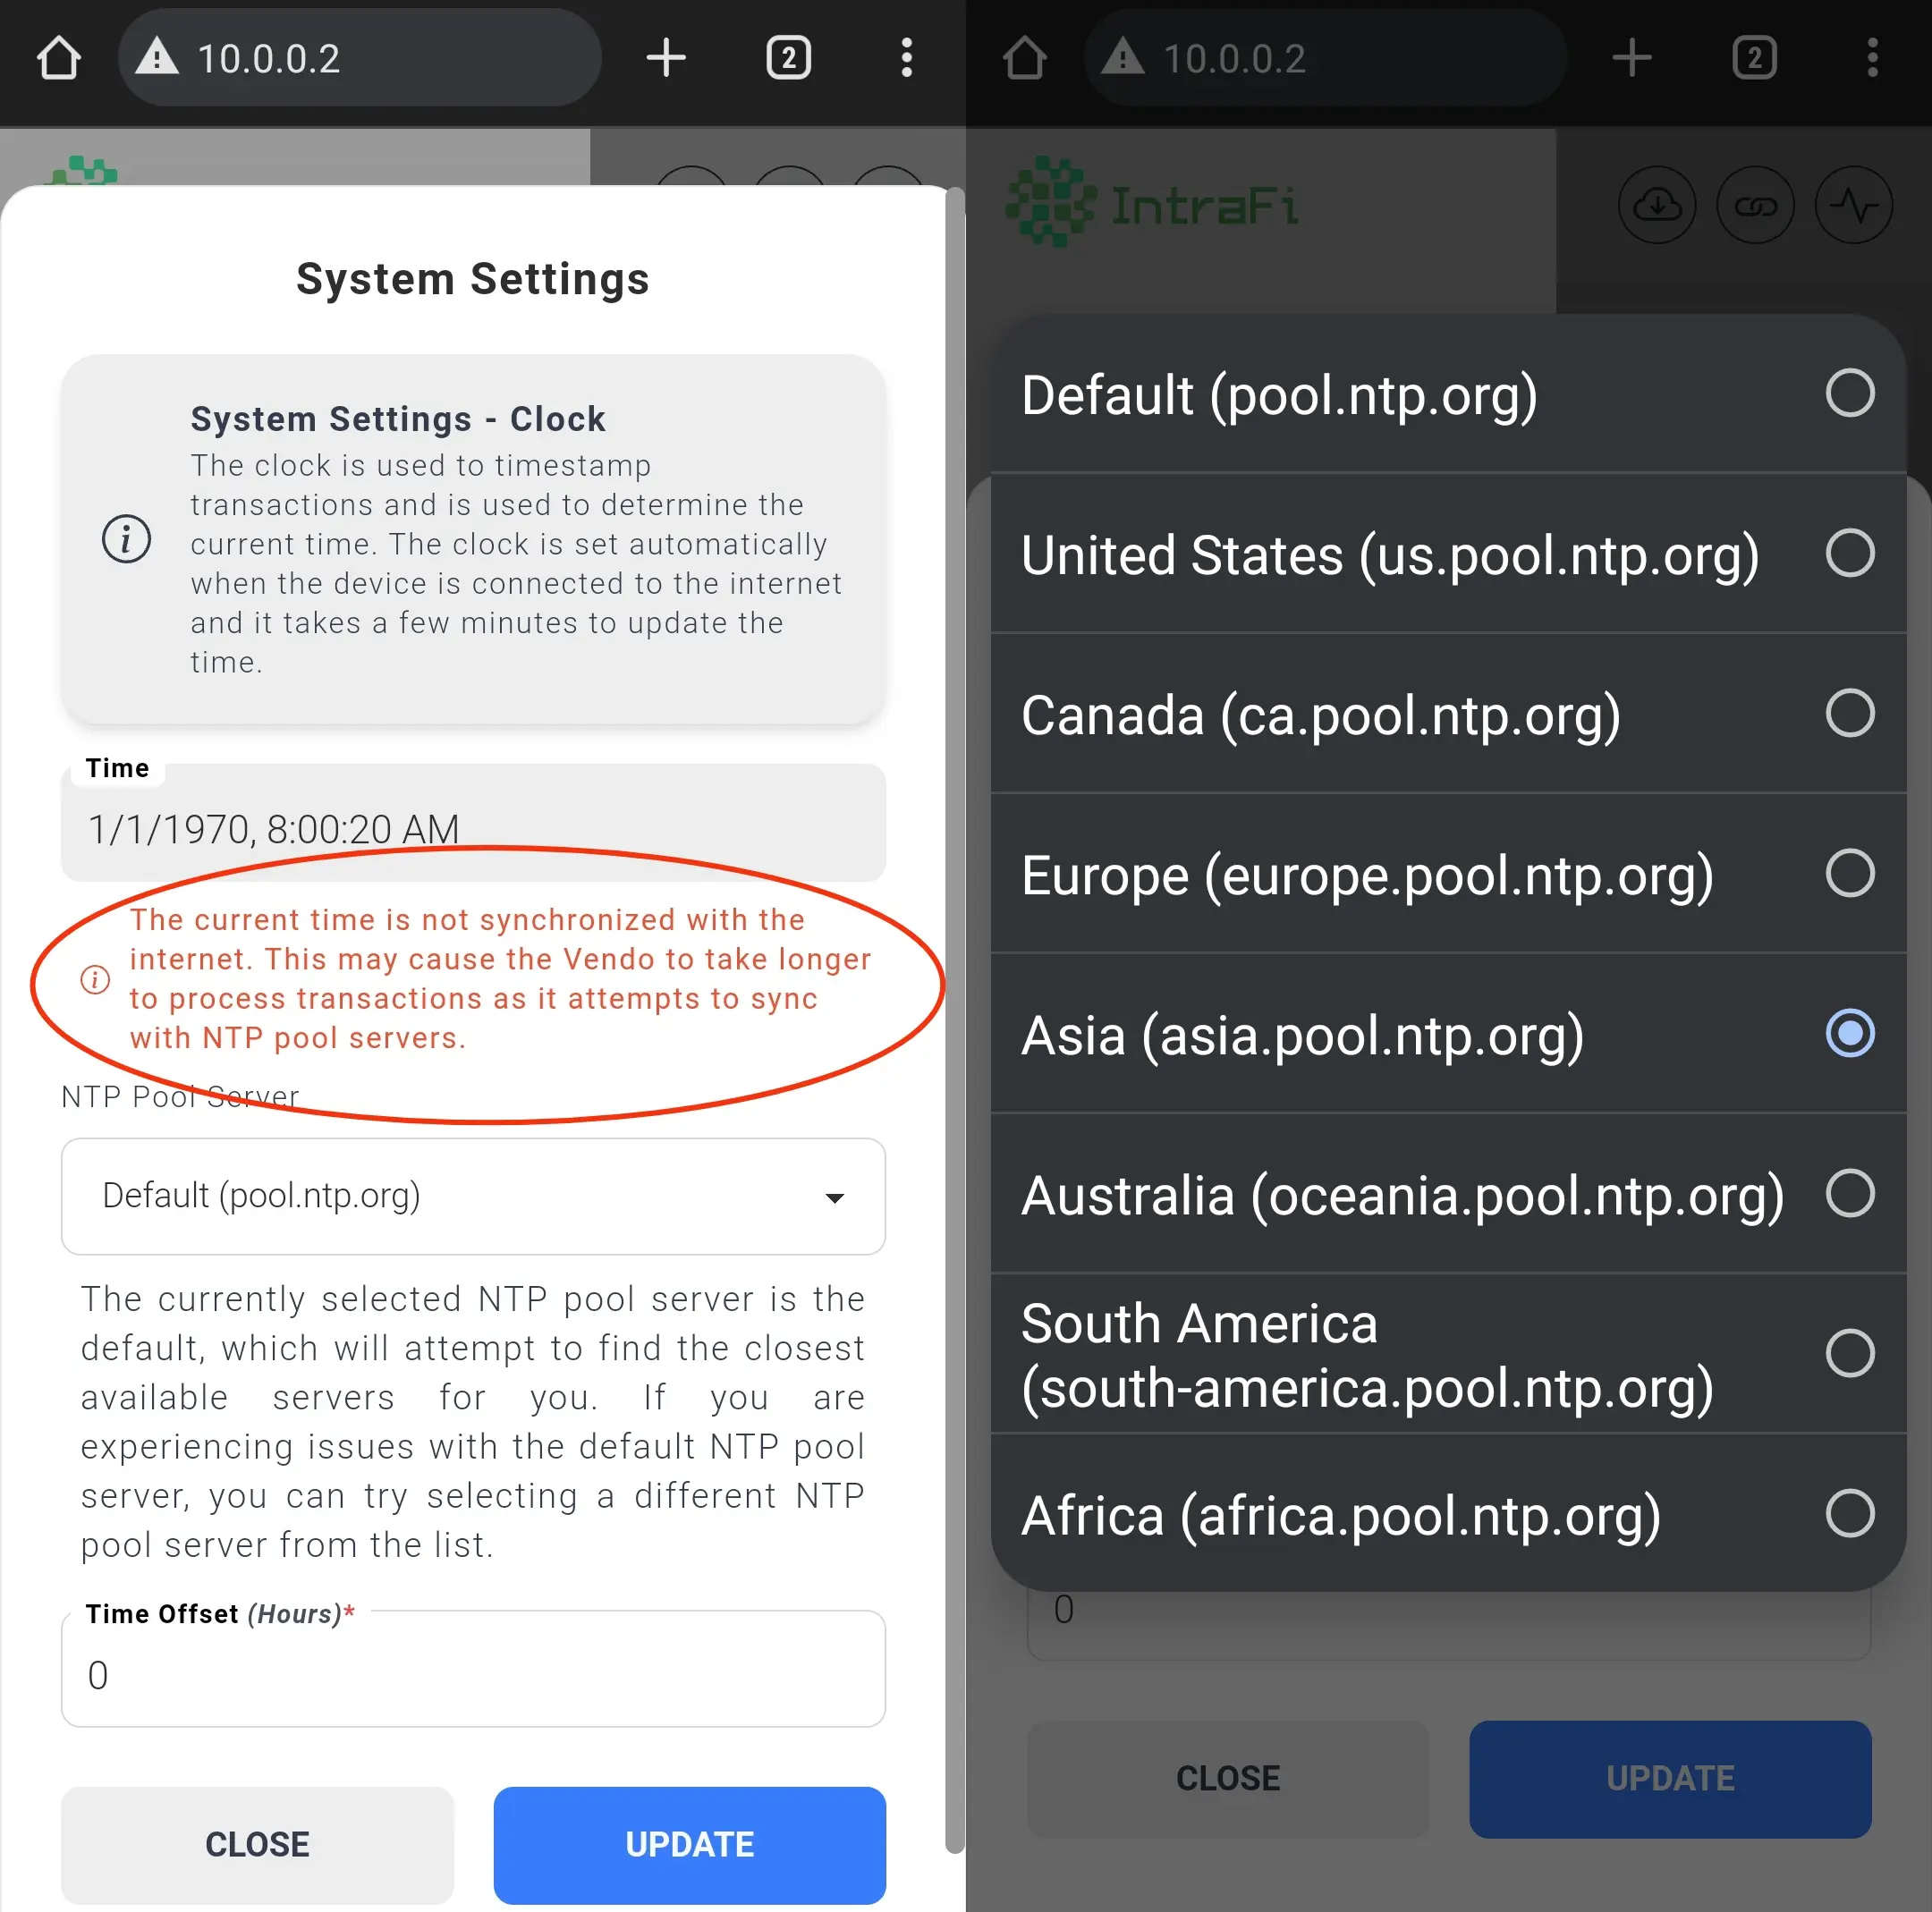
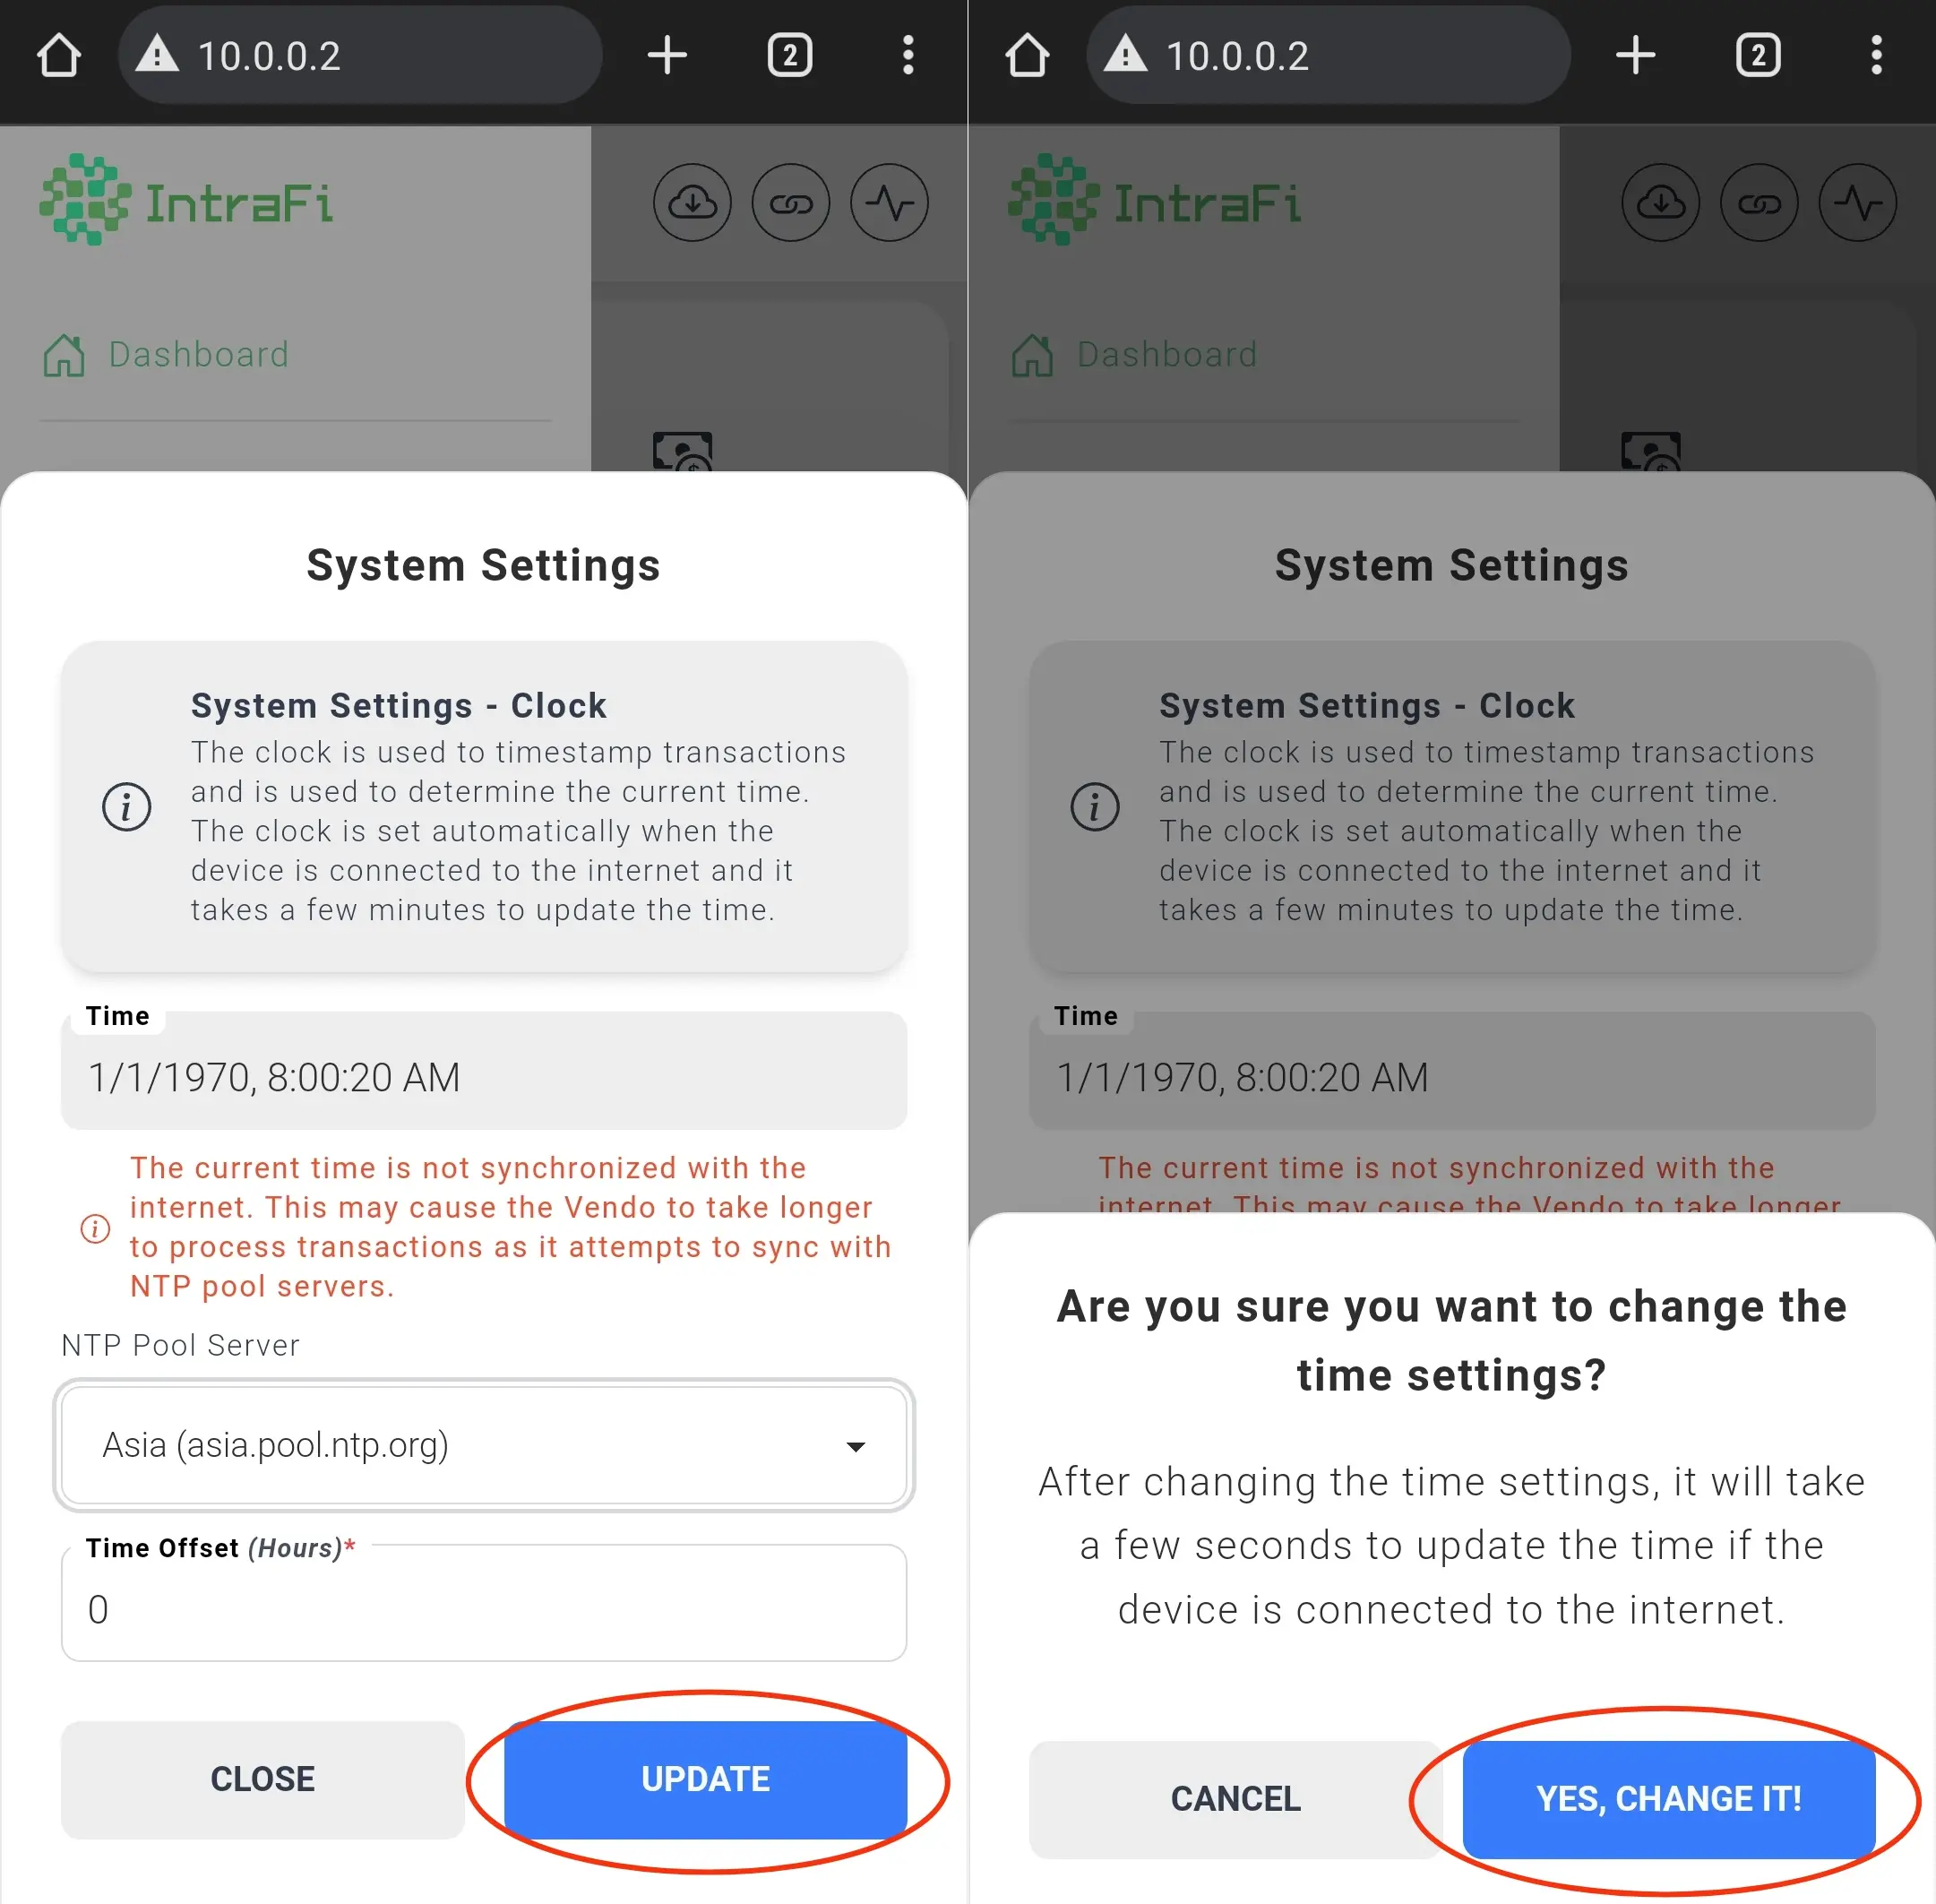
Update the System Clock since the default NTP Pool Server may be unreliable and take time to sync. This is crucial for verifying and determining the expiration validity of the generated vouchers and for the sales report.
-
After completing all the steps, access to the Hotspot Portal at http://10.0.0.1 will be available. If any screens appear, follow the steps below.
Hotspot Portal as MikroTik Web Admin Panel
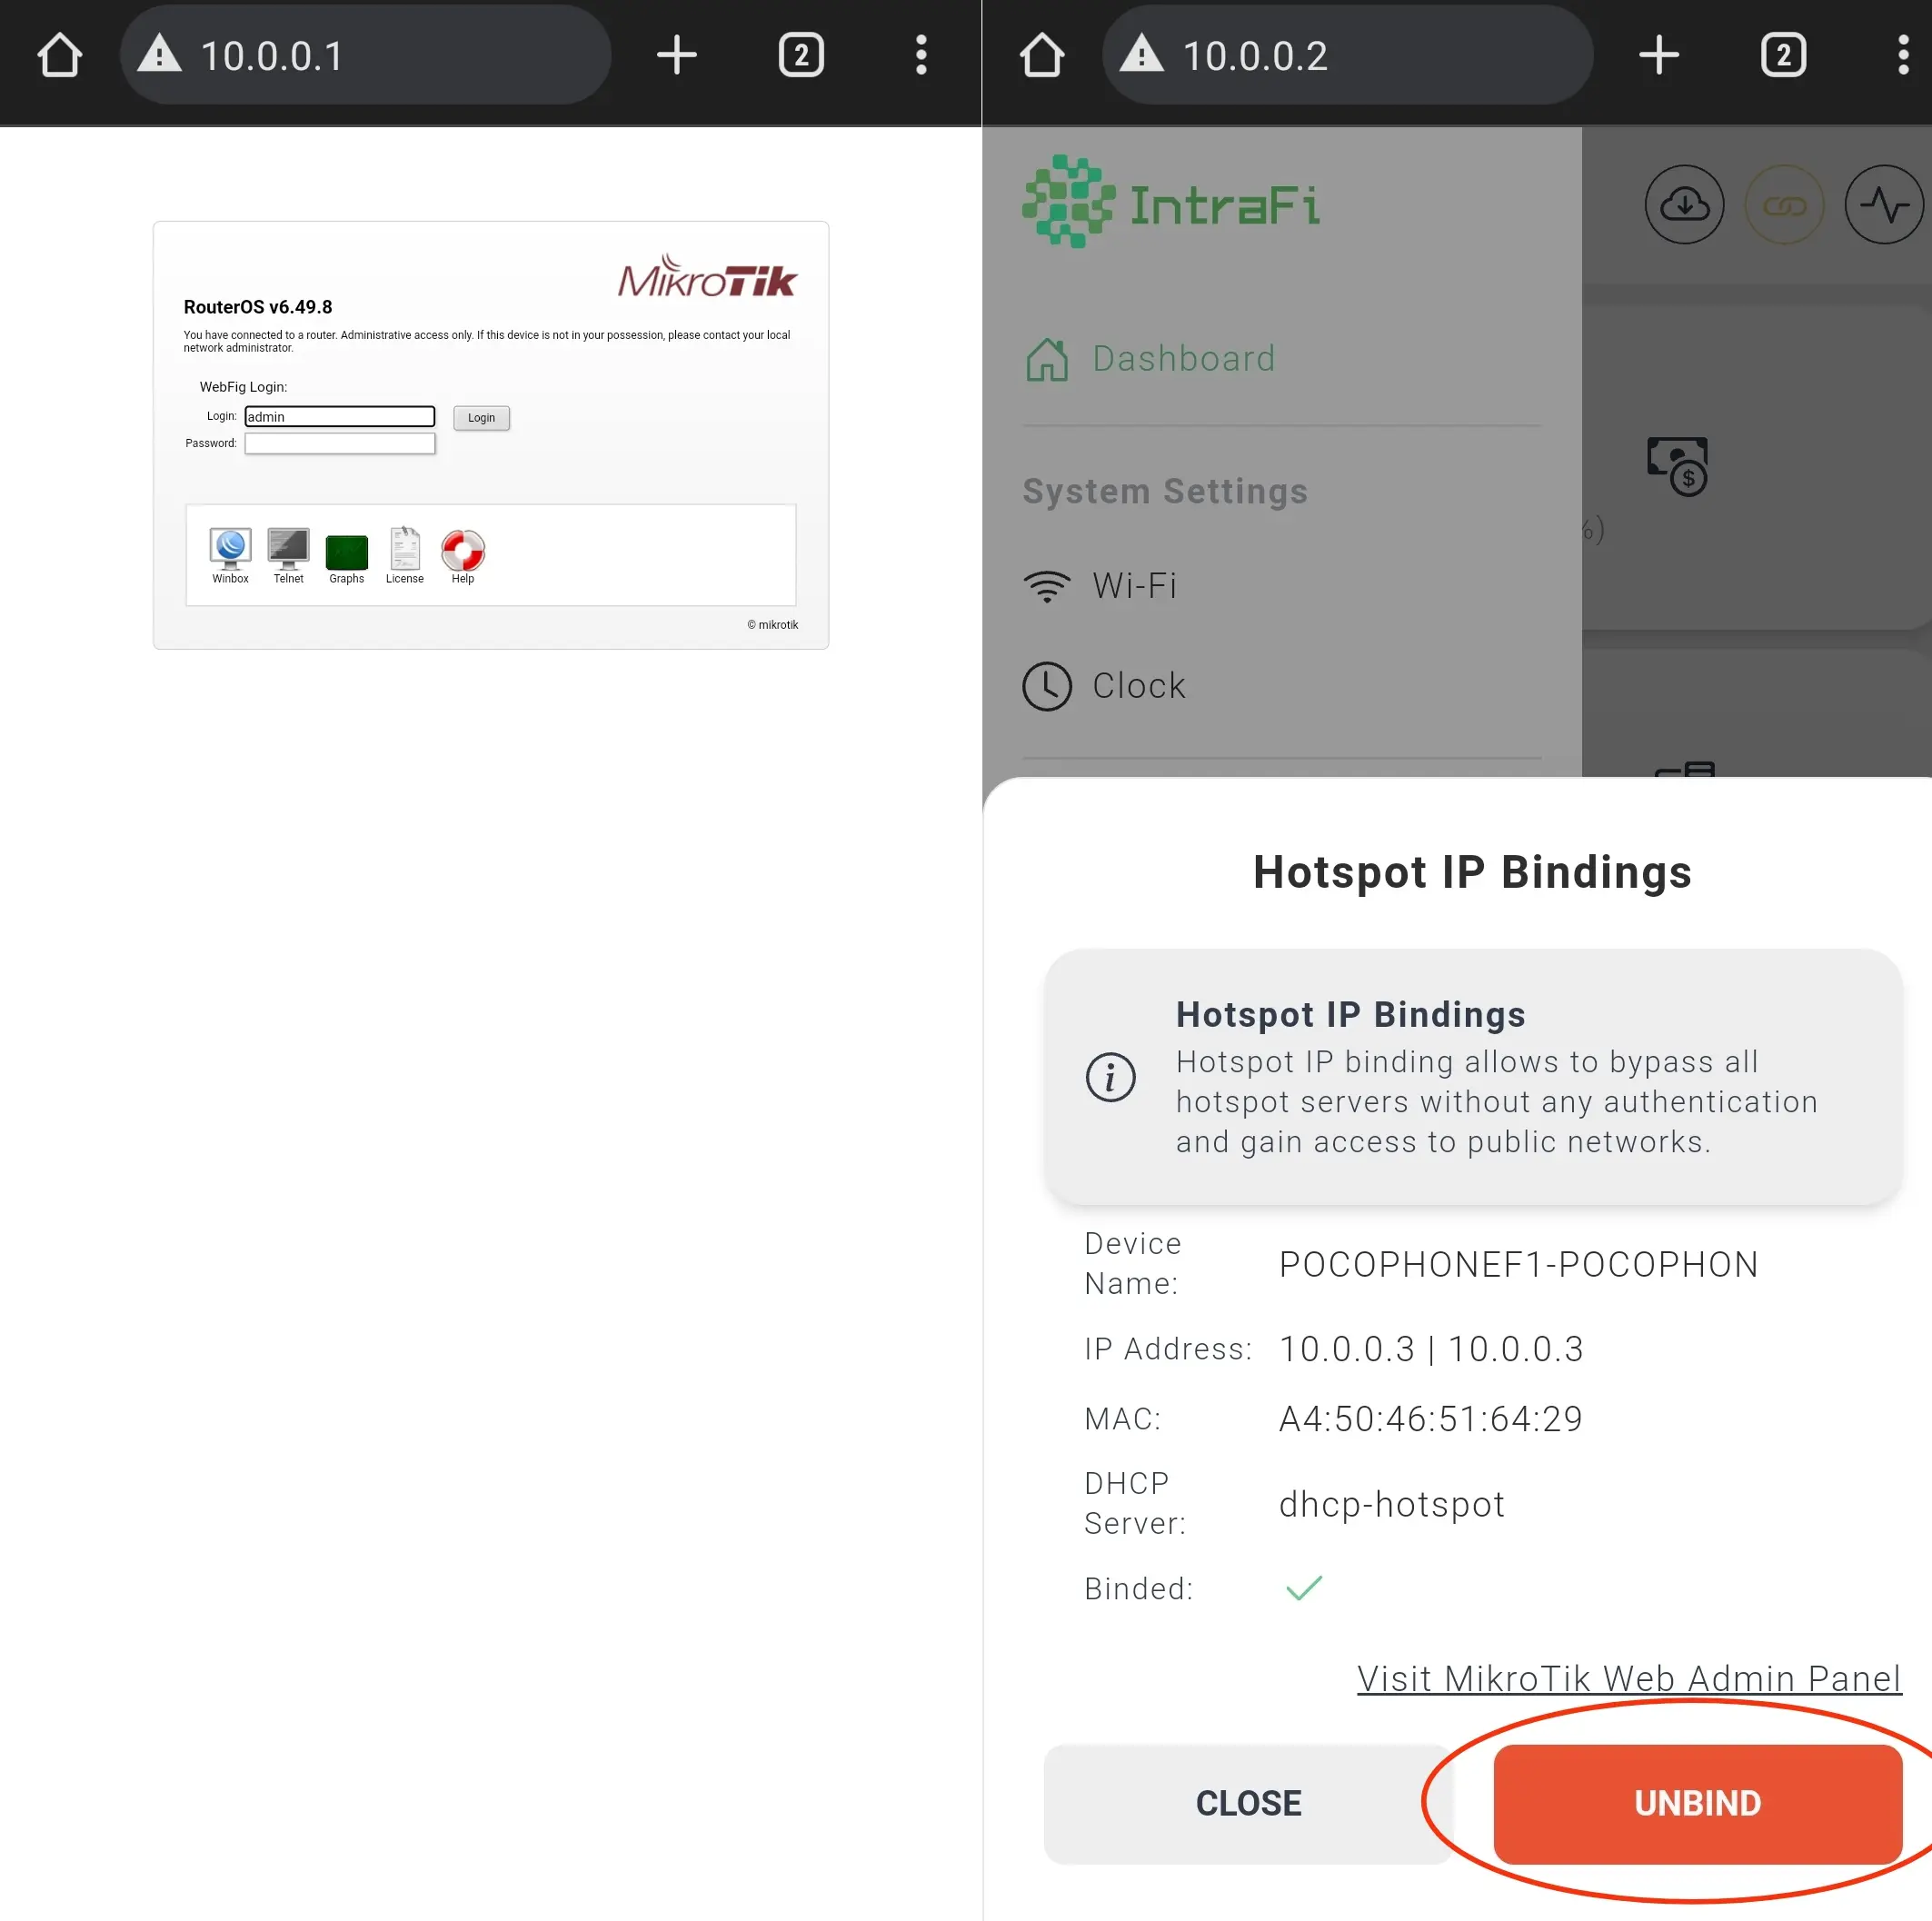
-
If it was binded through the hotspot IP binding, unbind it in the ESP device Admin Panel at http://10.0.0.2. Locate it at Menu -> Hotspot IP Binding, as shown in the picture above (right side).
-
If the MikroTik router’s device has an antenna, it must be connected to PORT 2 or PORT 3. Otherwise, if it was connected to PORT 2, it will be displayed in the picture above (left side).
IntraFi Hotspot Portal without Settings
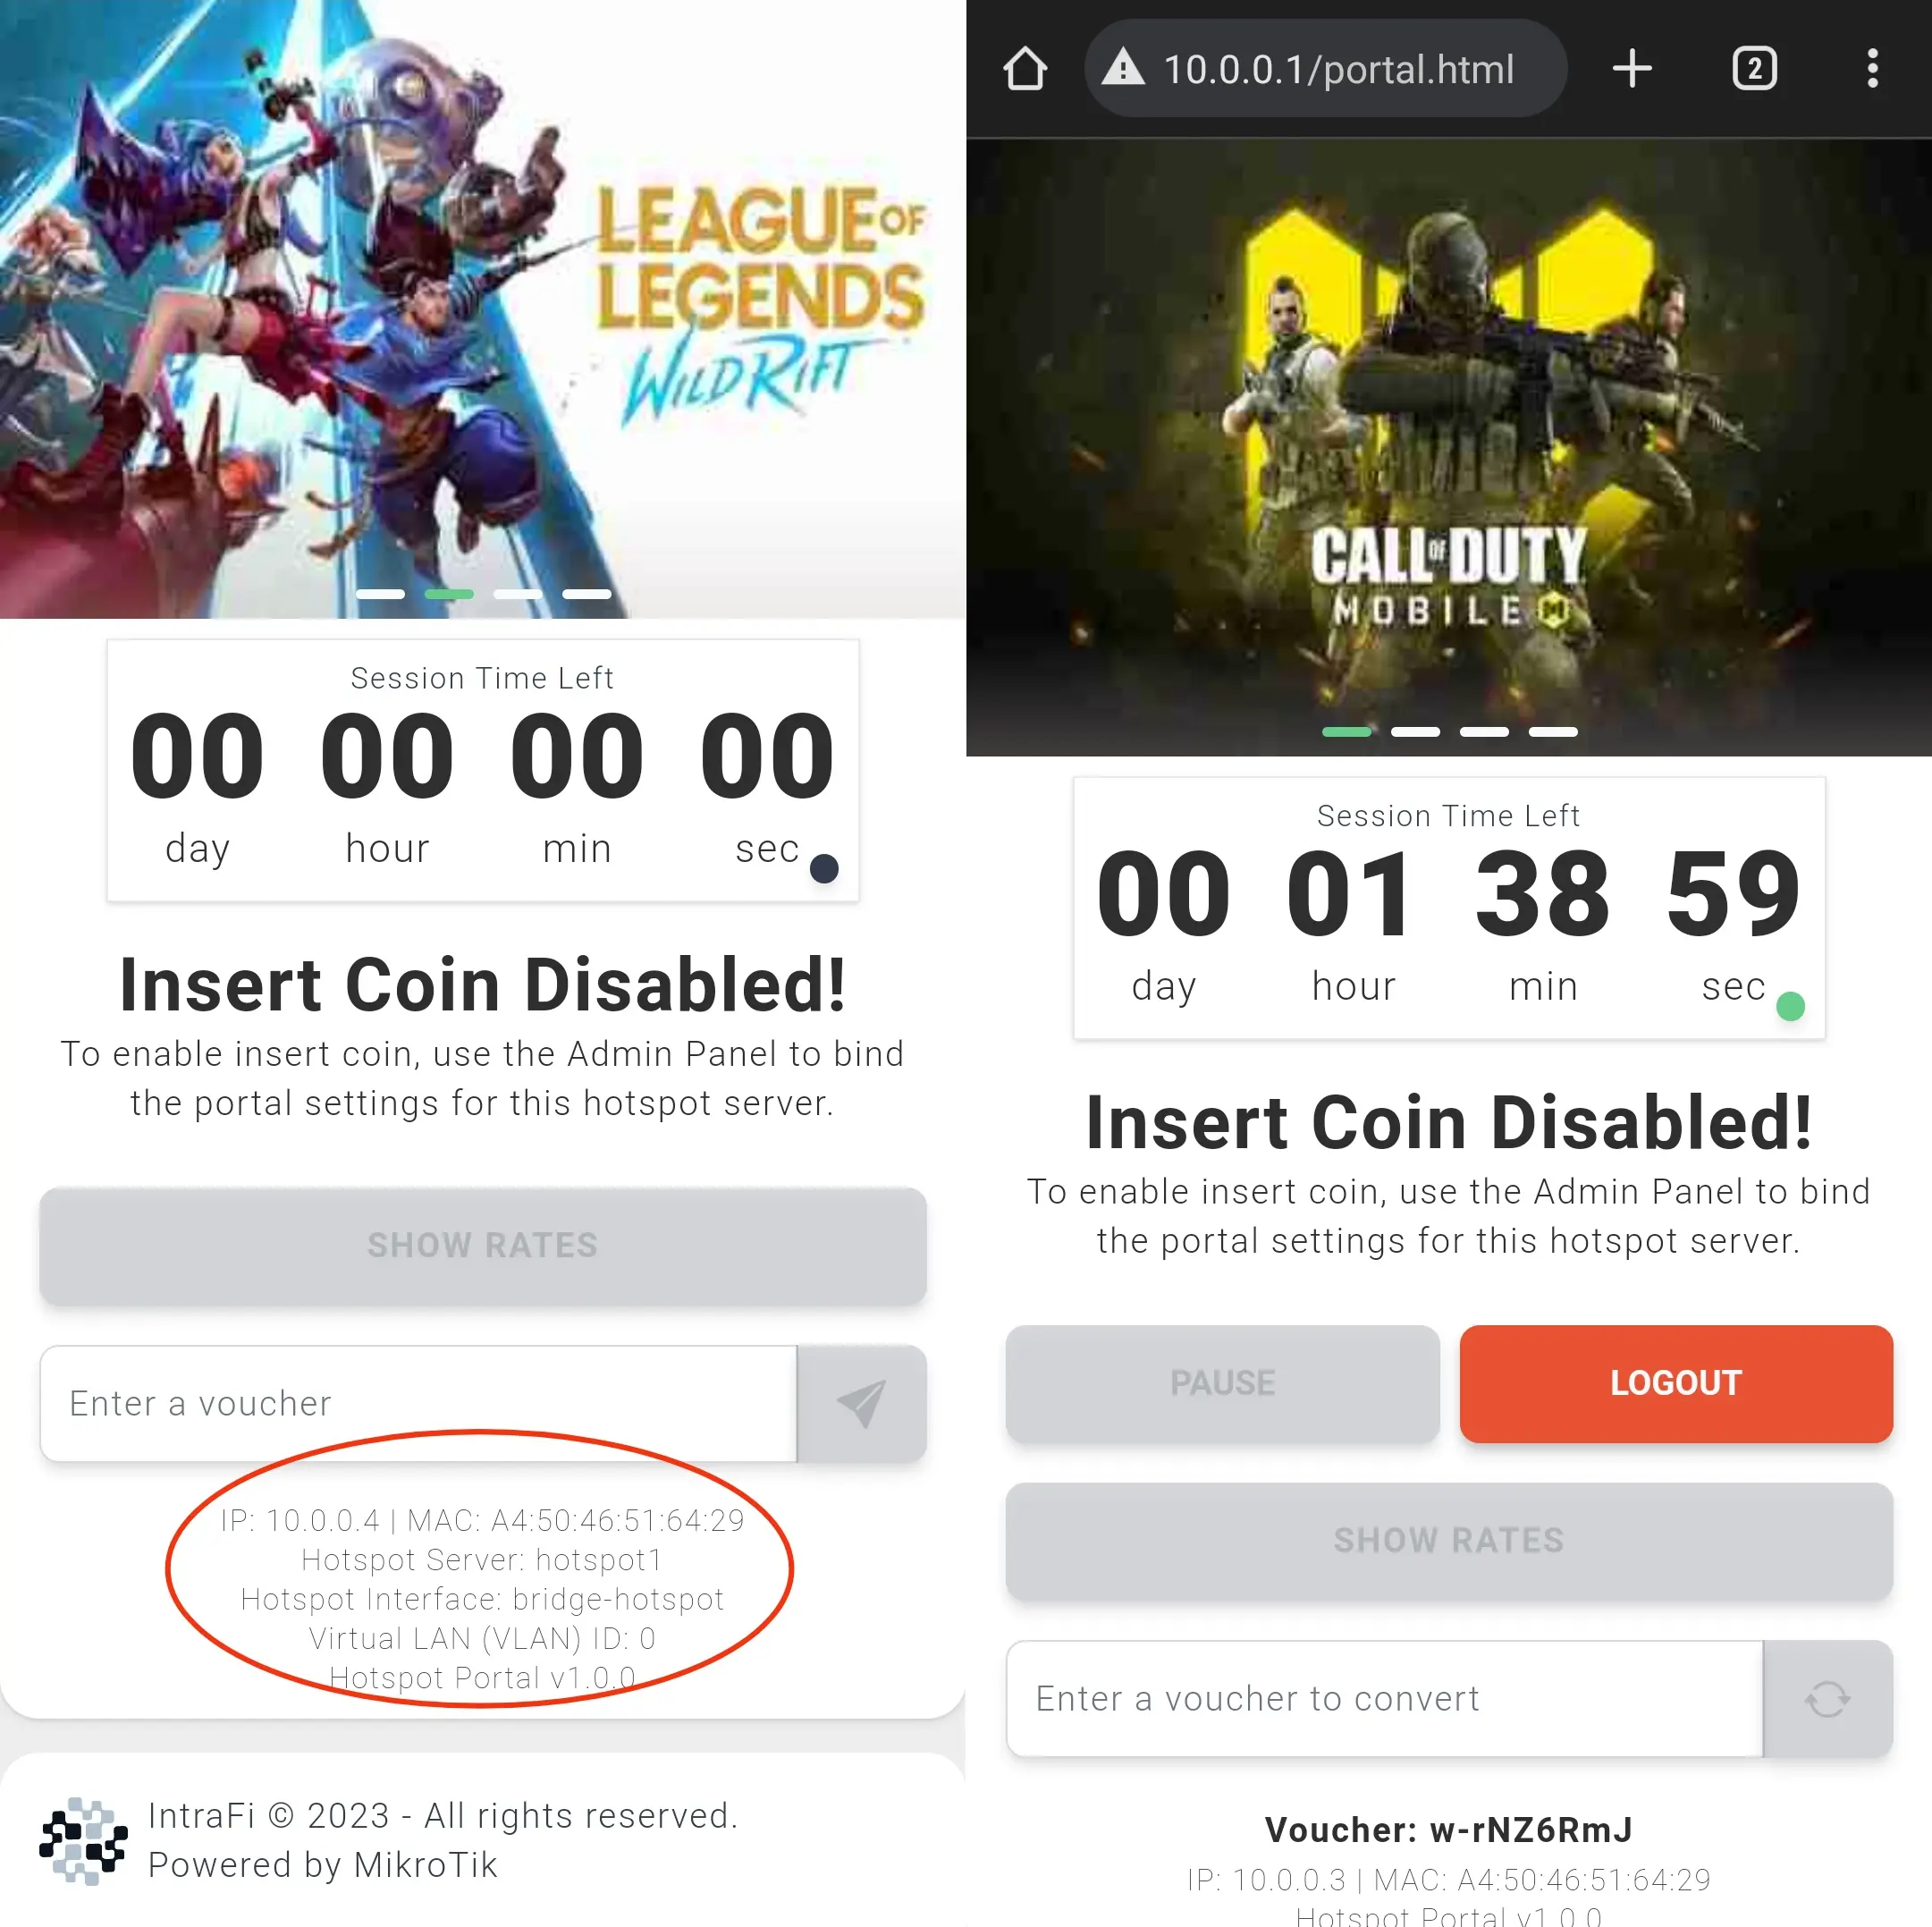
Hotspot portal settings are missing. Double click/tap the device information below to show the hotspot portal setup, as shown in the picture above (left side).
MikroTik Default or Not Found Hotspot Portal
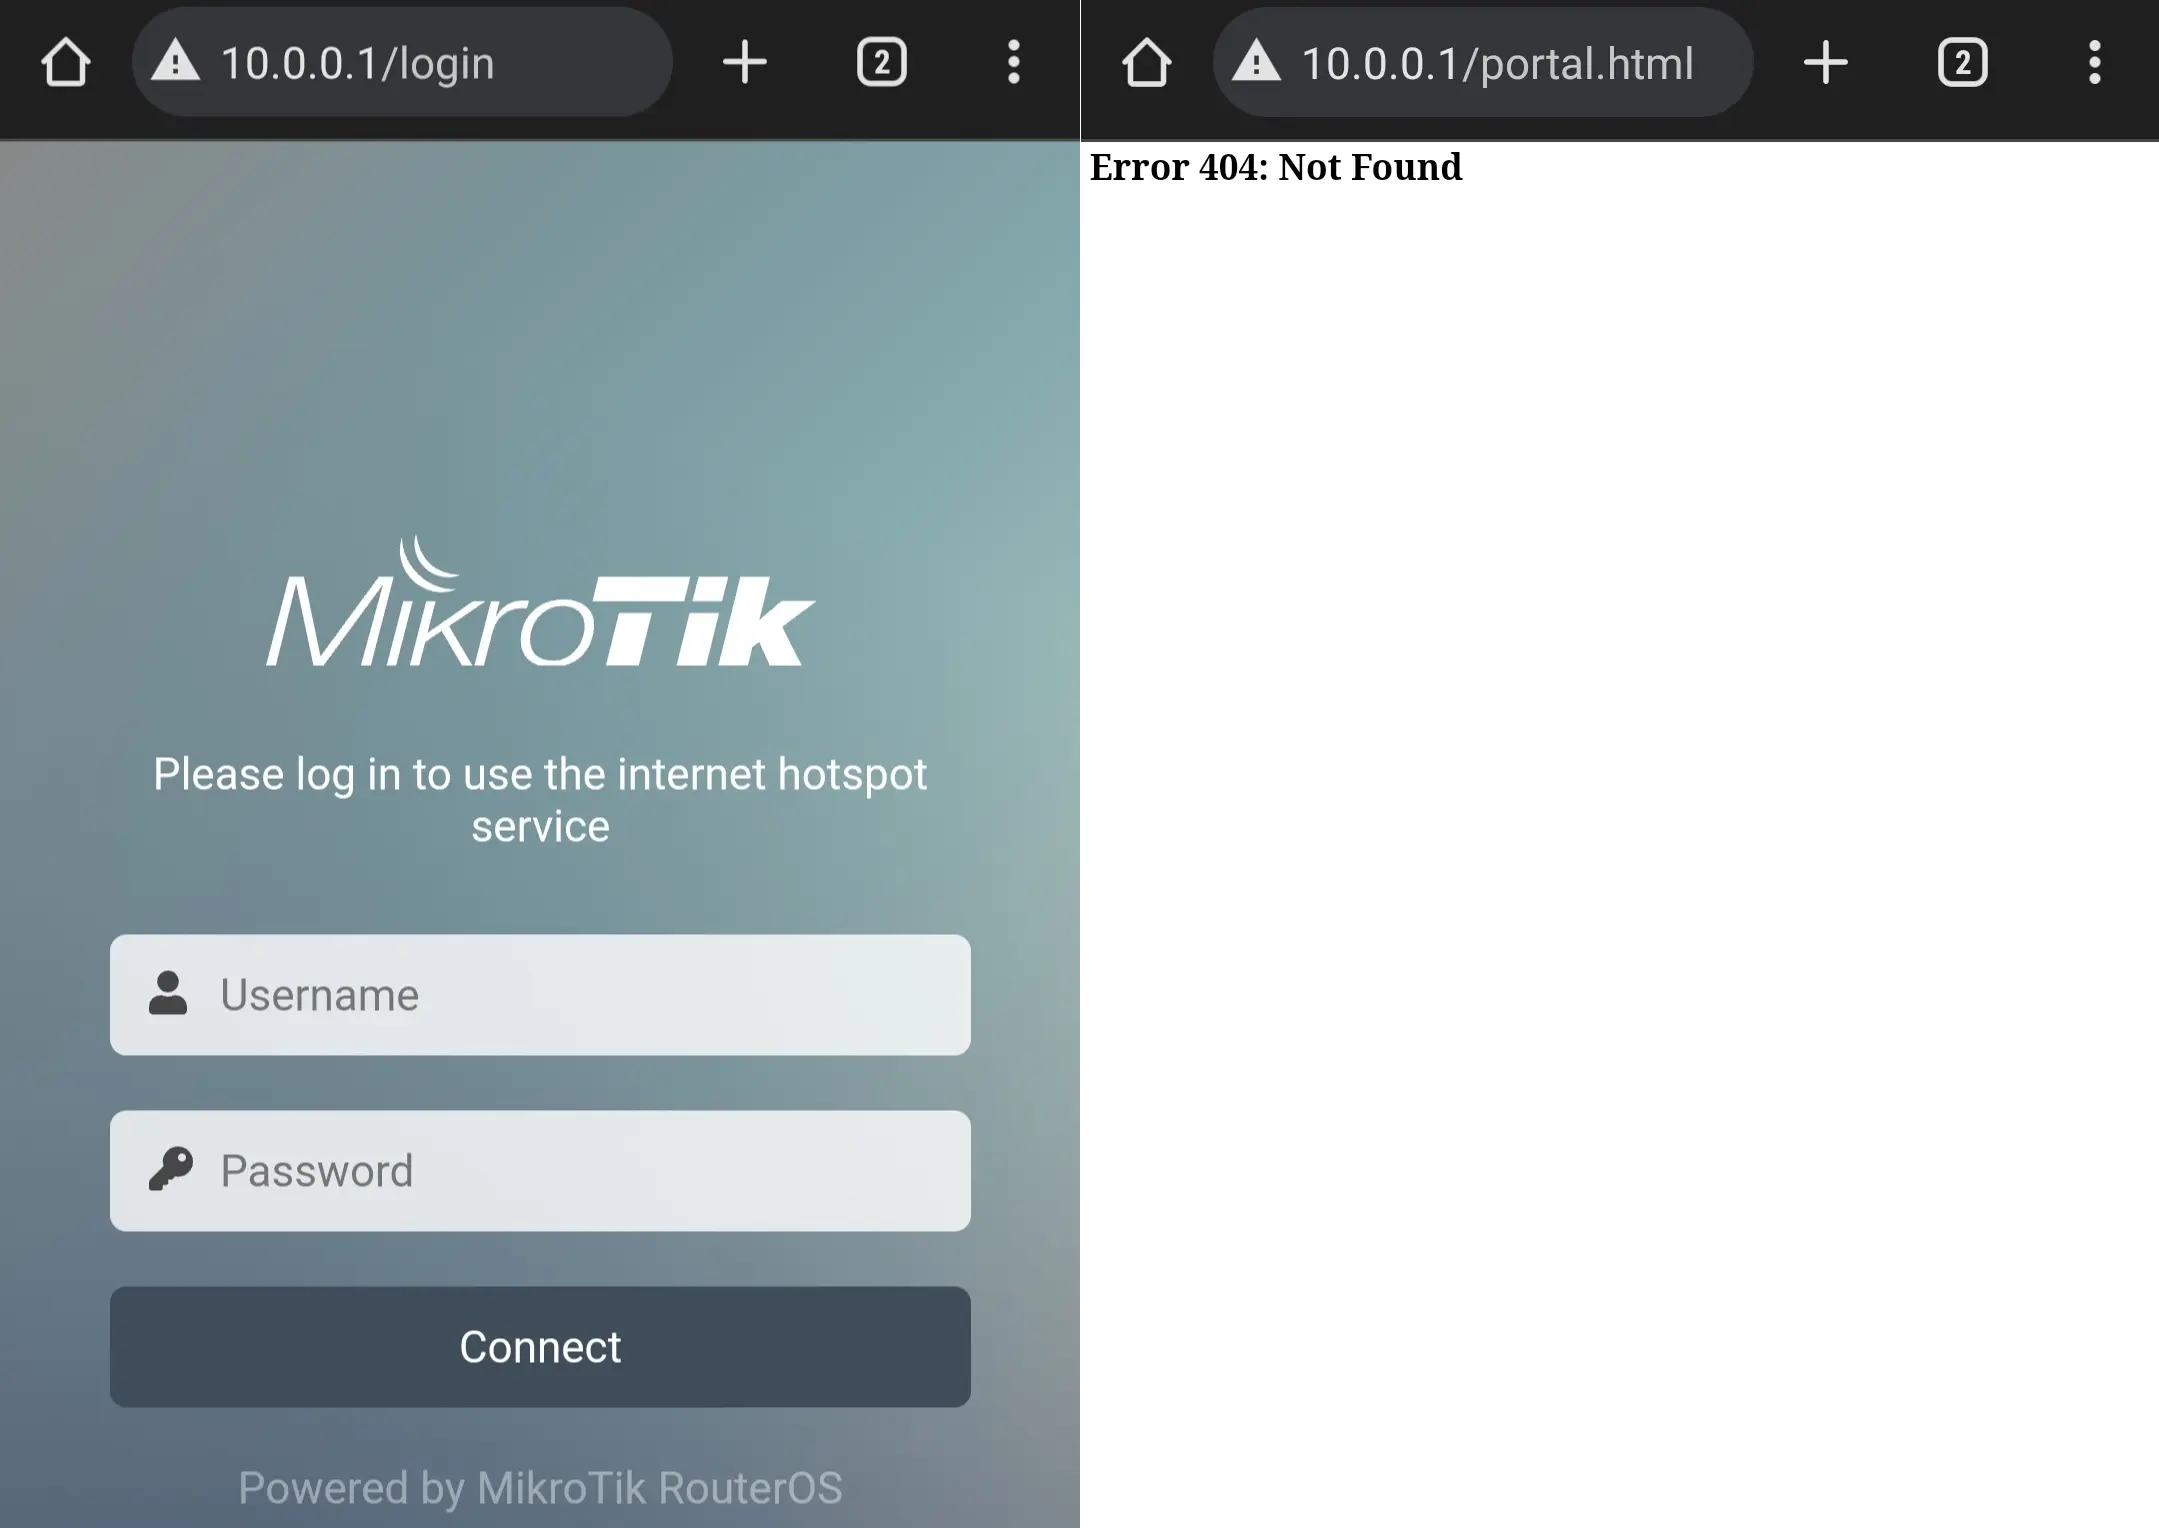
If it was previously configured for the MikroTik and ESP devices, proceed with the ESP Device Configuration, starting from Step 5.
-
-
Enjoy earning passive income!