MikroTik Router Configuration
Automatic configuration of ESP8266 device for brand new and used MikroTik router.
Recommended routers for starting out are Mikrotik hAP lite TC (RB941-2nD-TC) or MikroTik hEX (RB750Gr3).
Requirements
- Perform the ESP Device Installation first.
- No configuration needed in MikroTik device, the ESP device will do all the work.
- To perform the automatic configuration, see the instruction here.
Automatic Configuration
Before starting, please backup your previous configuration, automatic configuration will reset all the configuration for your MikroTik router device. If you’re planning to manually configure, you can skip this and continue to follow the ESP Device Configuration.
-
To initiate the MikroTik Automatic Configuration, please review the requirements first.
-
Ensure that the router has an internet connection by connecting PORT 1 (Internet Port) to the main router connected to the ISP provider.
-
Ensure that the router is configured with admin as the username and a blank password to enable to start the automatic configuration.
-
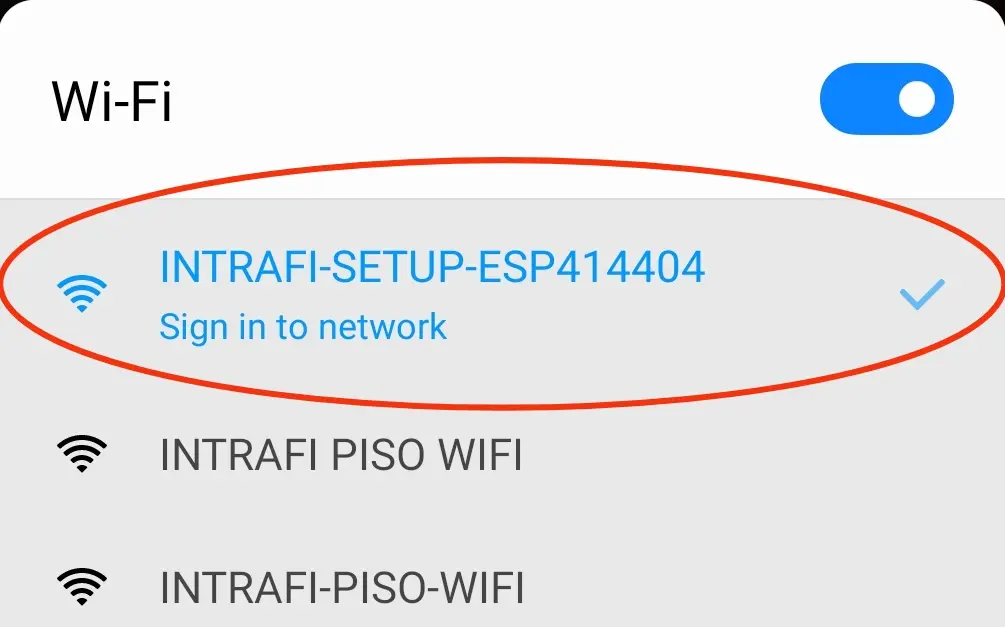
Connect to the ESP device setup named INTRAFI-SETUP-ESPxxxx Wi-Fi network after connecting a Captive Portal pop-up will show.
-
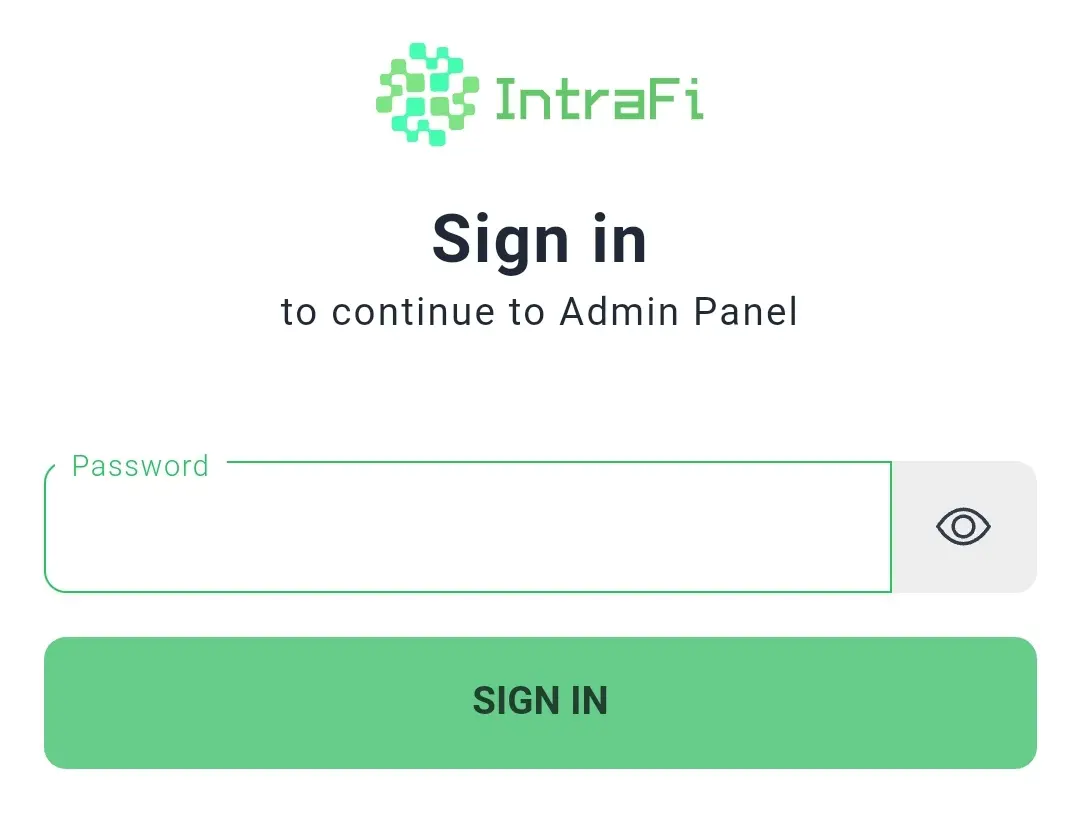
If there is no captive portal automatically pop-up, check your notification or open a browser and go to this URL http://192.168.4.1, use the default admin for the password.
-
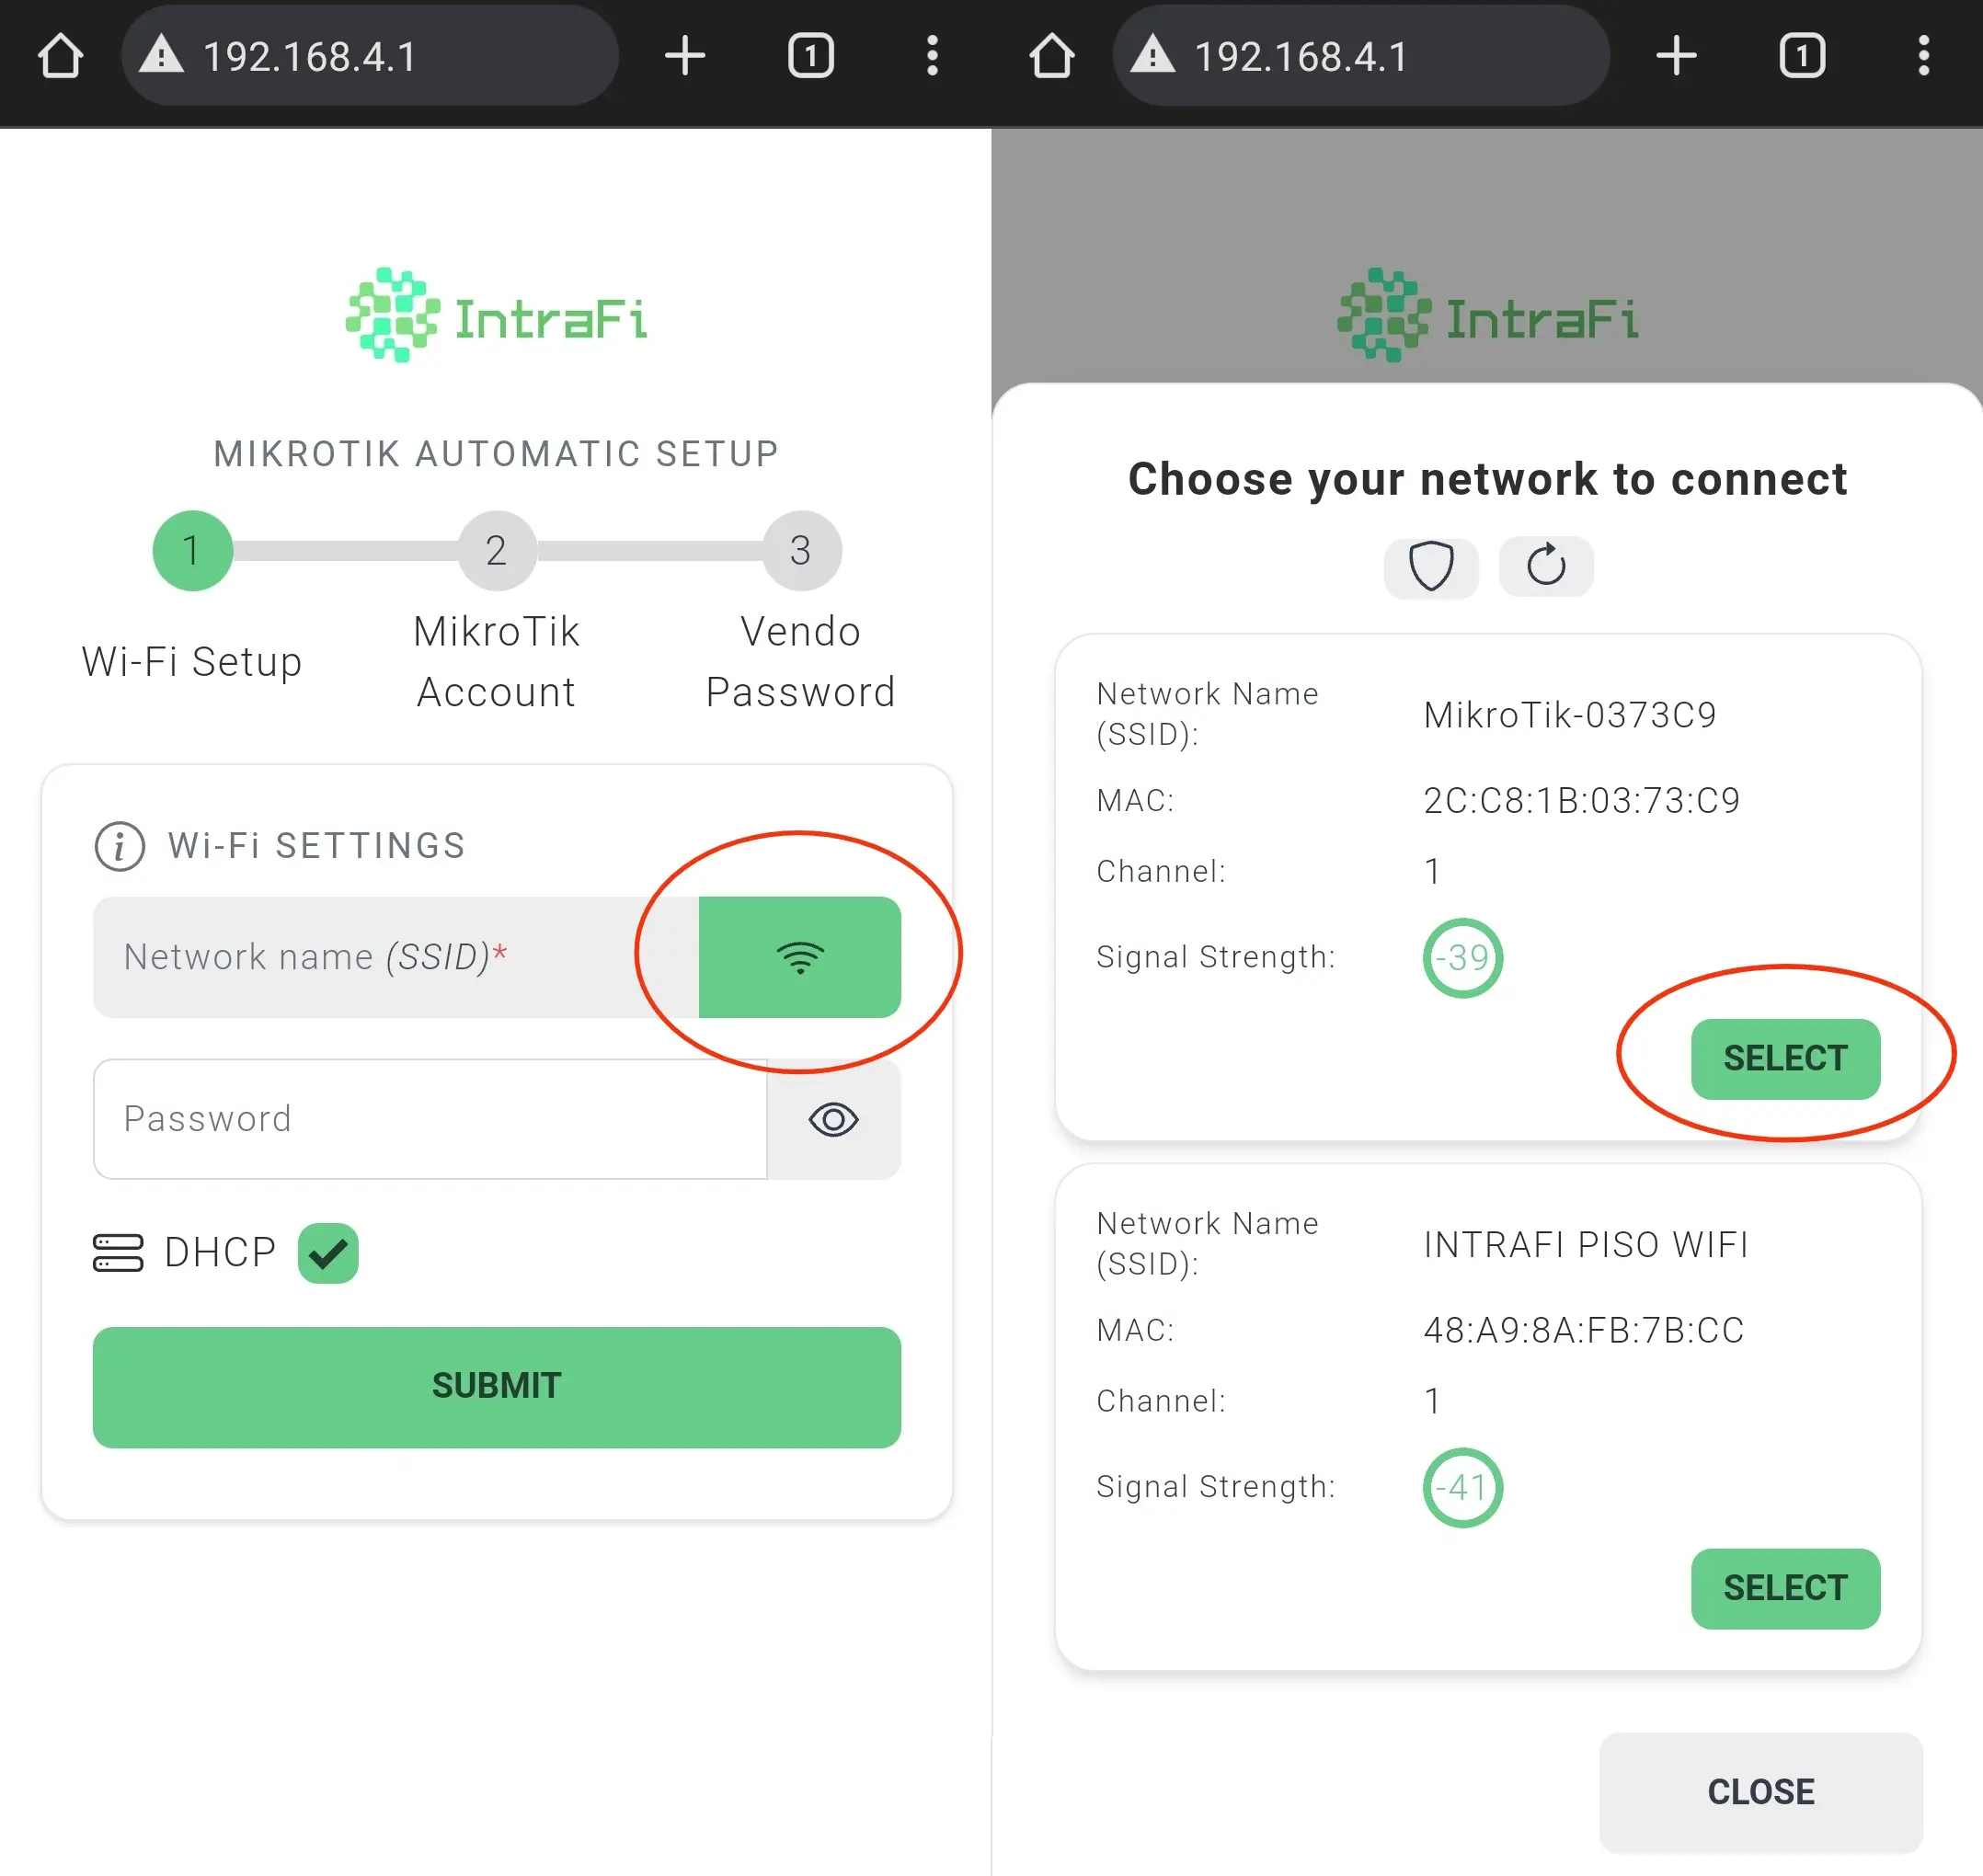
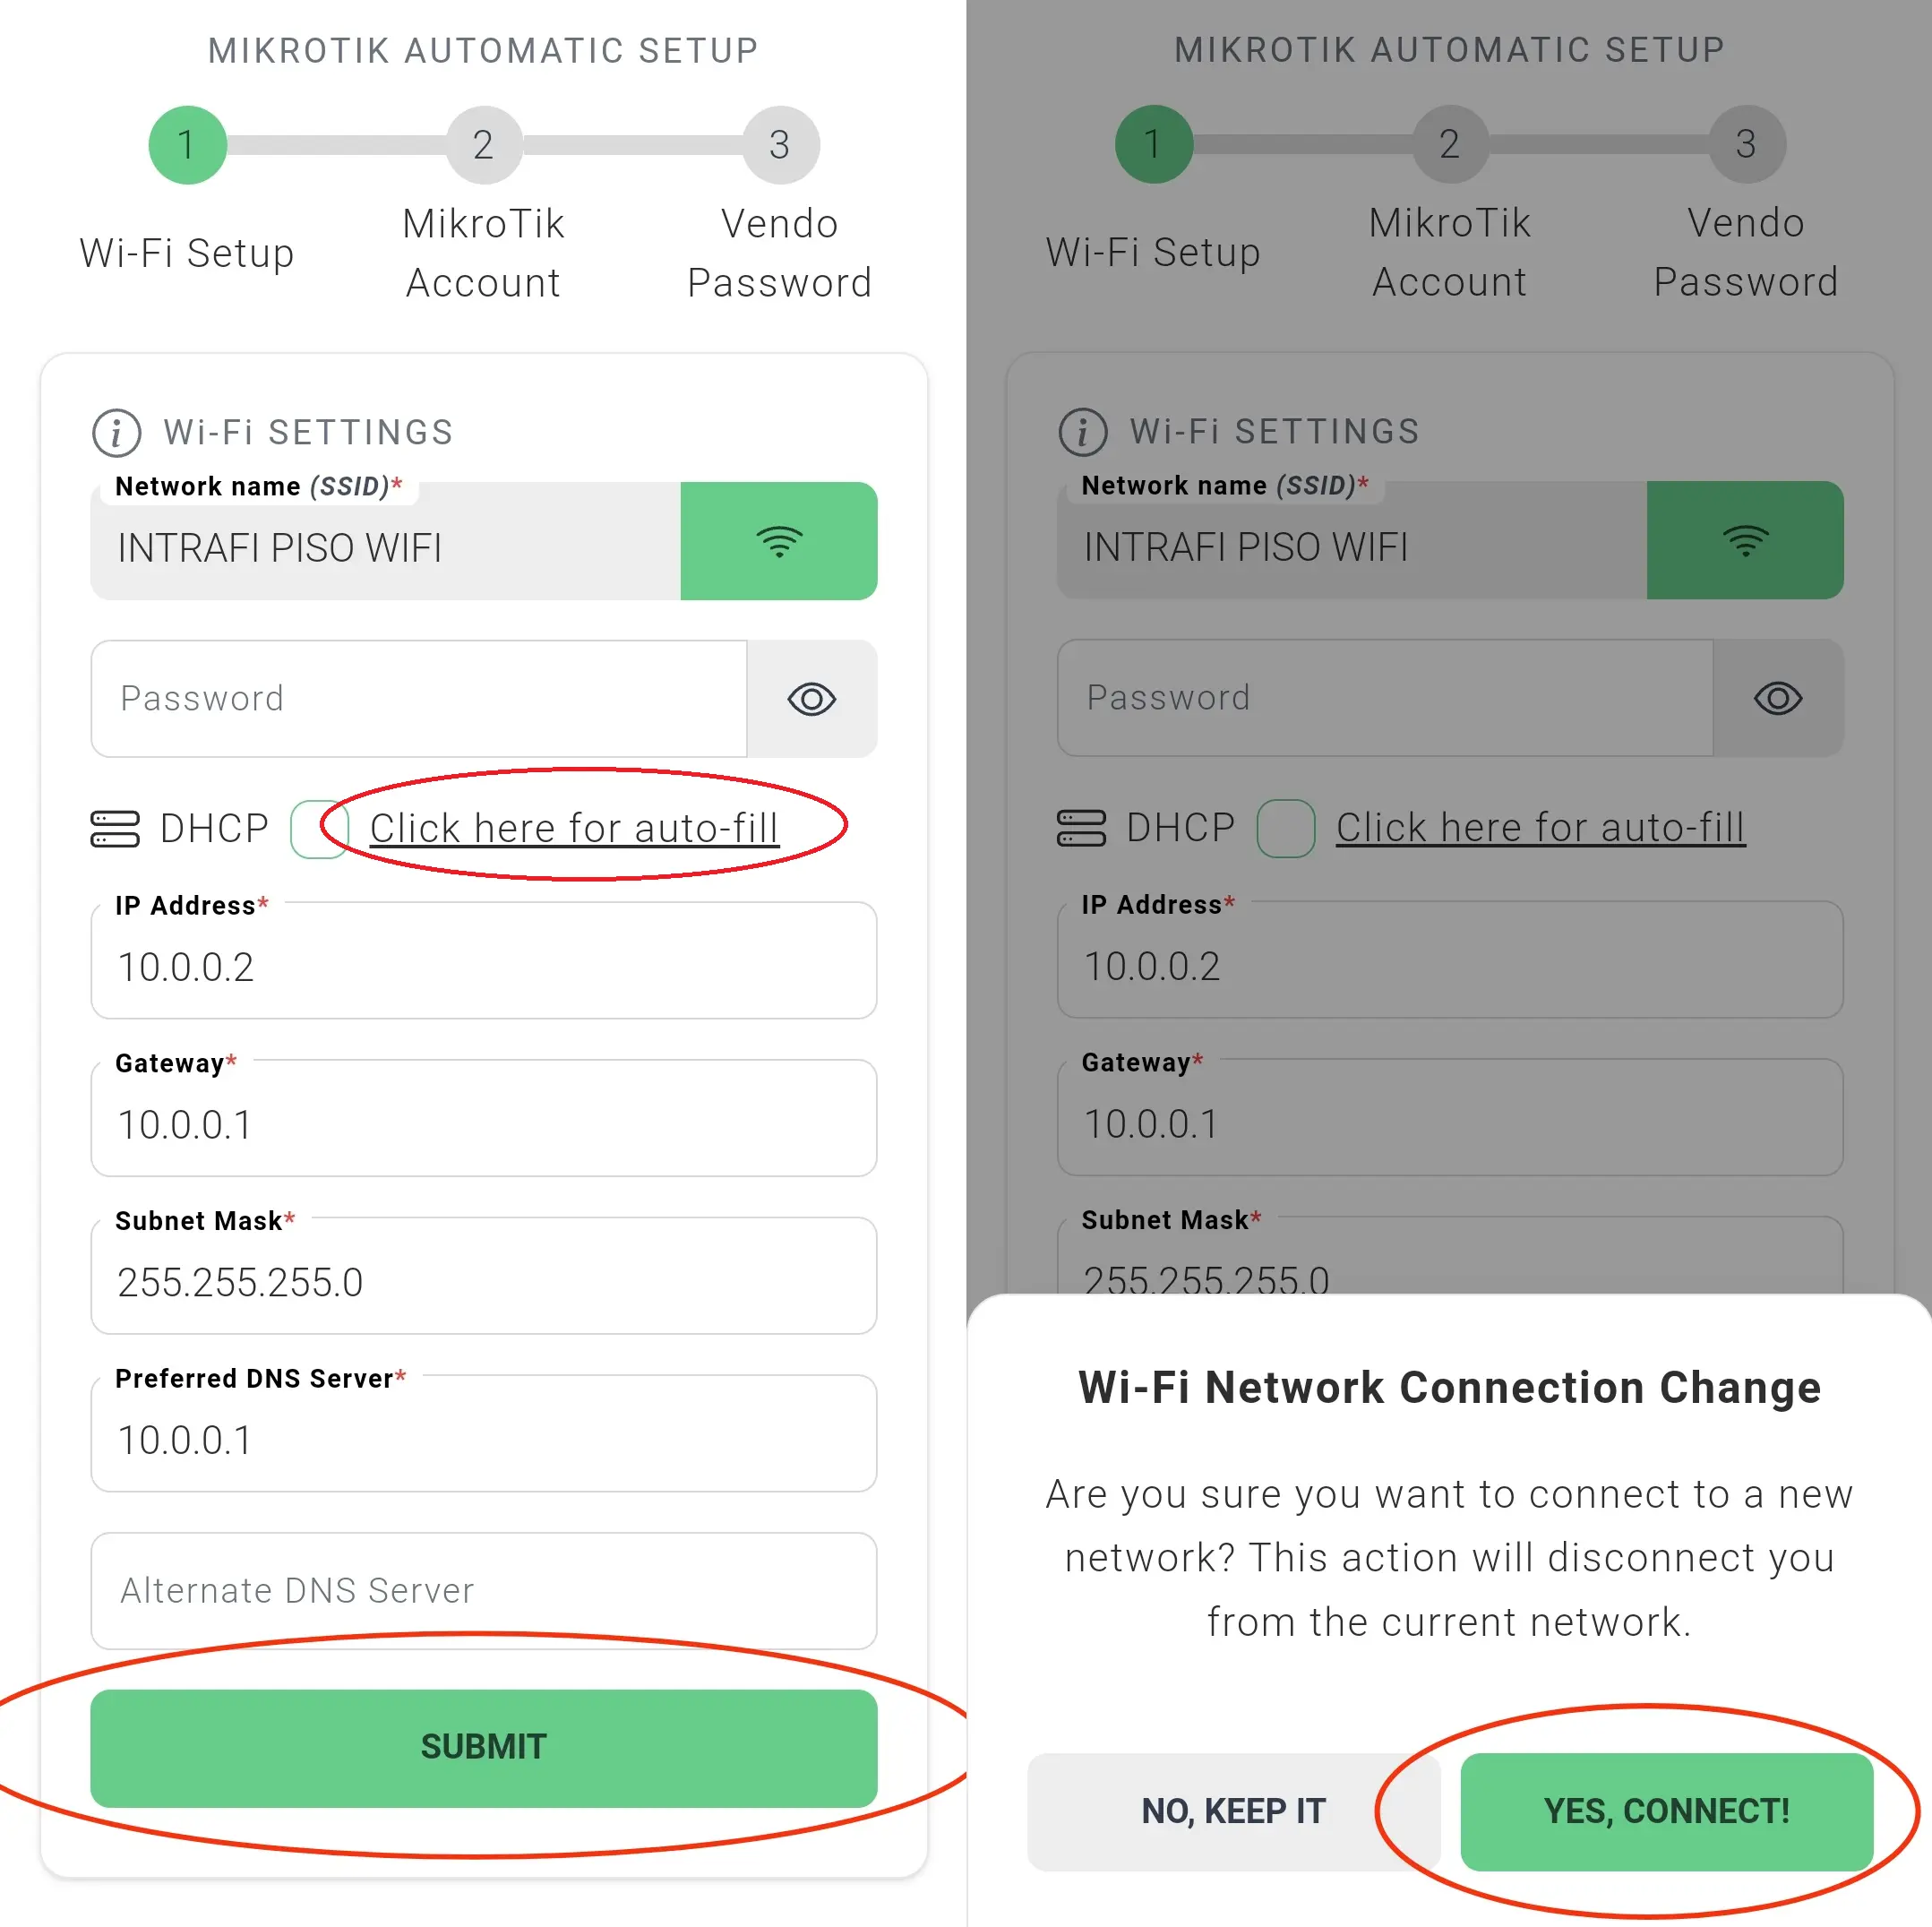
Scan the network first by clicking the Wi-Fi icon at the right side of the Network Name, then choose the network to connect.
-
Then, follow the provided instructions based on your MikroTik if it has default configuration, with configuration, or with IntraFi default configuration for the ESP Wi-Fi Settings below
MikroTik Default Configuration
If the MikroTik device has the default configuration, is likely a brand new device, or has no DPK file installed, then connect the ESP device directly to the MikroTik router’s built-in Wi-Fi or through the Wi-Fi antenna.
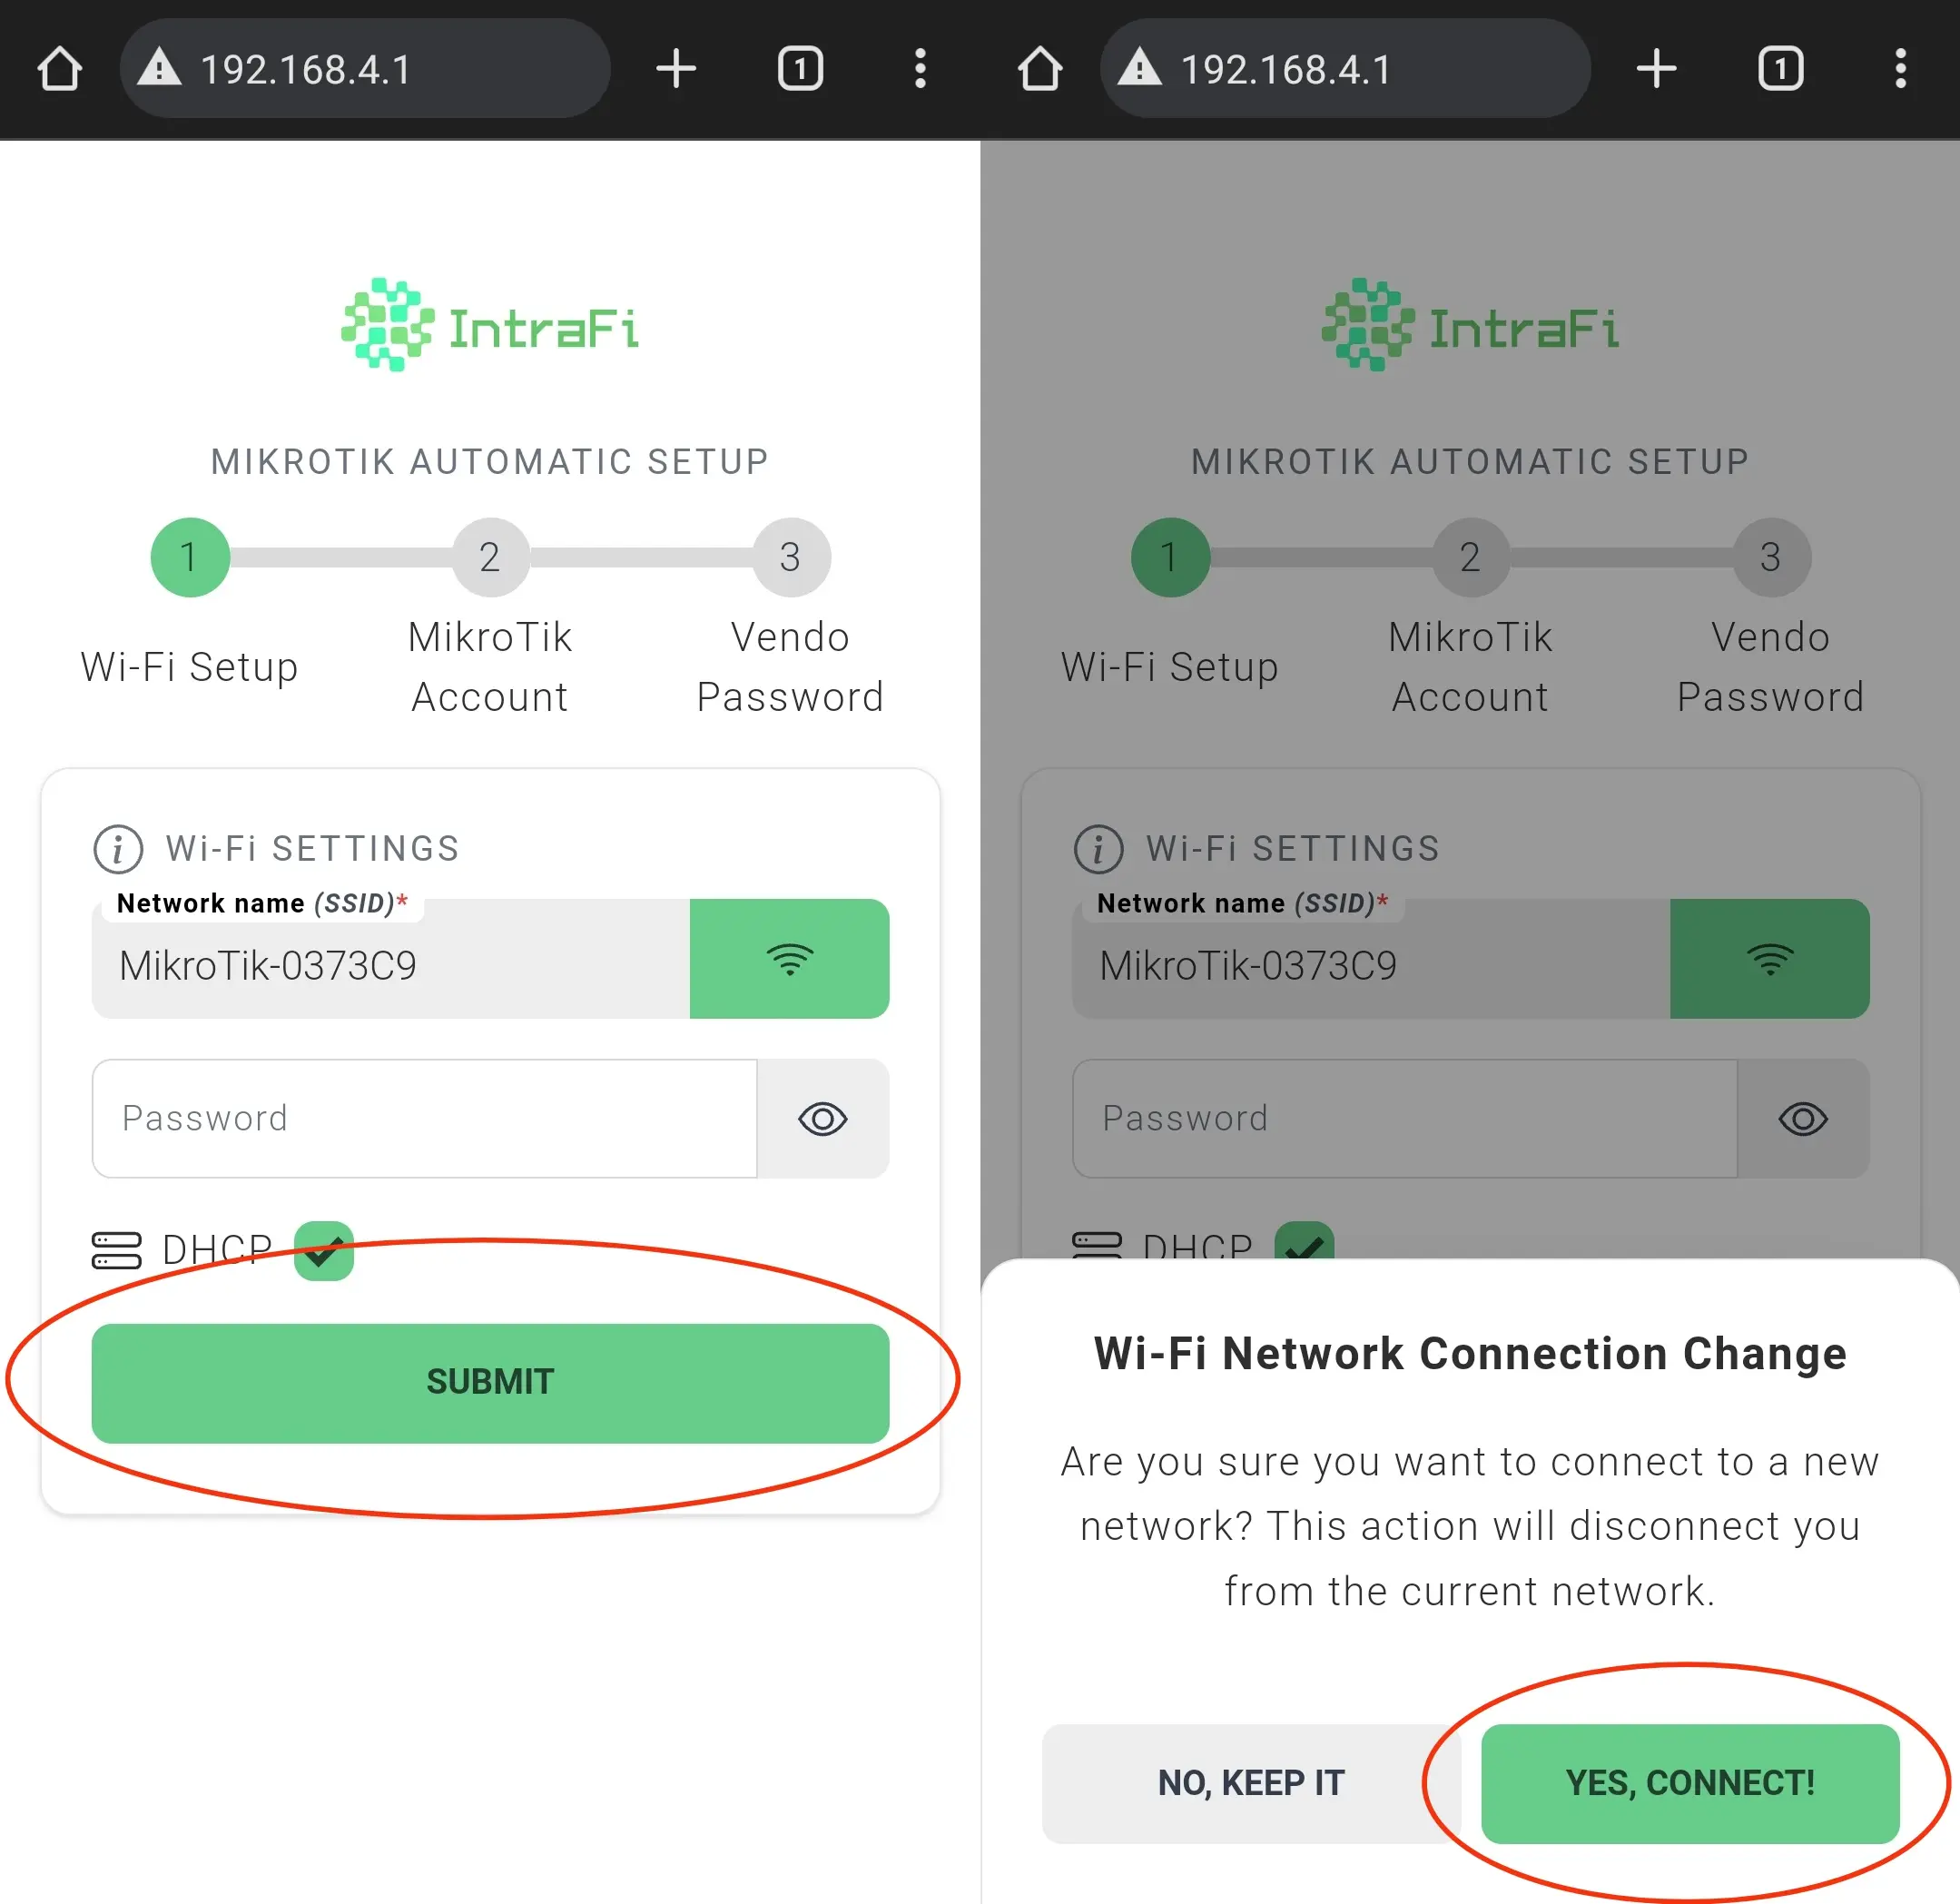
The default Wi-Fi network name of the MikroTik router is MikroTik-xxxx.
MikroTik with Configuration
If the MikroTik device has been previously configured, proceed to the next steps.
-
If there is no DPK file installed, factory reset the MikroTik router’s device to the default configuration.
-
If it has the default configurations, proceed with the steps for MikroTik Default Configuration, and skip the steps below.
-
Download WinBox for PC or the MikroTik App for the mobile application. The configuration steps shown in the following images are the same for both platforms.
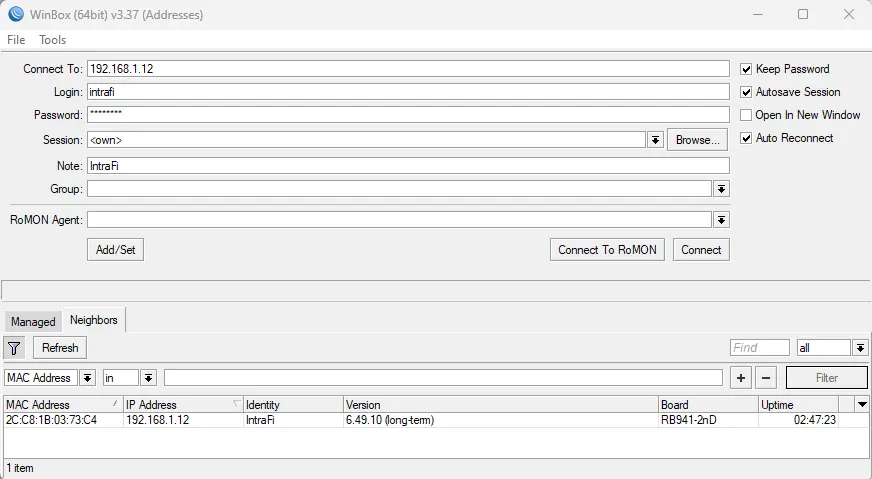
Example connecting through WinBox to your MikroTik router. Using the given IP Address, Username, and Password.
-
Ensure that the MikroTik user has an admin account with a blank password and full group policy access. If none exists, create one.

MikroTik configuration can be located at the menu of “System -> Users”.
-
Ensure that the MikroTik router device has the IP Service List API enabled with the default port 8728.
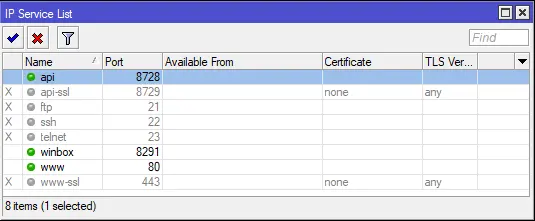
MikroTik configuration can be located at the menu of “IP -> Services”.
-
Ensure that the MikroTik router has given access to the ESP device, if ever a hotspot server is configured add the ESP device at the Hotspot IP-Bindings. Use the MAC Address for your ESP device, do not copy exactly what shown in the image.

MikroTik configuration can be located at the menu of “IP -> Hotspot -> IP Bindings”.
-
Now we can connect the ESP device to the MikroTik router, through the given Wi-Fi settings.
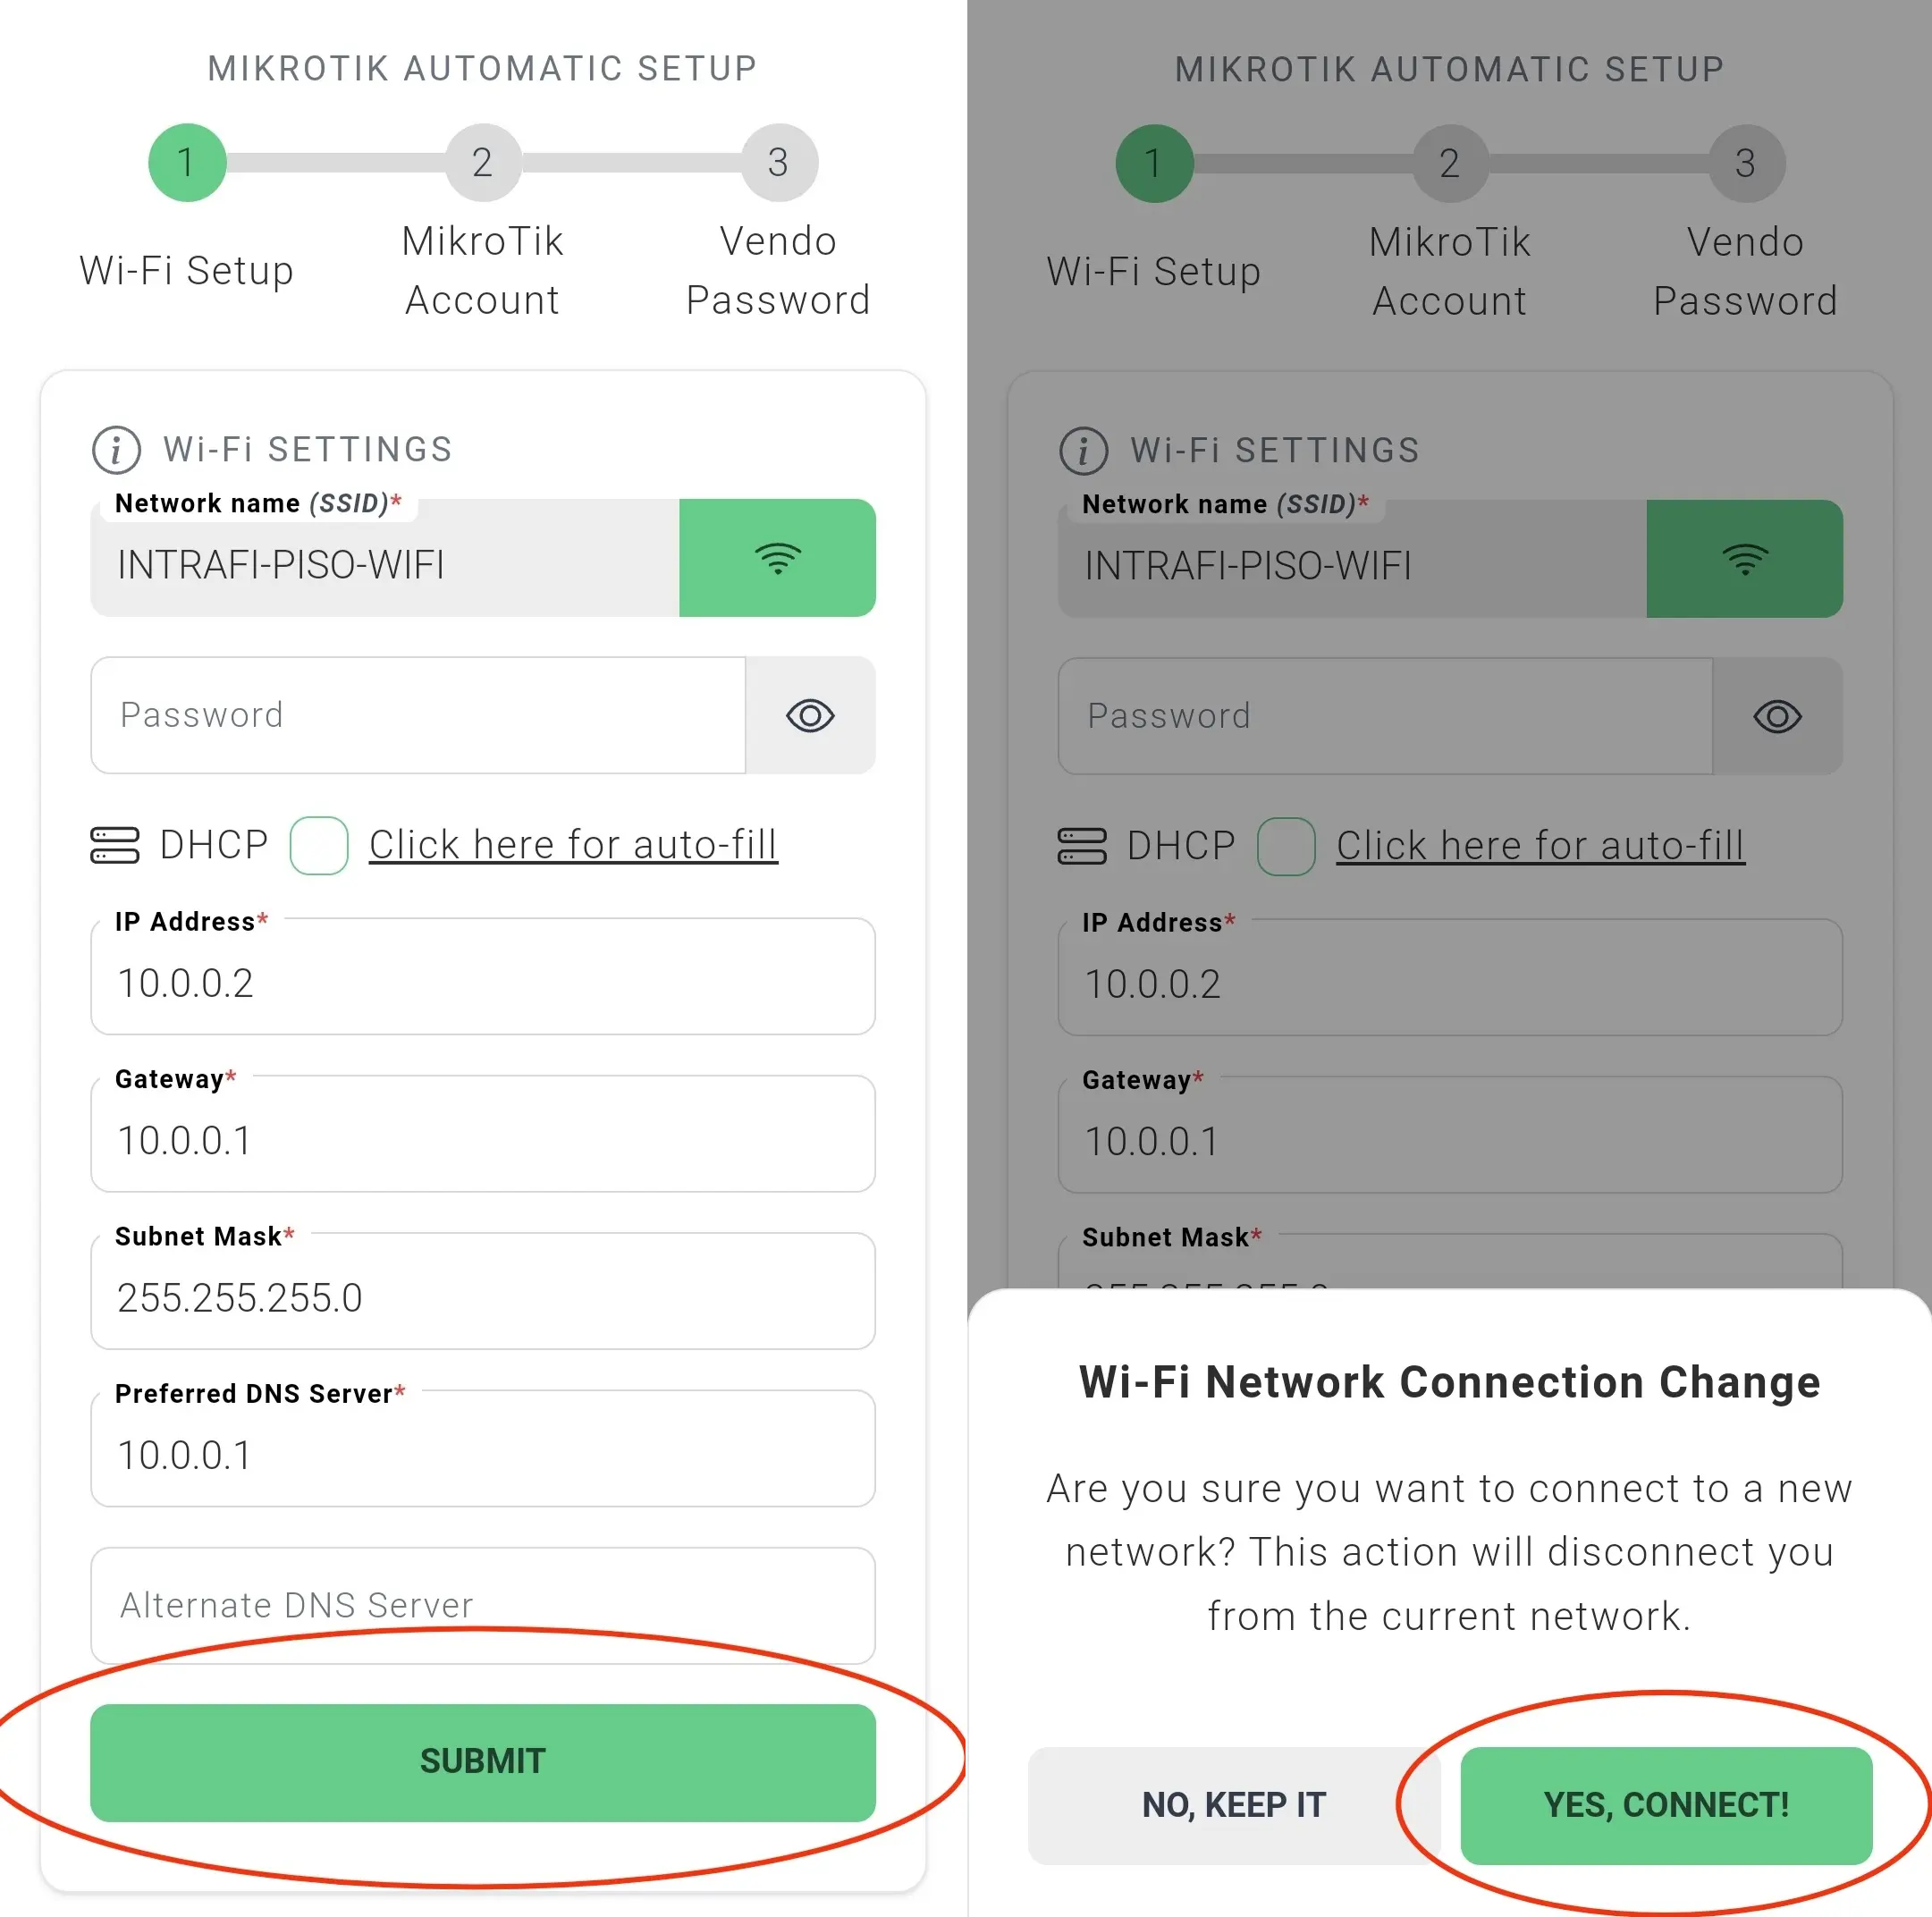
Use only the IP Address in the Wi-Fi settings that matches to the configuration from the previous step.
MikroTik with IntraFi Default Configuration
If the MikroTik device has been configured with IntraFi automatic configuration or decide to factory reset the MikroTik device, it will have the INTRAFI-SETUP-MIKROTIK network name if the device has built-in Wi-Fi. In such a case, proceed to the next step.
-
If the MikroTik device has built-in Wi-Fi, proceed to this step. Then, connect the ESP device using the Wi-Fi settings as shown in the image below.
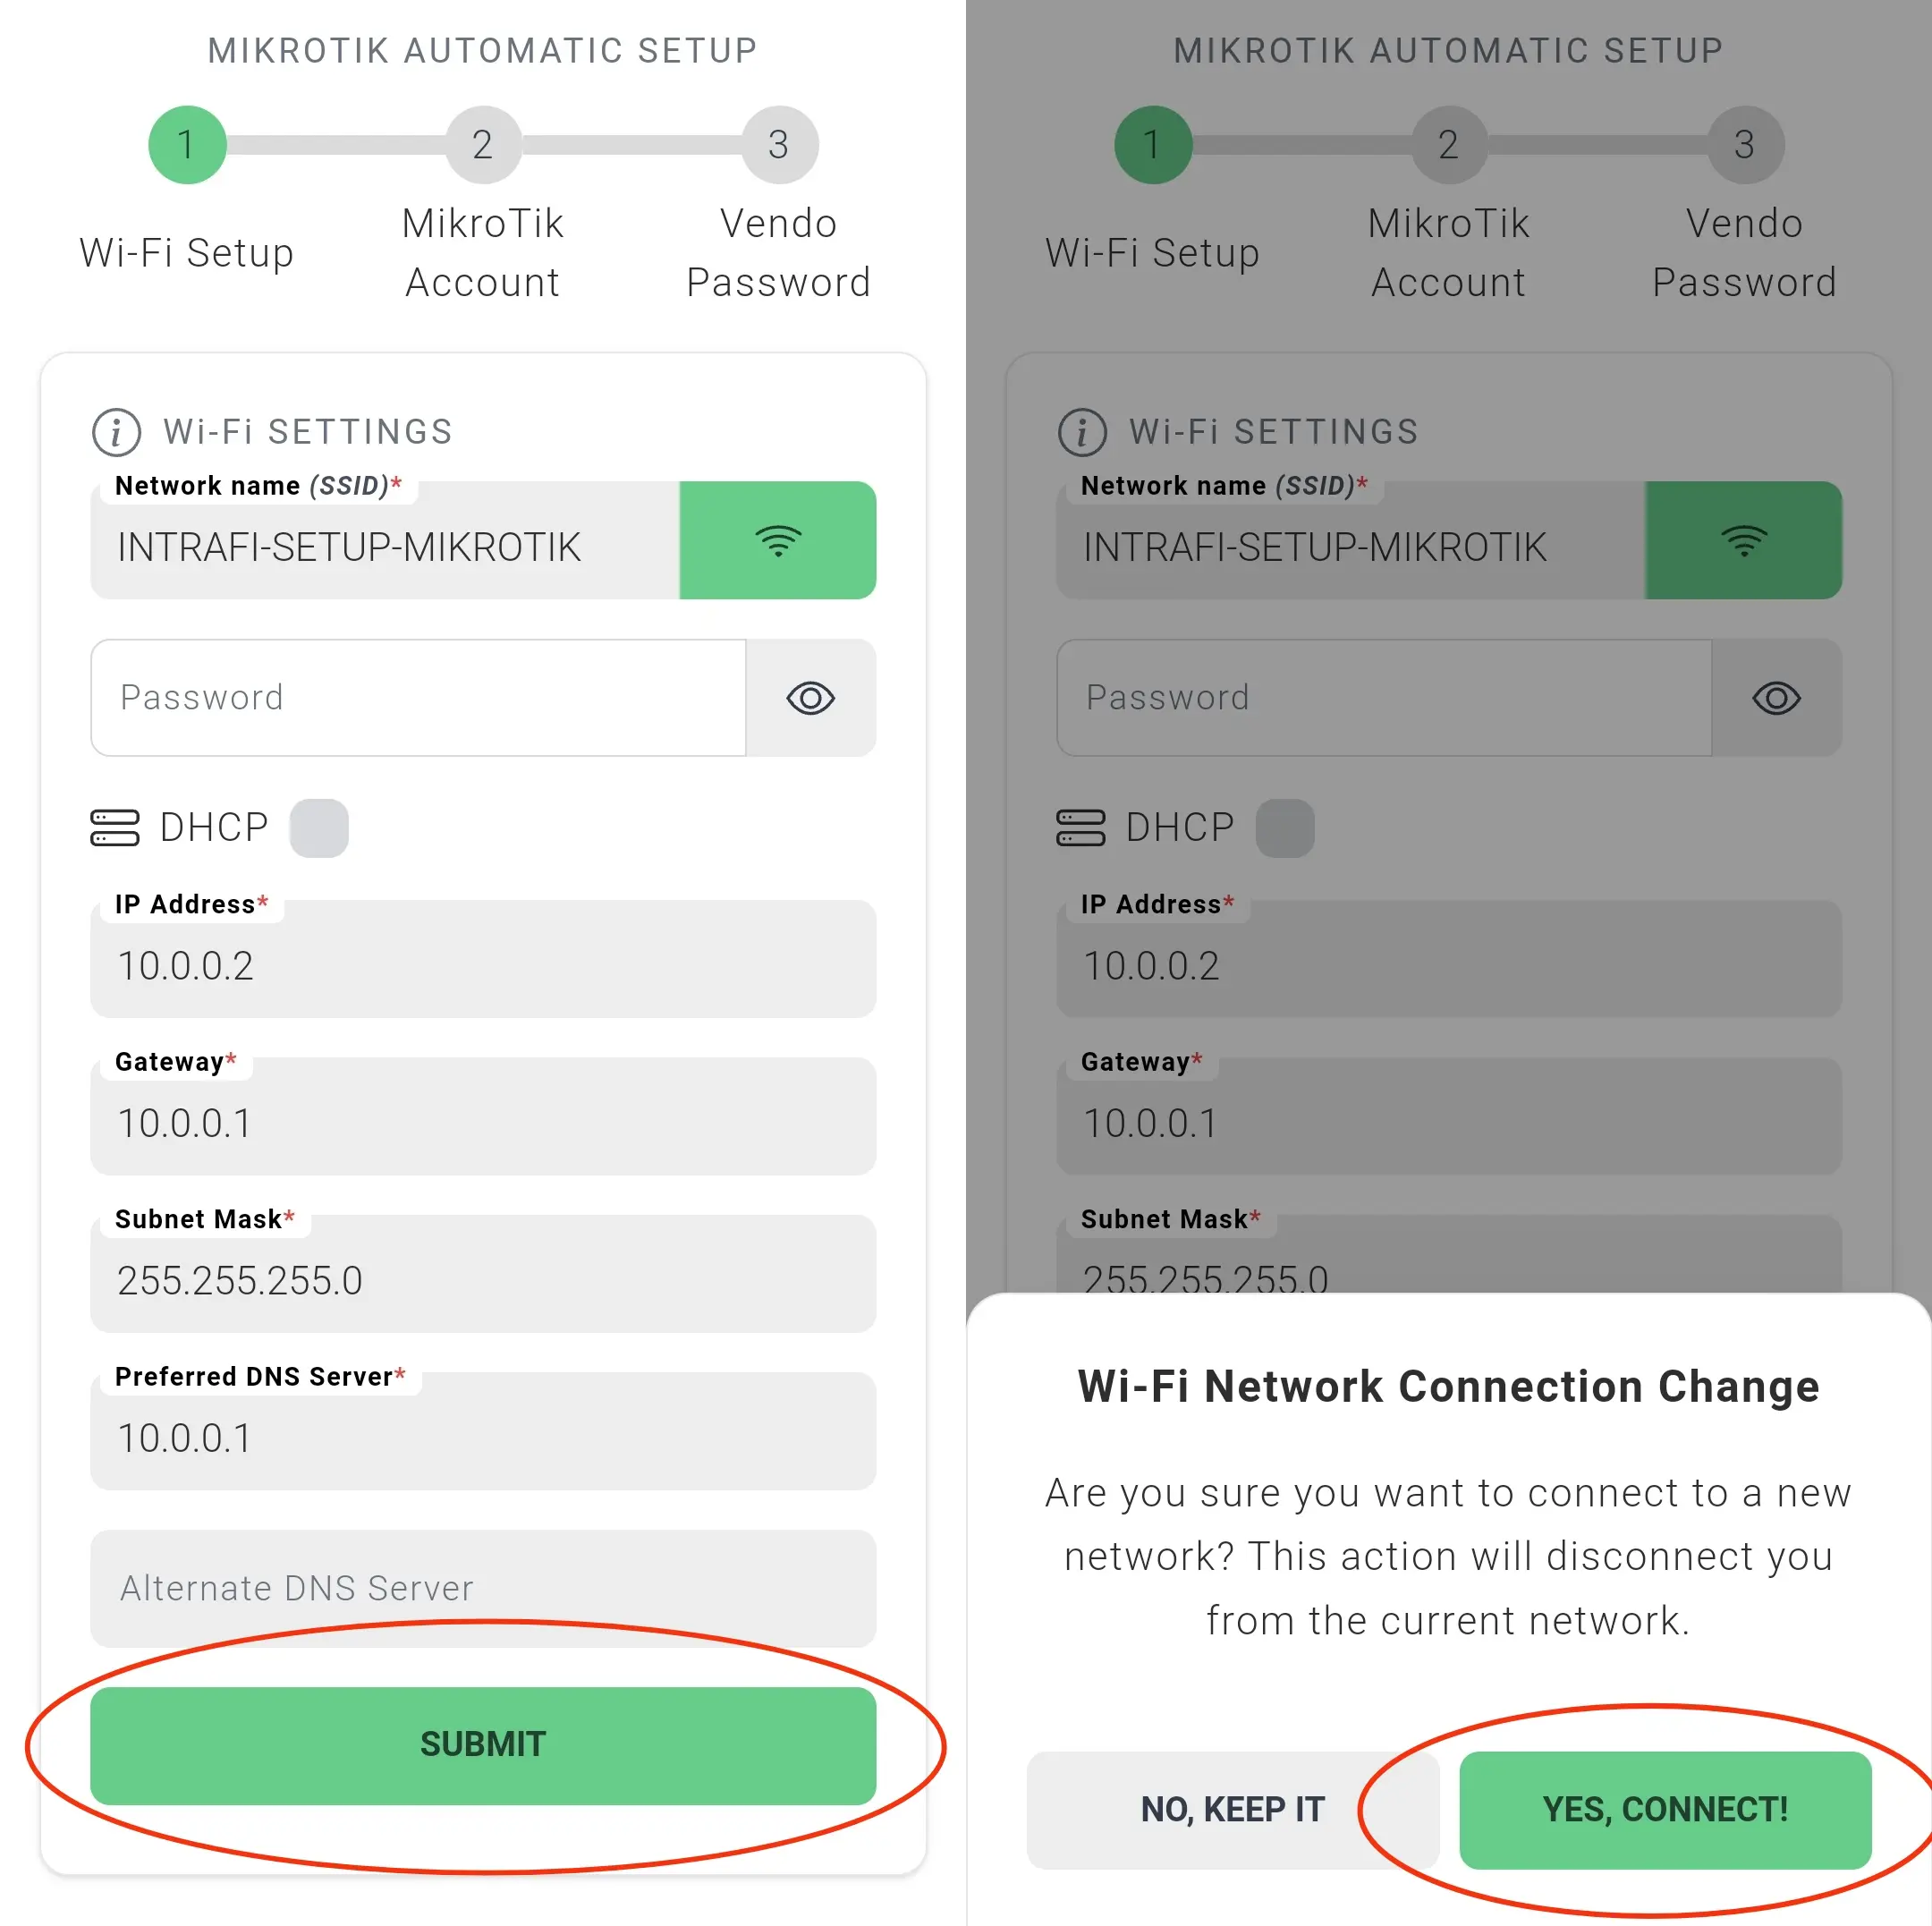
-
If the MikroTik device lacks built-in Wi-Fi but has an external antenna, connect the antenna to PORT 2 or PORT 3. Then, connect the ESP device using the Wi-Fi settings as shown in the image below.
-
-
After completing all the steps and the MikroTik Automatic Configuration, the INTRAFI-SETUP-ESPxxxx will be hidden. If it fails and is shown again, repeat the steps, starting from Step 2. For assurance, in case the firmware is corrupted start again from ESP Device Installation.